crwdns2915892:0crwdne2915892:0
Prereq-only guide to remove the daughterboard/joystick board from the Xbox X/S controller.
crwdns2942213:0crwdne2942213:0
-
-
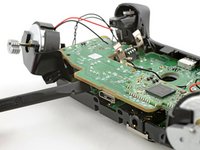
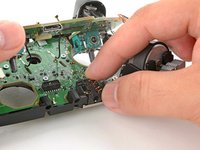
Slide one arm of a pair of tweezers under the antenna coaxial cable connector, as close to the metal head as possible.
-
Lift the connector straight up to disconnect it.
-
Repeat the procedure for the second antenna cable.
-
-
crwdns2935267:0crwdne2935267:0Silicone Work Mat$9.95
-
Set the controller on a heat-resistant surface, such as a silicone work mat.
-
-
-
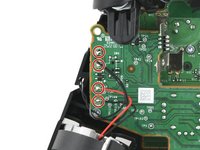
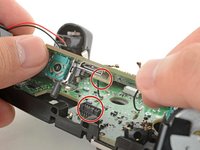
Use your soldering iron to heat up one of the motor wire solder pads.
-
Once the solder is melted, use tweezers to lift the wire away from the pad.
-
-
-
-
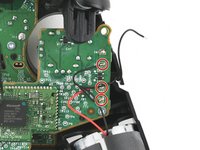
Desolder the seven remaining wires connecting the four motors to the motherboard.
-
-
-
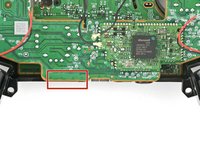
Use a Torx T5 driver to remove the two 7 mm‑long screws securing the daughterboard.
-
-
-
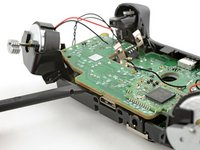
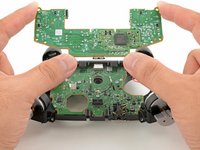
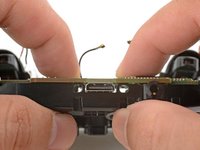
Insert the flat end of a spudger between the daughterboard and the bottom edge of the frame at the location marked on the image.
-
Twist the spudger to push up the daughterboard and disconnect the socket.
-
-
-
Line up the daughterboard socket to the main board socket.
-
Check that the headphone jack isn't out of position.
-
Check that the antenna cables aren't trapped between the two boards.
-
Use your fingers to gently squeeze the boards together to reconnect the socket.
-


To reassemble your device, follow these instructions in reverse order.
Take your e-waste to an R2 or e-Stewards certified recycler.
Repair didn’t go as planned? Try some basic troubleshooting, or ask our Answers community for help.
To reassemble your device, follow these instructions in reverse order.
Take your e-waste to an R2 or e-Stewards certified recycler.
Repair didn’t go as planned? Try some basic troubleshooting, or ask our Answers community for help.

