crwdns2933423:0crwdne2933423:0
crwdns2947577:0crwdnd2947577:0crwdne2947577:0

Xbox Series X (Digital Edition) Back Panel Replacement

crwdns2942213:0crwdne2942213:0

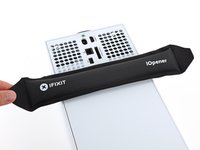
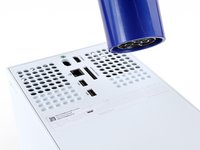
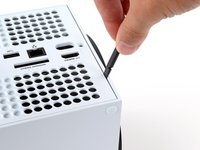
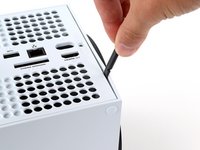
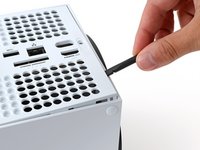
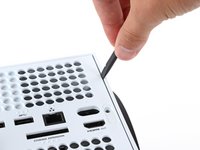
    1. Xbox Series X (Digital Edition) Back Panel Replacement, Uncover the back panel screws: crwdns2935265:01crwdnd2935265:01crwdnd2935265:02crwdne2935265:0 Xbox Series X (Digital Edition) Back Panel Replacement, Uncover the back panel screws: crwdns2935265:01crwdnd2935265:02crwdnd2935265:02crwdne2935265:0
      • Before you begin, completely power down and unplug all cables from your console.

      • Two stickers cover the back panel screws. You can remove the stickers without heating them, though it makes them much easier to remove cleanly.

      • Heat an iOpener and lay it on the smaller sticker near the bottom of the back panel for two minutes.

      • Alternatively, you can use a hair dryer to heat the sticker.

      crwdns2952109:0crwdne2952109:0

      crwdns2917038:0crwdne2917038:0

    2. Xbox Series X (Digital Edition) Back Panel Replacement: crwdns2935265:02crwdnd2935265:01crwdnd2935265:03crwdne2935265:0 Xbox Series X (Digital Edition) Back Panel Replacement: crwdns2935265:02crwdnd2935265:02crwdnd2935265:03crwdne2935265:0 Xbox Series X (Digital Edition) Back Panel Replacement: crwdns2935265:02crwdnd2935265:03crwdnd2935265:03crwdne2935265:0
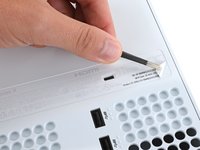
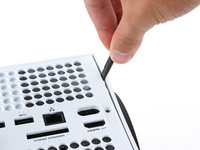
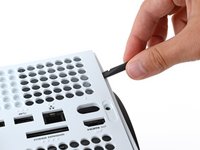
      • Use a pair of angled tweezers to remove the sticker hiding the first screw on the back panel, near the base.

      crwdns2952109:0crwdne2952109:0

      crwdns2917038:0crwdne2917038:0

    3. Xbox Series X (Digital Edition) Back Panel Replacement: crwdns2935265:03crwdnd2935265:01crwdnd2935265:03crwdne2935265:0 Xbox Series X (Digital Edition) Back Panel Replacement: crwdns2935265:03crwdnd2935265:02crwdnd2935265:03crwdne2935265:0 Xbox Series X (Digital Edition) Back Panel Replacement: crwdns2935265:03crwdnd2935265:03crwdnd2935265:03crwdne2935265:0
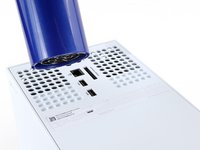
      • Use an iOpener or hair dryer to heat the larger sticker near the center of the back panel.

      crwdns2952109:0crwdne2952109:0

      crwdns2917038:0crwdne2917038:0

    4. Xbox Series X (Digital Edition) Back Panel Replacement: crwdns2935265:04crwdnd2935265:01crwdnd2935265:03crwdne2935265:0 Xbox Series X (Digital Edition) Back Panel Replacement: crwdns2935265:04crwdnd2935265:02crwdnd2935265:03crwdne2935265:0 Xbox Series X (Digital Edition) Back Panel Replacement: crwdns2935265:04crwdnd2935265:03crwdnd2935265:03crwdne2935265:0
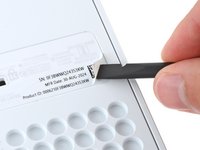
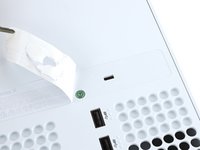
      • Use the flat end of a spudger to scrape up a corner of the larger sticker until you can grip it with a pair of blunt tweezers.

      • Use blunt tweezers to peel back the sticker to reveal the second screw.

      • You only need to peel this sticker to where you can access the hidden screw. You don't need to pull it completely off.

      • Technically, these are tamper-evident stickers, but don't worry—Microsoft can't legally void your warranty, as long as you don't damage anything. Have fun!

      crwdns2952109:0crwdne2952109:0

      crwdns2917038:0crwdne2917038:0

    5. Xbox Series X (Digital Edition) Back Panel Replacement, Remove the back panel screws: crwdns2935265:05crwdnd2935265:01crwdnd2935265:02crwdne2935265:0 Xbox Series X (Digital Edition) Back Panel Replacement, Remove the back panel screws: crwdns2935265:05crwdnd2935265:02crwdnd2935265:02crwdne2935265:0
      crwdns2935267:0crwdne2935267:0
      Magnetic Project Mat
      $19.95
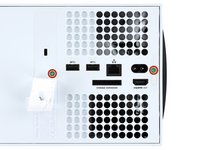
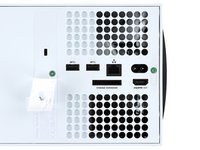
      • Throughout this repair, keep track of each screw and make sure it goes back exactly where it came from to avoid damaging your console.

      • Use a T8 Torx driver to remove the two 7.4 mm‑long screws securing the back panel.

      crwdns2952109:0crwdne2952109:0

      crwdns2917038:0crwdne2917038:0

    6. Xbox Series X (Digital Edition) Back Panel Replacement, Unclip the back panel: crwdns2935265:06crwdnd2935265:01crwdnd2935265:03crwdne2935265:0 Xbox Series X (Digital Edition) Back Panel Replacement, Unclip the back panel: crwdns2935265:06crwdnd2935265:02crwdnd2935265:03crwdne2935265:0 Xbox Series X (Digital Edition) Back Panel Replacement, Unclip the back panel: crwdns2935265:06crwdnd2935265:03crwdnd2935265:03crwdne2935265:0
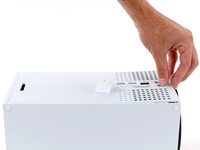
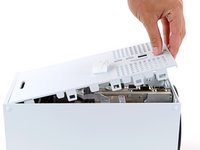
      • Insert the flat end of a spudger into the gap between the back panel and the shell, near the left side of the base.

      • Pry up the back panel to release it from the locking clips.

      crwdns2952109:0crwdne2952109:0

      crwdns2917038:0crwdne2917038:0

    7. Xbox Series X (Digital Edition) Back Panel Replacement: crwdns2935265:07crwdnd2935265:01crwdnd2935265:03crwdne2935265:0 Xbox Series X (Digital Edition) Back Panel Replacement: crwdns2935265:07crwdnd2935265:02crwdnd2935265:03crwdne2935265:0 Xbox Series X (Digital Edition) Back Panel Replacement: crwdns2935265:07crwdnd2935265:03crwdnd2935265:03crwdne2935265:0
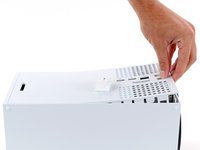
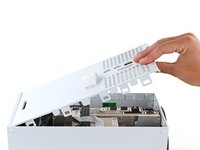
      • Insert the flat end of a spudger into the gap between the back panel and the shell, near the right side of the base.

      • Pry up the back panel to release it from the locking clips.

      crwdns2952109:0crwdne2952109:0

      crwdns2917038:0crwdne2917038:0

    8. Xbox Series X (Digital Edition) Back Panel Replacement, Remove the back panel: crwdns2935265:08crwdnd2935265:01crwdnd2935265:03crwdne2935265:0 Xbox Series X (Digital Edition) Back Panel Replacement, Remove the back panel: crwdns2935265:08crwdnd2935265:02crwdnd2935265:03crwdne2935265:0 Xbox Series X (Digital Edition) Back Panel Replacement, Remove the back panel: crwdns2935265:08crwdnd2935265:03crwdnd2935265:03crwdne2935265:0
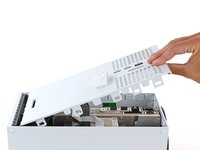
      • Grip the back panel at the opening you just created and pull it up and away from the shell to unclip the long edges.

      • During reassembly, press along the edges of the back panel to snap it into place.

      crwdns2952109:0crwdne2952109:0

      crwdns2917038:0crwdne2917038:0

    9. Xbox Series X (Digital Edition) Back Panel Replacement: crwdns2935265:09crwdnd2935265:01crwdnd2935265:03crwdne2935265:0 Xbox Series X (Digital Edition) Back Panel Replacement: crwdns2935265:09crwdnd2935265:02crwdnd2935265:03crwdne2935265:0 Xbox Series X (Digital Edition) Back Panel Replacement: crwdns2935265:09crwdnd2935265:03crwdnd2935265:03crwdne2935265:0
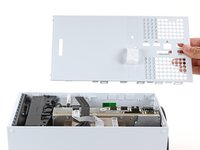
      • The back panel slots into a gap at the top of the shell.

      • Tilt the back panel up and pull it away from the top edge of the shell to release it from the gap.

      • Remove the back panel.

      crwdns2952109:0crwdne2952109:0

      crwdns2917038:0crwdne2917038:0

crwdns2915888:0crwdne2915888:0

To reassemble your device, follow these instructions in reverse order.

Repair didn’t go as planned? Try some basic troubleshooting, or ask our Answers community for help.


crwdns2935221:0crwdne2935221:0

Spencer Day

crwdns2935283:009/14/22crwdne2935283:0

200,373 crwdns2915208:0crwdne2915208:0

crwdns2935297:01,243crwdne2935297:0

crwdns2935287:0crwdne2935287:0

iFixit crwdns2935289:0iFixitcrwdne2935289:0

Staff

crwdns2931471:0123crwdne2931471:0

crwdns2935297:085,578crwdne2935297:0

crwdns2947412:00crwdne2947412:0

crwdns2917038:0crwdne2917038:0

crwdns2936625:0crwdne2936625:0:

crwdns2936751:024crwdne2936751:0 2

crwdns2936753:07crwdne2936753:0 13

crwdns2936753:030crwdne2936753:0 123

crwdns2942667:0crwdne2942667:0 1,134