crwdns2933423:0crwdne2933423:0

Whirlpool Refrigerator Dispenser Assembly Replacement

crwdns2942213:0crwdne2942213:0

  1. Whirlpool Refrigerator Dispenser Assembly Replacement, Safety precautions: crwdns2935265:01crwdnd2935265:01crwdnd2935265:01crwdne2935265:0
    • Before you begin your repair, perform the following:

    • Turn off your main water supply

    • Unplug your device

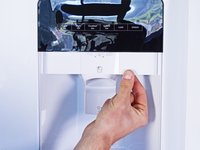
  2. Whirlpool Refrigerator Dispenser Assembly Replacement, Unfasten the dispenser panels: crwdns2935265:02crwdnd2935265:01crwdnd2935265:02crwdne2935265:0 Whirlpool Refrigerator Dispenser Assembly Replacement, Unfasten the dispenser panels: crwdns2935265:02crwdnd2935265:02crwdnd2935265:02crwdne2935265:0
    • The dispenser panel screws are located under the dispenser as if you're looking up into the dispenser tube (where the ice cubes and water come out).

    • Remove the screw(s) securing the two dispenser panels.

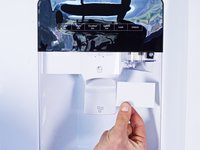
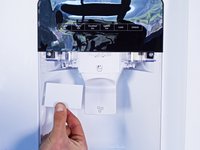
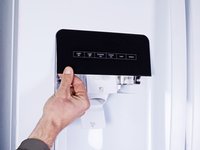
  3. Whirlpool Refrigerator Dispenser Assembly Replacement, Remove the dispenser panels: crwdns2935265:03crwdnd2935265:01crwdnd2935265:03crwdne2935265:0 Whirlpool Refrigerator Dispenser Assembly Replacement, Remove the dispenser panels: crwdns2935265:03crwdnd2935265:02crwdnd2935265:03crwdne2935265:0 Whirlpool Refrigerator Dispenser Assembly Replacement, Remove the dispenser panels: crwdns2935265:03crwdnd2935265:03crwdnd2935265:03crwdne2935265:0
    • Pull the dispenser panels straight down to separate them from the chassis.

    • Remove the dispenser panels.

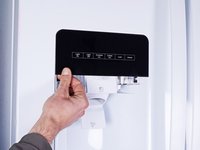
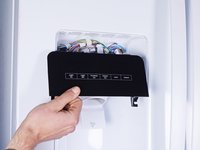
  4. Whirlpool Refrigerator Dispenser Assembly Replacement, Unfasten the control board: crwdns2935265:04crwdnd2935265:01crwdnd2935265:01crwdne2935265:0
    • Remove the screw(s) securing the control board.

  5. Whirlpool Refrigerator Dispenser Assembly Replacement: crwdns2935265:05crwdnd2935265:01crwdnd2935265:03crwdne2935265:0 Whirlpool Refrigerator Dispenser Assembly Replacement: crwdns2935265:05crwdnd2935265:02crwdnd2935265:03crwdne2935265:0 Whirlpool Refrigerator Dispenser Assembly Replacement: crwdns2935265:05crwdnd2935265:03crwdnd2935265:03crwdne2935265:0
    • Tilt the bottom of the control board away from the chassis to release its clips.

    • Pull straight down to separate the control board enough to access its connectors.

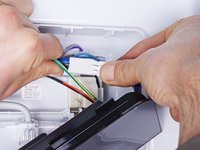
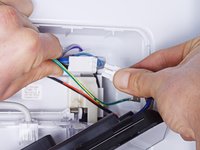
  6. Whirlpool Refrigerator Dispenser Assembly Replacement, Disconnect the control board: crwdns2935265:06crwdnd2935265:01crwdnd2935265:03crwdne2935265:0 Whirlpool Refrigerator Dispenser Assembly Replacement, Disconnect the control board: crwdns2935265:06crwdnd2935265:02crwdnd2935265:03crwdne2935265:0 Whirlpool Refrigerator Dispenser Assembly Replacement, Disconnect the control board: crwdns2935265:06crwdnd2935265:03crwdnd2935265:03crwdne2935265:0
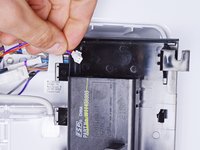
    • Disconnect the connectors attached to the control board.

  7. Whirlpool Refrigerator Dispenser Assembly Replacement, Remove the control board: crwdns2935265:07crwdnd2935265:01crwdnd2935265:01crwdne2935265:0
    • Remove the control board.

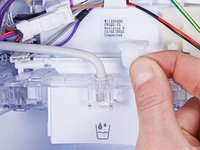
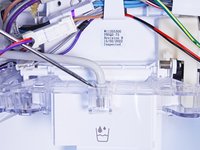
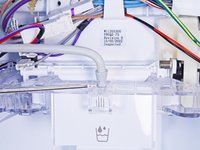
  8. Whirlpool Refrigerator Dispenser Assembly Replacement, Remove the plastic clip: crwdns2935265:08crwdnd2935265:01crwdnd2935265:03crwdne2935265:0 Whirlpool Refrigerator Dispenser Assembly Replacement, Remove the plastic clip: crwdns2935265:08crwdnd2935265:02crwdnd2935265:03crwdne2935265:0 Whirlpool Refrigerator Dispenser Assembly Replacement, Remove the plastic clip: crwdns2935265:08crwdnd2935265:03crwdnd2935265:03crwdne2935265:0
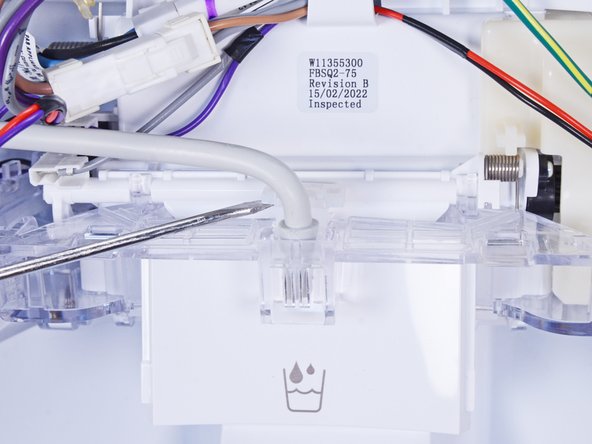
    • Use a flathead screwdriver, or a similar tool, to pry up the plastic clip securing the water hose.

    • Remove the plastic clip.

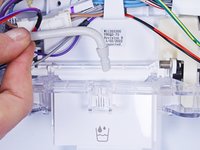
  9. Whirlpool Refrigerator Dispenser Assembly Replacement, Disconnect the water hose: crwdns2935265:09crwdnd2935265:01crwdnd2935265:03crwdne2935265:0 Whirlpool Refrigerator Dispenser Assembly Replacement, Disconnect the water hose: crwdns2935265:09crwdnd2935265:02crwdnd2935265:03crwdne2935265:0 Whirlpool Refrigerator Dispenser Assembly Replacement, Disconnect the water hose: crwdns2935265:09crwdnd2935265:03crwdnd2935265:03crwdne2935265:0
    • Use a flathead screwdriver, or a similar tool, to pry up the water hose enough to grip it with your fingers.

    • Pull the water hose straight up to disconnect it.

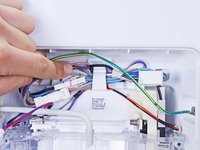
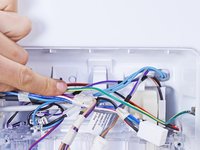
  10. Whirlpool Refrigerator Dispenser Assembly Replacement, Reposition the cables: crwdns2935265:010crwdnd2935265:01crwdnd2935265:02crwdne2935265:0 Whirlpool Refrigerator Dispenser Assembly Replacement, Reposition the cables: crwdns2935265:010crwdnd2935265:02crwdnd2935265:02crwdne2935265:0
    • Reposition the cables so they lay in front of the top plastic clip.

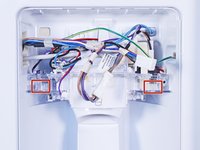
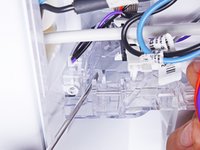
  11. Whirlpool Refrigerator Dispenser Assembly Replacement, Unclip the dispenser assembly: crwdns2935265:011crwdnd2935265:01crwdnd2935265:03crwdne2935265:0 Whirlpool Refrigerator Dispenser Assembly Replacement, Unclip the dispenser assembly: crwdns2935265:011crwdnd2935265:02crwdnd2935265:03crwdne2935265:0 Whirlpool Refrigerator Dispenser Assembly Replacement, Unclip the dispenser assembly: crwdns2935265:011crwdnd2935265:03crwdnd2935265:03crwdne2935265:0
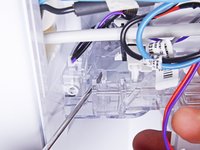
    • Depending on your device, the amount of plastic clips that secure the dispenser assembly can vary.

    • Use a flathead screwdriver, or a similar tool, to press the plastic clip toward the dispenser assembly.

    • Repeat for the other plastic clips to completely separate the dispenser assembly from the chassis.

  12. Whirlpool Refrigerator Dispenser Assembly Replacement, Reposition the dispenser assembly: crwdns2935265:012crwdnd2935265:01crwdnd2935265:02crwdne2935265:0 Whirlpool Refrigerator Dispenser Assembly Replacement, Reposition the dispenser assembly: crwdns2935265:012crwdnd2935265:02crwdnd2935265:02crwdne2935265:0
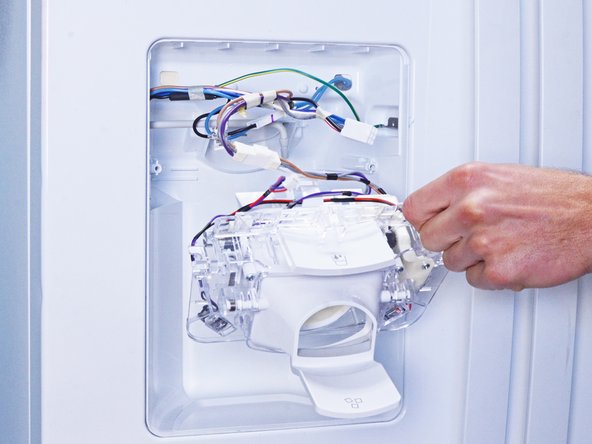
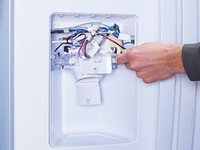
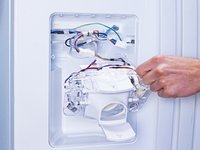
    • Pull the dispenser assembly away from the chassis enough to access its connectors.

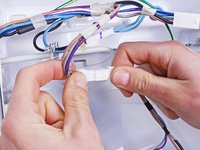
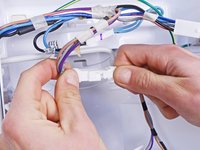
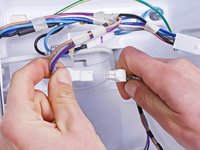
  13. Whirlpool Refrigerator Dispenser Assembly Replacement, Disconnect the dispenser assembly: crwdns2935265:013crwdnd2935265:01crwdnd2935265:03crwdne2935265:0 Whirlpool Refrigerator Dispenser Assembly Replacement, Disconnect the dispenser assembly: crwdns2935265:013crwdnd2935265:02crwdnd2935265:03crwdne2935265:0 Whirlpool Refrigerator Dispenser Assembly Replacement, Disconnect the dispenser assembly: crwdns2935265:013crwdnd2935265:03crwdnd2935265:03crwdne2935265:0
    • While performing this step, support the dispenser assembly so it doesn't fall.

    • Disconnect the connector attached to the dispenser assembly.

  14. Whirlpool Refrigerator Dispenser Assembly Replacement, Remove the dispenser assembly: crwdns2935265:014crwdnd2935265:01crwdnd2935265:01crwdne2935265:0
    • Remove the dispenser assembly.

  15. Whirlpool Refrigerator Dispenser Assembly Replacement, Meter the dispenser assembly: crwdns2935265:015crwdnd2935265:01crwdnd2935265:02crwdne2935265:0 Whirlpool Refrigerator Dispenser Assembly Replacement, Meter the dispenser assembly: crwdns2935265:015crwdnd2935265:02crwdnd2935265:02crwdne2935265:0
    • If you own a multimeter, you can test your solenoid's resistance.

    • With the button in its neutral position, the multimeter should read "open circuit" or "OL."

    • With the button pressed, the multimeter should read close to 0Ω.

crwdns2915888:0crwdne2915888:0

To reassemble your device, follow these instructions in reverse order.

Take your e-waste to an R2 or e-Stewards certified recycler.

Repair didn’t go as planned? Ask our Answers community for help.

nicO

crwdns2935283:004/14/15crwdne2935283:0

15,927 crwdns2915208:0crwdne2915208:0

crwdns2935297:088crwdne2935297:0

crwdns2915084:0crwdne2915084:0

Global Fixers crwdns2935289:0Global Fixerscrwdne2935289:0

Community

crwdns2931471:033crwdne2931471:0

crwdns2935297:0550crwdne2935297:0

crwdns2944067:02crwdne2944067:0

The bottom side of refrigeration is not working but the top inversely working the cooling process

Dawit Muluneh - crwdns2934203:0crwdne2934203:0

I'd take a look at one of two troubleshooting pages:

Freezer Not Freezing or Refrigerator Not Cooling

nicO -

crwdns2917038:0crwdne2917038:0

crwdns2936625:0crwdne2936625:0:

crwdns2936751:024crwdne2936751:0 3

crwdns2936753:07crwdne2936753:0 16

crwdns2936753:030crwdne2936753:0 83

crwdns2942667:0crwdne2942667:0 1,065