crwdns2933423:0crwdne2933423:0

Whirlpool Dryer Control Panel Replacement

crwdns2942213:0crwdne2942213:0

  1. Whirlpool Dryer Control Panel Replacement, Safety Precautions: crwdns2935265:01crwdnd2935265:01crwdnd2935265:01crwdne2935265:0
    • Before you begin your repair, unplug your dryer.

    • Your power cord may have four prongs rather than three. The additional prong is a ground connection.

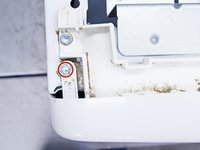
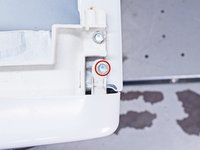
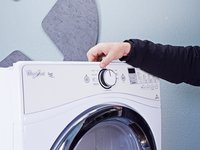
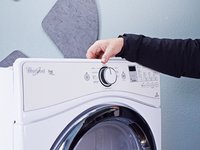
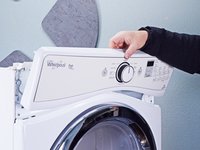
  2. Whirlpool Dryer Control Panel Replacement, Unfasten the top panel: crwdns2935265:02crwdnd2935265:01crwdnd2935265:03crwdne2935265:0 Whirlpool Dryer Control Panel Replacement, Unfasten the top panel: crwdns2935265:02crwdnd2935265:02crwdnd2935265:03crwdne2935265:0 Whirlpool Dryer Control Panel Replacement, Unfasten the top panel: crwdns2935265:02crwdnd2935265:03crwdnd2935265:03crwdne2935265:0
    crwdns2935267:0crwdne2935267:0
    FixMat
    $36.95
    crwdns2942207:0crwdne2942207:0
    • Throughout this guide, keep track of each screw and reinstall it exactly where it came from.

    • Use a nut driver to remove the screws securing the top panel to the rear panel bracket.

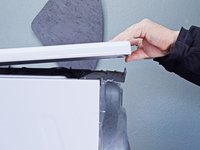
  3. Whirlpool Dryer Control Panel Replacement, Remove the top panel: crwdns2935265:03crwdnd2935265:01crwdnd2935265:02crwdne2935265:0 Whirlpool Dryer Control Panel Replacement, Remove the top panel: crwdns2935265:03crwdnd2935265:02crwdnd2935265:02crwdne2935265:0
    • Grasp the top and slide it 1/2 to 1 inch toward the rear of the machine.

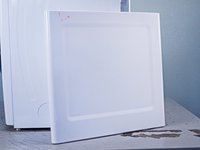
  4. Whirlpool Dryer Control Panel Replacement: crwdns2935265:04crwdnd2935265:01crwdnd2935265:02crwdne2935265:0 Whirlpool Dryer Control Panel Replacement: crwdns2935265:04crwdnd2935265:02crwdnd2935265:02crwdne2935265:0
    • Lift the top panel upward to separate it from the chassis.

    • Remove the top panel from the machine.

  5. Whirlpool Dryer Control Panel Replacement, Disconnect the control panel: crwdns2935265:05crwdnd2935265:01crwdnd2935265:02crwdne2935265:0 Whirlpool Dryer Control Panel Replacement, Disconnect the control panel: crwdns2935265:05crwdnd2935265:02crwdnd2935265:02crwdne2935265:0
    • Disconnect the control panel cable from the main board.

  6. Whirlpool Dryer Control Panel Replacement: crwdns2935265:06crwdnd2935265:01crwdnd2935265:02crwdne2935265:0 Whirlpool Dryer Control Panel Replacement: crwdns2935265:06crwdnd2935265:02crwdnd2935265:02crwdne2935265:0
    • Disconnect the drum light connector.

  7. Whirlpool Dryer Control Panel Replacement, Unfasten the control panel: crwdns2935265:07crwdnd2935265:01crwdnd2935265:02crwdne2935265:0 Whirlpool Dryer Control Panel Replacement, Unfasten the control panel: crwdns2935265:07crwdnd2935265:02crwdnd2935265:02crwdne2935265:0
    • Remove the screws securing the control panel.

  8. Whirlpool Dryer Control Panel Replacement, Remove the control panel: crwdns2935265:08crwdnd2935265:01crwdnd2935265:03crwdne2935265:0 Whirlpool Dryer Control Panel Replacement, Remove the control panel: crwdns2935265:08crwdnd2935265:02crwdnd2935265:03crwdne2935265:0 Whirlpool Dryer Control Panel Replacement, Remove the control panel: crwdns2935265:08crwdnd2935265:03crwdnd2935265:03crwdne2935265:0
    • Lift the control panel up and tilt it away from the chassis to remove it.

    • Make sure to thread the cable through the hole in the chassis.

    • During reassembly, thread the cable through its proper hole before reinstalling the control panel.

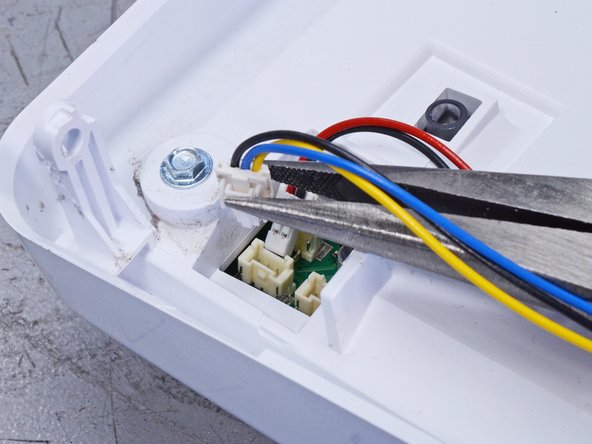
  9. Whirlpool Dryer Control Panel Replacement, Remove the wiring harness: crwdns2935265:09crwdnd2935265:01crwdnd2935265:03crwdne2935265:0 Whirlpool Dryer Control Panel Replacement, Remove the wiring harness: crwdns2935265:09crwdnd2935265:02crwdnd2935265:03crwdne2935265:0 Whirlpool Dryer Control Panel Replacement, Remove the wiring harness: crwdns2935265:09crwdnd2935265:03crwdnd2935265:03crwdne2935265:0
    • Disconnect the wiring harness connectors.

    • Lay the control panel down on a towel or other soft surface to perform the next few steps.

  10. Whirlpool Dryer Control Panel Replacement, Unfasten the control board: crwdns2935265:010crwdnd2935265:01crwdnd2935265:01crwdne2935265:0
    • Remove the screws which secure the front control board to its housing.

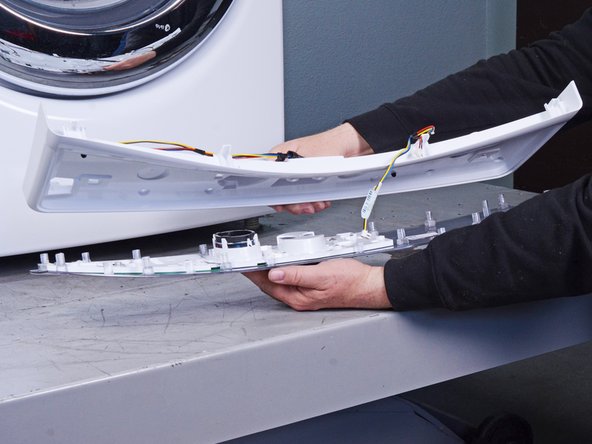
  11. Whirlpool Dryer Control Panel Replacement, Remove the control panel unit: crwdns2935265:011crwdnd2935265:01crwdnd2935265:03crwdne2935265:0 Whirlpool Dryer Control Panel Replacement, Remove the control panel unit: crwdns2935265:011crwdnd2935265:02crwdnd2935265:03crwdne2935265:0 Whirlpool Dryer Control Panel Replacement, Remove the control panel unit: crwdns2935265:011crwdnd2935265:03crwdnd2935265:03crwdne2935265:0
    • Lift up the back plate off the control panel and remove it.

    • The control panel is a circuit board attached to a face plate. Replace the entire unit if possible.

crwdns2915888:0crwdne2915888:0

To reassemble your device, follow these instructions in reverse order.

Take your e-waste to an R2 or e-Stewards certified recycler.

Repair didn’t go as planned? Ask our Answers community for help.

Bill Gilbert

crwdns2935283:006/30/22crwdne2935283:0

30,238 crwdns2915208:0crwdne2915208:0

crwdns2935297:0213crwdne2935297:0

crwdns2915084:0crwdne2915084:0

iFixit crwdns2935289:0iFixitcrwdne2935289:0

Staff

crwdns2931471:0137crwdne2931471:0

crwdns2935297:017,485crwdne2935297:0

crwdns2944067:00crwdne2944067:0

crwdns2917038:0crwdne2917038:0

crwdns2936625:0crwdne2936625:0:

crwdns2936751:024crwdne2936751:0 4

crwdns2936753:07crwdne2936753:0 19

crwdns2936753:030crwdne2936753:0 71

crwdns2942667:0crwdne2942667:0 612