crwdns2933423:0crwdne2933423:0

USB/Auxiliary Port

crwdns2942213:0crwdne2942213:0

  1. USB/Auxiliary Port, Outer Case: crwdns2935265:01crwdnd2935265:01crwdnd2935265:02crwdne2935265:0 USB/Auxiliary Port, Outer Case: crwdns2935265:01crwdnd2935265:02crwdnd2935265:02crwdne2935265:0
    • Using the standard metal spudger, begin by prying at the bottom of the plain rubber end cap (the end without the USB or auxiliary input).

  2. USB/Auxiliary Port: crwdns2935265:02crwdnd2935265:01crwdnd2935265:01crwdne2935265:0
    • Continue prying around the end panel, prying at different points until the entire panel is out of its seating.

    • Carefully remove the end panel.

    • The tabs which connect the panel are on the short sides.

    • WARNING: you will likely cause cosmetic damage to the end cap.

  3. USB/Auxiliary Port: crwdns2935265:03crwdnd2935265:01crwdnd2935265:01crwdne2935265:0
    • Slide out the rubber foot located on the bottom of the case.

  4. USB/Auxiliary Port: crwdns2935265:04crwdnd2935265:01crwdnd2935265:01crwdne2935265:0
    • Using a T6 bit, remove the flat topped 5mm screw located on the bottom of the casing, underneath the rubber foot.

    • This is the only flat topped screw in the speaker, so keep track of which one it is.

  5. USB/Auxiliary Port: crwdns2935265:05crwdnd2935265:01crwdnd2935265:03crwdne2935265:0 USB/Auxiliary Port: crwdns2935265:05crwdnd2935265:02crwdnd2935265:03crwdne2935265:0 USB/Auxiliary Port: crwdns2935265:05crwdnd2935265:03crwdnd2935265:03crwdne2935265:0
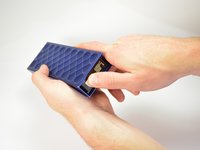
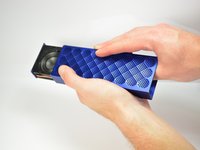
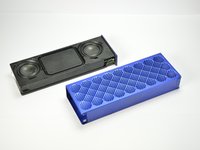
    • Push against the side without end cap to slide the internal components out of the case.

    • While holding the metal outset casing with one hand, press on the black inner plastic casing with your thumb.

    • It will be very difficult the first time. There is a rubber seal on the outside of the plastic inner case that creates a lot of friction with the metal outer case.

  6. USB/Auxiliary Port, USB/Auxiliary Port: crwdns2935265:06crwdnd2935265:01crwdnd2935265:02crwdne2935265:0 USB/Auxiliary Port, USB/Auxiliary Port: crwdns2935265:06crwdnd2935265:02crwdnd2935265:02crwdne2935265:0
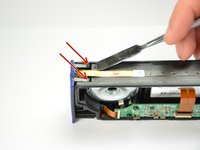
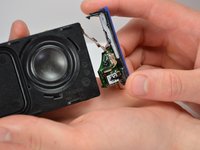
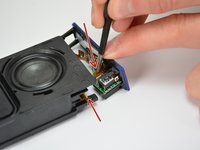
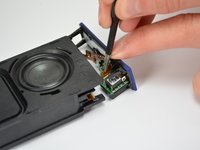
    • Using the standard metal spudger, carefully pry up the top 2 plastic tabs which hold the exterior button and port cover onto the interior plastic frame.

  7. USB/Auxiliary Port: crwdns2935265:07crwdnd2935265:01crwdnd2935265:01crwdne2935265:0
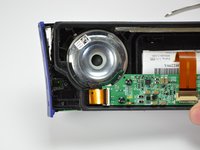
    • Using the classic metal spudger, pry up the bottom 2 tabs attaching the other side of the button panel.

    • It should come off after prying up the first tab.

  8. USB/Auxiliary Port: crwdns2935265:08crwdnd2935265:01crwdnd2935265:03crwdne2935265:0 USB/Auxiliary Port: crwdns2935265:08crwdnd2935265:02crwdnd2935265:03crwdne2935265:0 USB/Auxiliary Port: crwdns2935265:08crwdnd2935265:03crwdnd2935265:03crwdne2935265:0
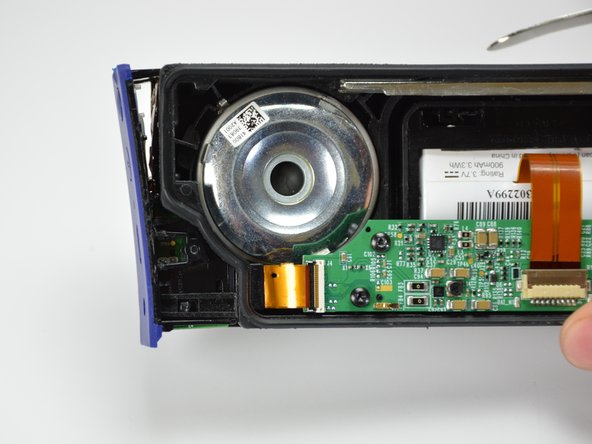
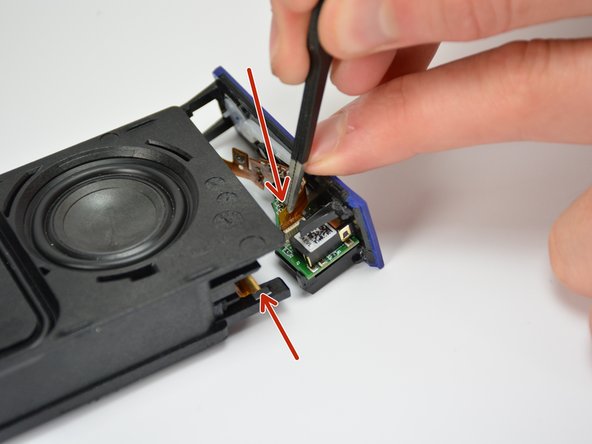
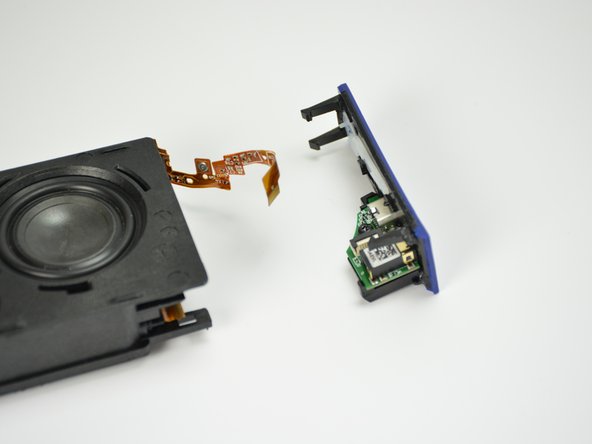
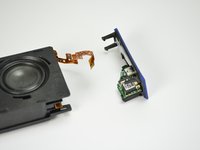
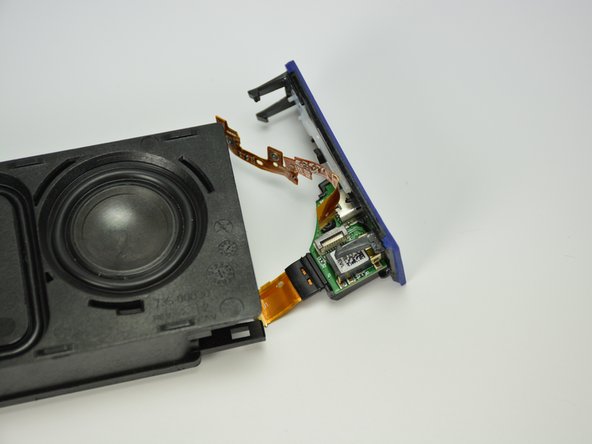
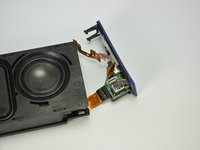
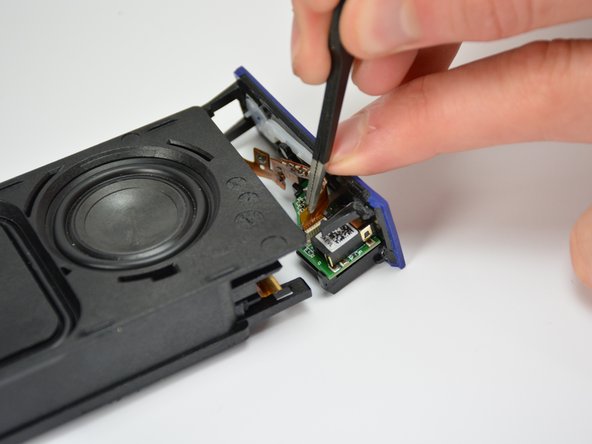
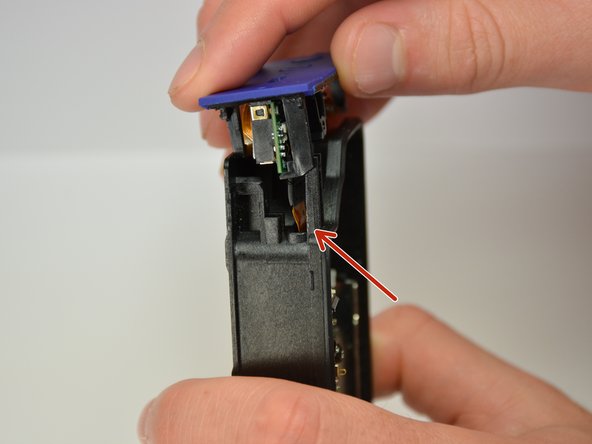
    • Carefully lift out the end panel.

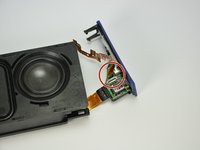
    • Unplug both the connection ribbon and the ZIF ribbon using tweezers or your hands.

    • There is a bit of glue to hold the connection ribbon down.

  9. USB/Auxiliary Port: crwdns2935265:09crwdnd2935265:01crwdnd2935265:01crwdne2935265:0
    • Remove the 5mm T6 screw holding the port assembly onto the end cap.

    • Unlike the flat top screw holding the metal housing, these screws are roundtop.

  10. USB/Auxiliary Port: crwdns2935265:010crwdnd2935265:01crwdnd2935265:01crwdne2935265:0
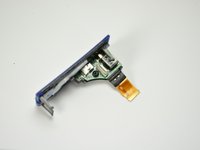
    • Remove the old port assembly from the end cap.

    • Alternate Reassembly required, read on.

  11. USB/Auxiliary Port: crwdns2935265:011crwdnd2935265:01crwdnd2935265:01crwdne2935265:0
    • Disconnect the Motherboard connection ribbon from the motherboard.

    • The ribbon should no longer be connected at either end.

  12. USB/Auxiliary Port: crwdns2935265:012crwdnd2935265:01crwdnd2935265:01crwdne2935265:0
    • Very carefully pull the motherboard connection ribbon through the plastic casing, removing it from the plastic casing.

  13. USB/Auxiliary Port: crwdns2935265:013crwdnd2935265:01crwdnd2935265:01crwdne2935265:0
    • Insert the connection ribbon into its ZIF connection port on the bottom of the new port assembly

    • ZIF connectors are delicate and often give beginners trouble, search for ZIF connector tips on the web.

  14. USB/Auxiliary Port: crwdns2935265:014crwdnd2935265:01crwdnd2935265:02crwdne2935265:0 USB/Auxiliary Port: crwdns2935265:014crwdnd2935265:02crwdnd2935265:02crwdne2935265:0
    • Position the new port assembly on the end cap and reinsert the 5mm T6 screw.

    • The rubber insulation around the motherboard connector should help hold the ZIF connector in place after the screw has been reinserted.

  15. USB/Auxiliary Port: crwdns2935265:015crwdnd2935265:01crwdnd2935265:02crwdne2935265:0 USB/Auxiliary Port: crwdns2935265:015crwdnd2935265:02crwdnd2935265:02crwdne2935265:0
    • Reconnect the button ribbon connector on the top of the port assembly.

  16. USB/Auxiliary Port: crwdns2935265:016crwdnd2935265:01crwdnd2935265:02crwdne2935265:0 USB/Auxiliary Port: crwdns2935265:016crwdnd2935265:02crwdnd2935265:02crwdne2935265:0
    • Reconnect the endcap to the plastic housing.

    • While you reconnect the endcap to the plastic housing, carefully position the ribbon slide through the ribbon slit and into the plastic casing.

  17. USB/Auxiliary Port: crwdns2935265:017crwdnd2935265:01crwdnd2935265:01crwdne2935265:0
    • Snap the end cap back onto the inner plastic casing and reconnect the ZIF ribbon to the motherboard.

    • Finish reassembling in descending order starting at step 5.

crwdns2915888:0crwdne2915888:0

To reassemble your device, follow steps 1 through 5 in reverse order.

crwdns2935229:05crwdne2935229:0

Noah Sadler

crwdns2935283:004/01/15crwdne2935283:0

548 crwdns2915208:0crwdne2915208:0

crwdns2935297:02crwdne2935297:0

crwdns2915084:0crwdne2915084:0

Cal Poly, Team 12-1, Lancaster Spring 2015 crwdns2935289:0Cal Poly, Team 12-1, Lancaster Spring 2015crwdne2935289:0

CPSU-LANCASTER-S15S12G1

crwdns2931471:05crwdne2931471:0

crwdns2935297:011crwdne2935297:0

crwdns2917034:0crwdne2917034:0

Can anyone at all tell us where we can definitely purchase the USB/Auxiliary Port and its Motherboard to Aux Port ZIF Ribbon?

Thanks in advance.

barrysum - crwdns2934203:0crwdne2934203:0

crwdns2917038:0crwdne2917038:0

crwdns2936625:0crwdne2936625:0:

crwdns2936751:024crwdne2936751:0 0

crwdns2936753:07crwdne2936753:0 5

crwdns2936753:030crwdne2936753:0 22

crwdns2942667:0crwdne2942667:0 14,976