crwdns2915892:0crwdne2915892:0
This guide shows you how to replace the outer casing of the watch. If you have an outer cracked screen, main button, or case, then this is the guide you need.
crwdns2942213:0crwdne2942213:0
-
-
First, lift the bottom part of the band to start removing the wristband from the button area of the watch.
-
-
-
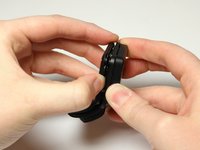
Continue to lift up on the band until the screen of the watch becomes loose from the band.
-
Continue to pull up on the wristband until it is completely off the watch.
-
-
-
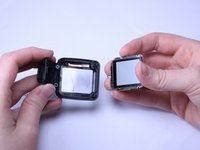
Grab the watch once it is separated from the wristband.
-
-
-
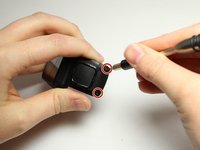
Flip over the watch and remove the four 3.0 mm Torx head screws with a T4 Torx head screwdriver.
-
-
-
-
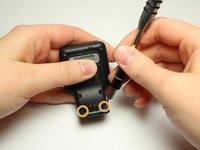
Remove the two 3.0 mm Torx screws from the front. Use a T4 Torx screwdriver to remove the screws.
-
The two 3.0 mm Torx screws are painted blue at the end. These screws have screw holders around them that will also need to be removed.
-
Unscrew the screws from the front of the watch casing and the screw holders fall out from the back of the watch casing.
-
-
-
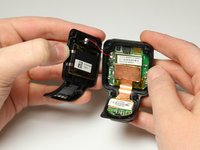
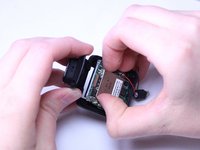
Gently pull the back panel away from the front panel.
-
-
-
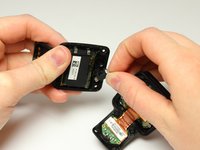
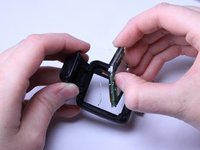
Gently wiggle the black box vibrator component away from the back panel with your fingers or a Spudger tool.
-
-
crwdns2935267:0crwdne2935267:0Tweezers$4.99
-
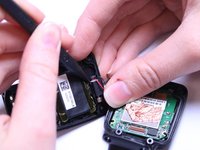
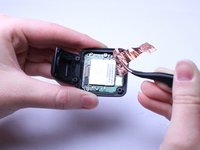
Now lift the smaller square of copper off the Front Panel. Use the bent, metal precision tweezers and slide it under the smaller square of copper lining then gently lift it up.
-
-
-
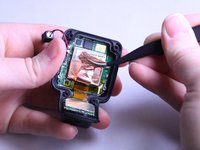
Use the bent, metal precision tweezers to remove the thin copper piece from large square silver piece in the Front Casing.
-
-
-
Remove the two 2.0 mm Torx Head screws with the T5 Torx screwdriver.
-
-
-
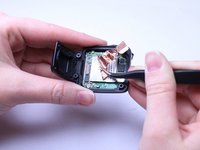
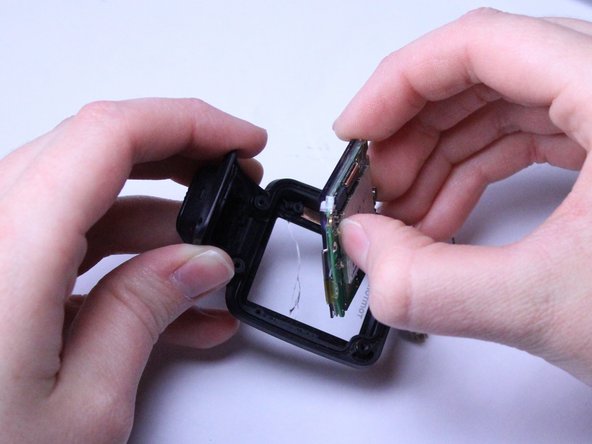
Use your fingers to gently pull the whole green motherboard out of the Front Casing.
-


You are finished when all parts have been removed to leave just the front casing by itself. To reassemble your device, follow these instructions in reverse order.
You are finished when all parts have been removed to leave just the front casing by itself. To reassemble your device, follow these instructions in reverse order.
crwdns2935221:0crwdne2935221:0
crwdns2935229:02crwdne2935229:0
crwdns2915084:0crwdne2915084:0

Texas Tech, Team S8-G6, Bennett Spring 2017 crwdns2935289:0Texas Tech, Team S8-G6, Bennett Spring 2017crwdne2935289:0
TTU-BENNETT-S17S8G6
crwdns2931471:04crwdne2931471:0
crwdns2935297:015crwdne2935297:0
crwdns2947412:09crwdne2947412:0
Great explaination, though you mention you don't replacement parts...? Can you share a link where you found the new front cover assembly?
Same question as Dyeffen : where can we get some replacement screens ?
Ansre
a_limal@yahoo.com.au
Steffen sorry :-(
Same question: where can we find the replacement cover part?
Hello if the control button is tight can the button be removed and cleaned underneath
Imran
Where an you find some replacement Parts ? I'm looking for the front cover.
buenas tardes, amigo necesito el aro o corona de acción para joystick que se me extravió del reloj tomtom, del mismo modelo que tienes en la reparación
hello, where did you buy the replacement part?
Same question here: where did you buy the front cover?
Grundsätzlich vielen Dank für diese Anleitung, Akkutausch hat gut geklappt! Aber warum ich den unter “Werkzeuge” aufgeführten T5 Schraubendreher kaufen soll, der dann gar nicht gebraucht wird, ist mir unverständlich. Zum Glück war der gerade nicht lieferbar und ich habe es so probiert. Auch den Ausbau des Vibrationsmotors habe ich mir gespart, der Akku ließ sich auch so tauschen. Hilfreicher wäre ein Hinweis gewesen, wie das Kabel des Akkus aus- und wieder eingebaut wird (ist auch auf euren Bildern überhaupt nicht zu sehen). War aber relativ einfach abzuziehen und wieder rein zu drücken.
Axel Motz - crwdns2934203:0crwdne2934203:0