crwdns2933423:0crwdne2933423:0
crwdns2947577:0crwdnd2947577:0crwdne2947577:0
Texas Instruments TI-5130 Printer Unit  Replacement

Texas Instruments TI-5130 Printer Unit Replacement

Shannon Perkins

crwdns2944109:0crwdnd2944109:0Shannon Perkinscrwdnd2944109:0crwdnd2944109:0crwdnd2944109:0crwdne2944109:0

crwdns2944111:0Sun 25, 2016crwdne2944111:0

5 - 10 crwdns2931279:0crwdne2931279:0
crwdns2937801:0crwdne2937801:0

crwdns2915892:0crwdne2915892:0

crwdns2942287:0crwdne2942287:0

Follow this guide to remove and replace the printing unit in the TI-5130 electronic calculator.

crwdns2942213:0crwdne2942213:0

crwdns2943213:0crwdne2943213:0

crwdns2943215:0crwdne2943215:0

  • Phillips #1 Screwdriver
    Phillips #1 Screwdriver

crwdns2944105:0crwdne2944105:0

  1. Texas Instruments TI-5130 Printer Unit  Replacement, Printer Unit: crwdns2935265:01crwdnd2935265:01crwdnd2935265:02crwdne2935265:0 Texas Instruments TI-5130 Printer Unit  Replacement, Printer Unit: crwdns2935265:01crwdnd2935265:02crwdnd2935265:02crwdne2935265:0
    • Flip the calculator over and remove the 4 main 10mm screws with a PH1 screwdriver.

  2. Texas Instruments TI-5130 Printer Unit  Replacement: crwdns2935265:02crwdnd2935265:01crwdnd2935265:01crwdne2935265:0
    • Flip the calculator back over and remove the top cover.

  3. Texas Instruments TI-5130 Printer Unit  Replacement: crwdns2935265:03crwdnd2935265:01crwdnd2935265:01crwdne2935265:0
    • Disconnect the printing unit from the motherboard by pulling up on the connector – located in the bottom left of the motherboard.

  4. Texas Instruments TI-5130 Printer Unit  Replacement: crwdns2935265:04crwdnd2935265:01crwdnd2935265:01crwdne2935265:0
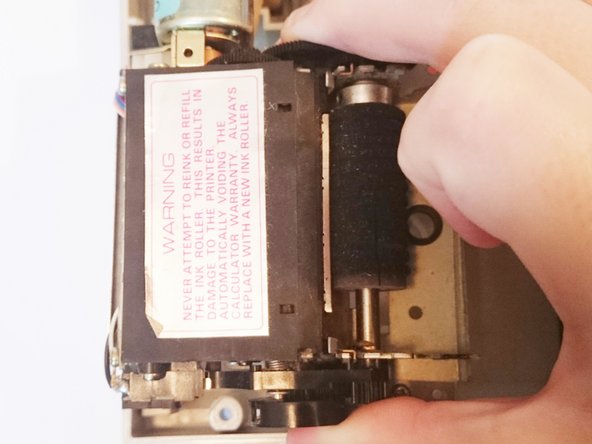
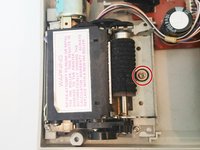
    • Remove the ink cartridge by pushing the tab back then lifting it out to gain access to the screw that holds the printer in place.

  5. Texas Instruments TI-5130 Printer Unit  Replacement: crwdns2935265:05crwdnd2935265:01crwdnd2935265:02crwdne2935265:0 Texas Instruments TI-5130 Printer Unit  Replacement: crwdns2935265:05crwdnd2935265:02crwdnd2935265:02crwdne2935265:0
    • Using a PH1 screwdriver remove the 10mm screw that holds down the printer unit.

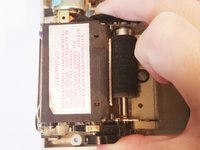
    • Remove the printer unit by lifting it up.

crwdns2915888:0crwdne2915888:0

To reassemble your device, follow these instructions in reverse order.

crwdns2935229:03crwdne2935229:0

Shannon Perkins

crwdns2935283:009/17/15crwdne2935283:0

652 crwdns2915208:0crwdne2915208:0

crwdns2935297:03crwdne2935297:0

crwdns2915084:0crwdne2915084:0

USF Sarasota-Manatee, Team 1-2, Stewart Fall 2015 crwdns2935289:0USF Sarasota-Manatee, Team 1-2, Stewart Fall 2015crwdne2935289:0

USFSM-STEWART-F15S1G2

crwdns2931471:05crwdne2931471:0

crwdns2935297:020crwdne2935297:0

crwdns2947412:02crwdne2947412:0

wehre did you buy the replacement printer

Tino ullrich - crwdns2934203:0crwdne2934203:0

what sources are there for TI-5130 printer unit?

Norman Todd - crwdns2934203:0crwdne2934203:0

crwdns2917038:0crwdne2917038:0

crwdns2936625:0crwdne2936625:0:

crwdns2936751:024crwdne2936751:0 1

crwdns2936753:07crwdne2936753:0 1

crwdns2936753:030crwdne2936753:0 17

crwdns2942667:0crwdne2942667:0 2,561