crwdns2933423:0crwdne2933423:0
crwdns2947577:0crwdnd2947577:0crwdne2947577:0
Summer LookOut Duo Navigation Buttons Replacement

Summer LookOut Duo Navigation Buttons Replacement

Jordyn Looney

crwdns2944107:0crwdnd2944107:0Jordyn Looneycrwdnd2944107:0crwdnd2944107:0crwdnd2944107:03crwdnd2944107:0crwdne2944107:0

crwdns2944111:0Mud 16, 2025crwdne2944111:0

crwdns2931287:010crwdne2931287:0
crwdns2937799:0crwdne2937799:0

crwdns2915892:0crwdne2915892:0

crwdns2942287:0crwdne2942287:0

If the navigation buttons on your Summer LookOut Duo baby monitor are refusing to function or need cleaning, this guide is a step-by-step on how to access the navigation buttons for cleaning or repair.

Before proceeding, make sure the device is powered off and dry to avoid internal damage to the device or potential shock hazards. Some electrical components will need to be removed in order to get to the navigation buttons.

CHOKING HAZARD: This device contains small screws. If possible, use a magnetic mat or small container within eyesight to keep track of the screws to prevent possible ingestion or misplacement.

crwdns2942213:0crwdne2942213:0

crwdns2943215:0crwdne2943215:0

crwdns2944105:0crwdne2944105:0

  1. Summer LookOut Duo Navigation Buttons Replacement, Battery: crwdns2935265:01crwdnd2935265:01crwdnd2935265:03crwdne2935265:0 Summer LookOut Duo Navigation Buttons Replacement, Battery: crwdns2935265:01crwdnd2935265:02crwdnd2935265:03crwdne2935265:0 Summer LookOut Duo Navigation Buttons Replacement, Battery: crwdns2935265:01crwdnd2935265:03crwdnd2935265:03crwdne2935265:0
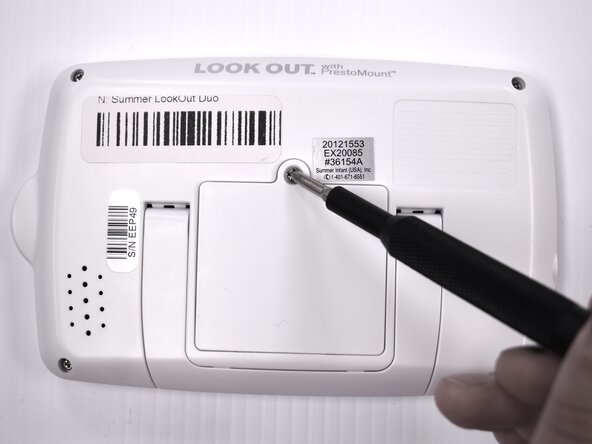
    • Flip the device over so the back is facing up.

    • Remove the 9 mm screw using a Phillips #1 screwdriver.

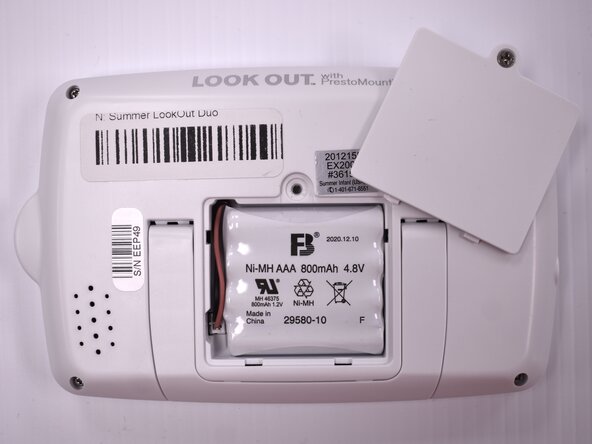
    • Lift the battery panel away from the device.

  2. Summer LookOut Duo Navigation Buttons Replacement: crwdns2935265:02crwdnd2935265:01crwdnd2935265:03crwdne2935265:0 Summer LookOut Duo Navigation Buttons Replacement: crwdns2935265:02crwdnd2935265:02crwdnd2935265:03crwdne2935265:0 Summer LookOut Duo Navigation Buttons Replacement: crwdns2935265:02crwdnd2935265:03crwdnd2935265:03crwdne2935265:0
    • Flip the handheld monitor over and let the battery fall out into your hand.

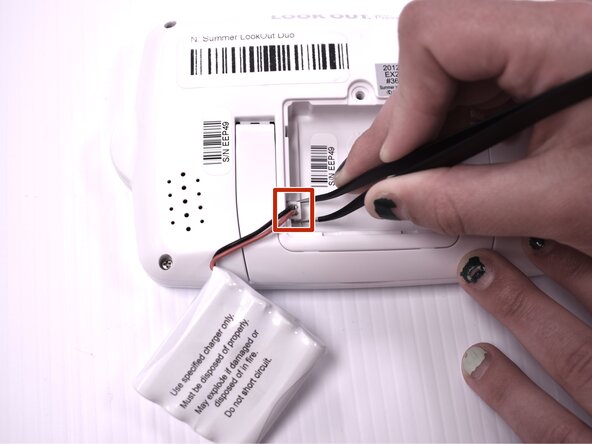
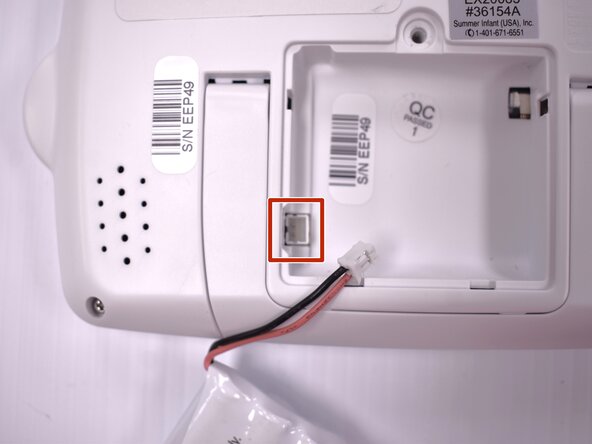
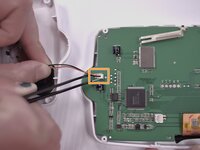
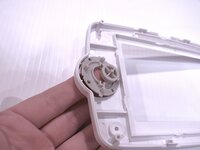
    • Using angled tweezers, gently remove the plastic wire coupling from the side of the open battery compartment.

    • If the coupling struggles to release, with a loose but firm grip, slightly wiggle the plastic wire coupling back and forth until it releases.

    • Remove the battery from the device.

  3. Summer LookOut Duo Navigation Buttons Replacement, Motherboard and Display: crwdns2935265:03crwdnd2935265:01crwdnd2935265:03crwdne2935265:0 Summer LookOut Duo Navigation Buttons Replacement, Motherboard and Display: crwdns2935265:03crwdnd2935265:02crwdnd2935265:03crwdne2935265:0 Summer LookOut Duo Navigation Buttons Replacement, Motherboard and Display: crwdns2935265:03crwdnd2935265:03crwdnd2935265:03crwdne2935265:0
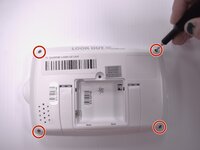
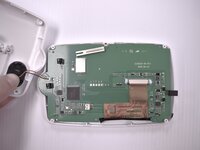
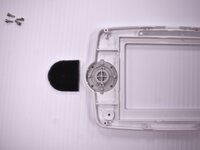
    • Using the Phillips #00 screwdriver, remove the four 7mm screws from each corner on the back of the handheld monitor.

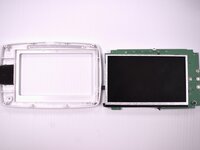
    • Remove the casing from the back of the handheld monitor.

    • A nylon spudger may be helpful to pry the case open.

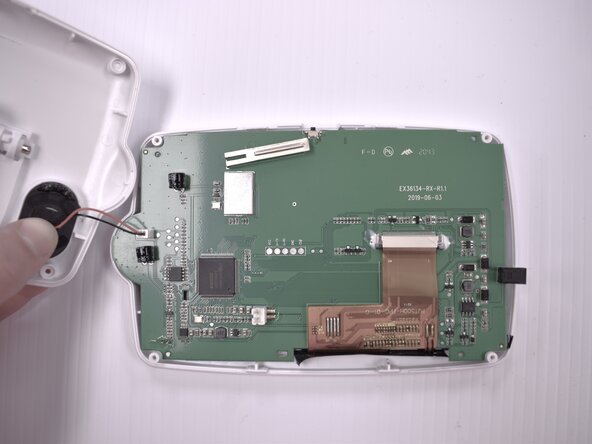
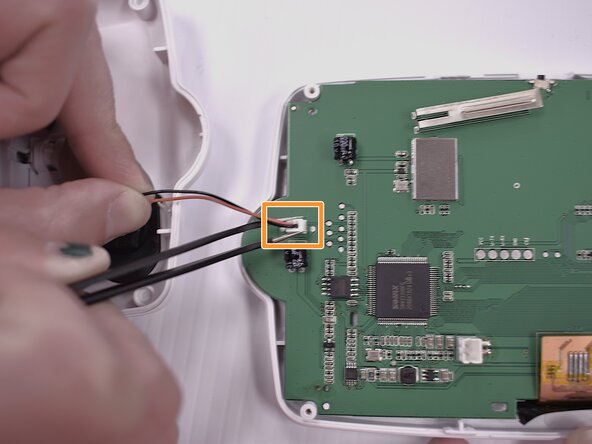
    • Using the angled tweezers, gently remove the plastic wire coupling connecting the speaker to the motherboard.

    • The power button may come loose as the case is being removed.

  4. Summer LookOut Duo Navigation Buttons Replacement: crwdns2935265:04crwdnd2935265:01crwdnd2935265:02crwdne2935265:0 Summer LookOut Duo Navigation Buttons Replacement: crwdns2935265:04crwdnd2935265:02crwdnd2935265:02crwdne2935265:0
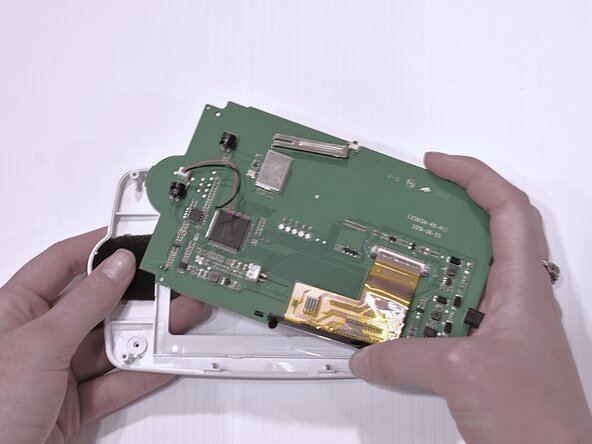
    • Remove the motherboard and monitor display together and set aside.

  5. Summer LookOut Duo Navigation Buttons Replacement, Navigation Buttons: crwdns2935265:05crwdnd2935265:01crwdnd2935265:02crwdne2935265:0 Summer LookOut Duo Navigation Buttons Replacement, Navigation Buttons: crwdns2935265:05crwdnd2935265:02crwdnd2935265:02crwdne2935265:0
    • Gently remove the black foam padding from the back of the buttons.

    • Using your fingers, gently lift the navigation buttons from the front monitor casing.

    • There are two sets of buttons: the outer navigation ring and the inner menu button.

    • The buttons are not fixed in place and will readily push out of the case. Use light force to prevent loss.

crwdns2915888:0crwdne2915888:0

To reassemble your device, follow these instructions in reverse order.

crwdns2947821:0crwdne2947821:0

crwdns2947823:0crwdne2947823:0

Jordyn Looney

crwdns2935283:002/25/25crwdne2935283:0

425 crwdns2915208:0crwdne2915208:0

crwdns2935297:04crwdne2935297:0

crwdns2915084:0crwdne2915084:0

Idaho State University, Team 1-4, Watkins Spring 2025 crwdns2935289:0Idaho State University, Team 1-4, Watkins Spring 2025crwdne2935289:0

ISU-WATKINS-S25S1G4

crwdns2931471:04crwdne2931471:0

crwdns2935297:05crwdne2935297:0

crwdns2947412:00crwdne2947412:0

crwdns2917038:0crwdne2917038:0

crwdns2936625:0crwdne2936625:0:

crwdns2936751:024crwdne2936751:0 0

crwdns2936753:07crwdne2936753:0 4

crwdns2936753:030crwdne2936753:0 5

crwdns2942667:0crwdne2942667:0 67