crwdns2915892:0crwdne2915892:0
Prerequisite-only guide! This guide is part of another procedure and is not meant to be used alone.
Use this guide to remove the complete right bumper assembly (R1) in a Steam Deck.
crwdns2942213:0crwdne2942213:0
-
-
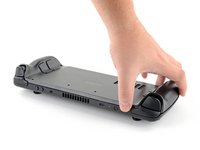
Power down your Steam Deck and unplug any cables.
-
-
crwdns2935267:0crwdne2935267:0FixMat$36.95
-
Use a Phillips driver to remove the eight screws securing the back cover:
-
Four coarse thread 9.5 mm-long screws
-
Four fine thread 5.8 mm-long screws
-
-
-
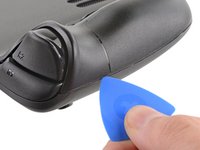
Insert an opening pick into the thin gap between the back cover and the front shell, along the edge of the right grip.
-
Pry up on the back cover to release it from the locking clips.
-
-
-
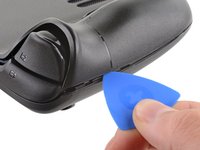
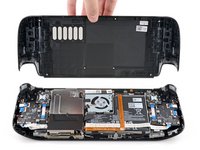
Grip the back cover at the opening you just created and pull it up and away from the device to unclip the long edges.
-
Remove the back cover.
-
-
crwdns2935267:0crwdne2935267:0Tweezers$4.99
-
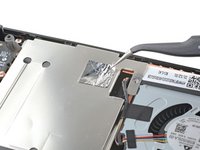
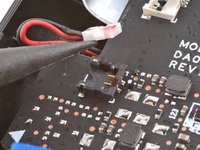
Use a pair of tweezers to remove the piece of foil tape covering the hidden screw on the board shield.
-
-
-
Use a Phillips driver to remove the three screws securing the board shield:
-
One 3.4 mm screw
-
Two 3.7 mm screws
-
-
-
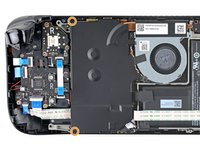
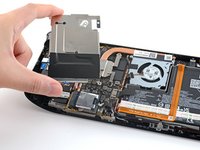
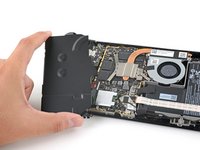
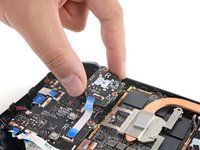
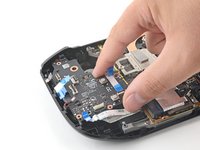
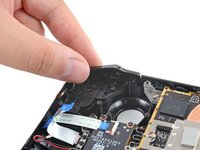
Remove the board shield.
-
-
-
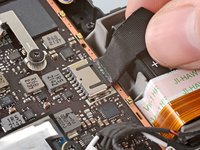
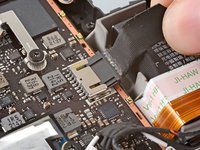
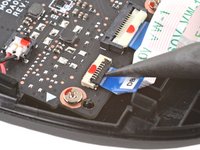
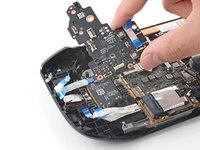
Grip the battery cable by its pull tab and pull it directly away from the motherboard to disconnect it.
-
-
-
-
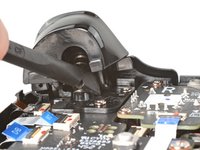
Place the flat end of a spudger onto the inside edge of the trigger's right clip.
-
Pivot the trigger clip out, away, and up from the peg to unlatch it.
-
-
-
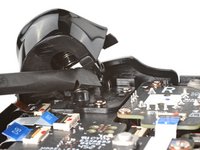
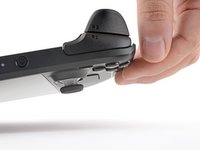
Remove the right trigger.
-
-
-
Use a Phillips driver to remove the three 5.2 mm screws securing the right trigger bracket.
-
-
-
Remove the right trigger bracket.
-
-
crwdns2935267:0crwdne2935267:0Tweezers$4.99
-
Use the pointed end of a spudger to lift up the small locking flap on the thumbstick cable's ZIF connector.
-
Use a pair of tweezers to slide the cable out of its connector.
-
-
-
Use a Phillips driver to remove the three 5.2 mm screws securing the thumbstick.
-
-
-
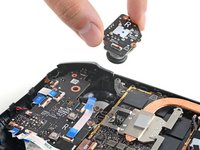
Remove the right thumbstick.
-
-
-
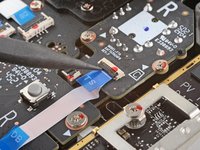
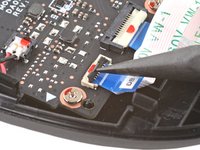
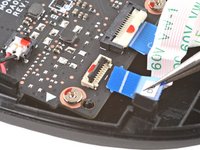
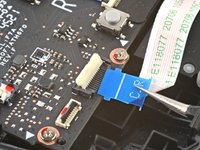
Use the pointed end of a spudger to lift up the small locking flap on the button board cable's ZIF connector.
-
Use a pair of tweezers to slide the cable out of its connector.
-
-
-
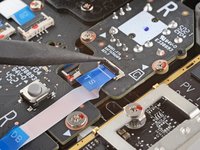
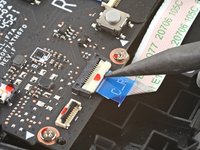
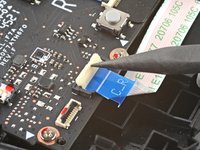
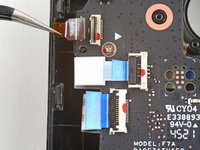
Use the pointed end of a spudger to lift up the small locking flap on the button board interconnect cable's ZIF connector.
-
Use a pair of tweezers to slide the cable out of its connector.
-
-
-
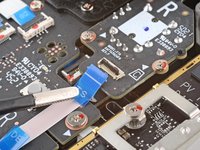
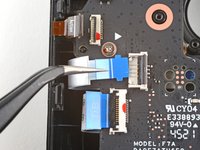
If any connectors are covered with tape, use a pair of tweezers to remove it.
-
Use the pointed end of a spudger to lift up the small locking flaps on the rest of the button board ZIF connectors. Use a pair of tweezers to slide the cables out of their connectors:
-
Disconnect the action buttons cable.
-
Disconnect the touchpad board cable.
-
Disconnect the touchpad cable.
-
-
-
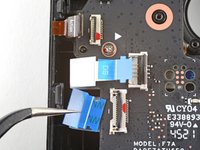
Use the pointed end of a spudger to lift up on the haptics cable to disconnect it.
-
-
-
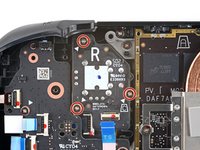
Use a Phillips driver to disconnect the four screws securing the right button board:
-
Three 5.2 mm screws
-
One 3.9 mm screw
-
-
-
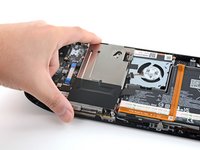
Remove the right button board.
-
-
-
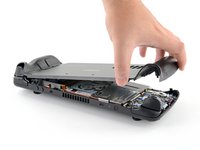
Use a Phillips driver to remove the two 5.2 mm screws securing the right bumper assembly.
-
-
-
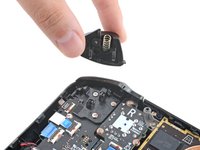
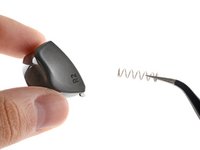
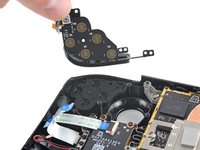
Remove the right bumper assembly.
-


To reassemble your device, follow these instructions in reverse order.
To reassemble your device, follow these instructions in reverse order.

