crwdns2915892:0crwdne2915892:0
Follow this guide to replace the main board (aka motherboard or logic board) in your Steam Controller (2nd Gen, 2026).
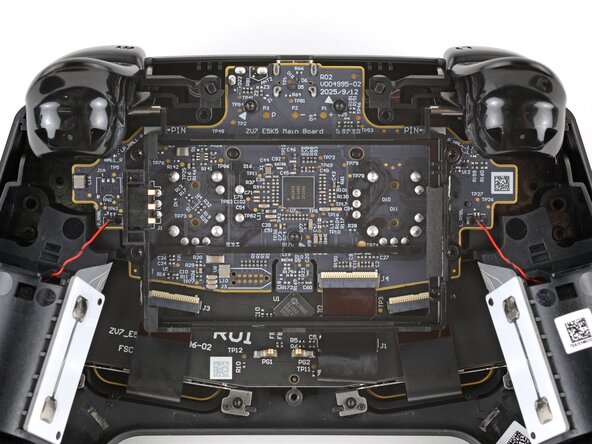
The main board includes the USB-C charging port and thumbstick modules (including the thumbstick covers), which are all soldered in place. Unless you're comfortable soldering, the only way to replace any of these parts is to replace the entire zboard.
Replacing the main board can fix a variety of problems: a broken charging port, loose port connection, improper joystick input, broken joysticks, or intermittent shutdowns.
You may need additional software tools and calibration procedures to get your replacement main board to function as intended.
crwdns2942213:0crwdne2942213:0
-
-
Unplug all cables and accessories from the controller, including the Steam Controller Puck.
 crwdns2952109:0crwdne2952109:0
-
-
crwdns2935267:0crwdne2935267:0TR6 Torx Security Screwdriver$5.99
-
Use a T6 Torx screwdriver to remove the seven screws securing the back cover.
-
Throughout this repair, keep track of each screw and make sure it goes back exactly where it came from.
-
-
-
Lift the right edge of the battery to remove it.
-
-
-
Use a T6 Torx screwdriver to remove the four 7.4 mm‑long screws securing the battery mounting bracket.
-
-
-
-
Remove the battery mounting bracket.
-
-
-
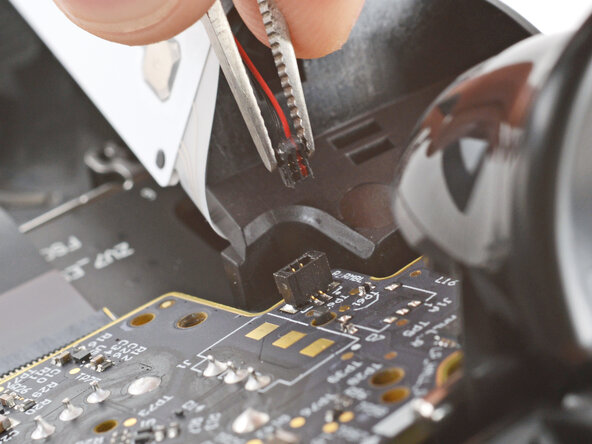
Firmly grip the short edges of one rumble motor connector with a pair of tweezers and pull straight up to disconnect it
-
-
-
Repeat to disconnect the other rumble motor.
-
-
-
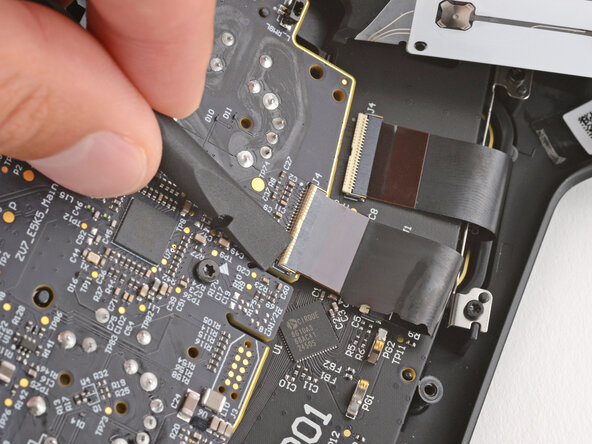
Use a spudger to lift the hinged locking flap on the interconnect cable ZIF connector, located on the bottom edge of the main board.
-
-
-
Use tweezers to grip the cable by its plastic pull tab and slide it out of the socket.
-
-
-
Use a T6 Torx screwdriver to remove the three 7.4 mm‑long screws securing the main board.
-
-
-
Pull the main board down so the top corners clear the triggers.
-
Remove the main board, guiding the thumbsticks through their cutouts.
-
-
-
If the rubber piece is out of place, remove it and set it aside.
-


To reassemble your device, follow these instructions in reverse order.
Take your e-waste to an R2 or e-Stewards certified recycler.
Repair didn’t go as planned? Try some basic troubleshooting, or ask our Answers community for help.
crwdns2935221:0crwdne2935221:0
crwdns2935227:0crwdne2935227:0
