crwdns2933423:0crwdne2933423:0

Sony Vaio SVE111B11L Motherboard Replacement

crwdns2942213:0crwdne2942213:0

  1. Sony Vaio SVE111B11L Motherboard Replacement, Battery: crwdns2935265:01crwdnd2935265:01crwdnd2935265:02crwdne2935265:0 Sony Vaio SVE111B11L Motherboard Replacement, Battery: crwdns2935265:01crwdnd2935265:02crwdnd2935265:02crwdne2935265:0
    • Remove the charging adaptor. Some charge may still be in the battery or computer. DO NOT touch connectors or copper yellow connector.

    • Locate the battery on the bottom of the computer.

    • Flip the computer so that the battery faces you.

  2. Sony Vaio SVE111B11L Motherboard Replacement: crwdns2935265:02crwdnd2935265:01crwdnd2935265:01crwdne2935265:0
    • Locate the two latches with the words “lock” and “release” on them.

  3. Sony Vaio SVE111B11L Motherboard Replacement: crwdns2935265:03crwdnd2935265:01crwdnd2935265:01crwdne2935265:0
    • Push the latches towards each other and lift the battery to remove it.

  4. Sony Vaio SVE111B11L Motherboard Replacement, Keyboard Assembly: crwdns2935265:04crwdnd2935265:01crwdnd2935265:01crwdne2935265:0
    • Remove the memory door on the bottom of the computer to access the screw for the keyboard.

    • The screws for the memory door do not come out.

    Incorrect picture for this step. Is should show removing the main cover on the bottom of the laptop to reveal the memory and hard drive

    Steve - crwdns2934203:0crwdne2934203:0

  5. Sony Vaio SVE111B11L Motherboard Replacement: crwdns2935265:05crwdnd2935265:01crwdnd2935265:01crwdne2935265:0
    • Remove the 6.7 mm screw that holds the keyboard assembly in place.

  6. Sony Vaio SVE111B11L Motherboard Replacement: crwdns2935265:06crwdnd2935265:01crwdnd2935265:01crwdne2935265:0
    • Be careful not to break the keyboard wire connection.

    • Slide the wires out, away from the solder connections.

    • Flip the computer over and open it.

    Not sure what wires I'm supposed to slide out. Again, picture is no help.

    Steve - crwdns2934203:0crwdne2934203:0

  7. Sony Vaio SVE111B11L Motherboard Replacement: crwdns2935265:07crwdnd2935265:01crwdnd2935265:03crwdne2935265:0 Sony Vaio SVE111B11L Motherboard Replacement: crwdns2935265:07crwdnd2935265:02crwdnd2935265:03crwdne2935265:0 Sony Vaio SVE111B11L Motherboard Replacement: crwdns2935265:07crwdnd2935265:03crwdnd2935265:03crwdne2935265:0
    • Gently pry the keyboard assembly from the screen side, using an opening tool. You will need to lift the keyboard about two inches.

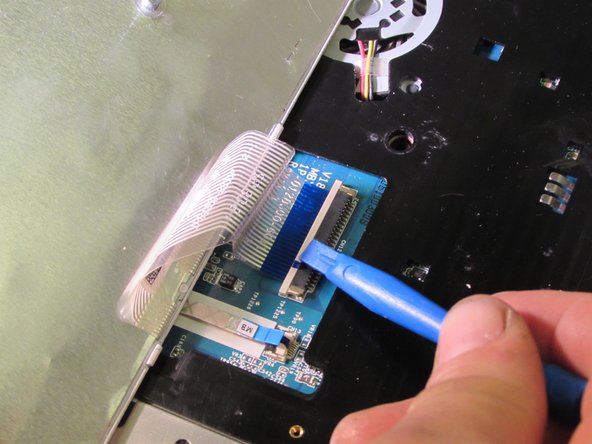
    • Using an opening tool, gently pull out and slightly up on the connector clip.

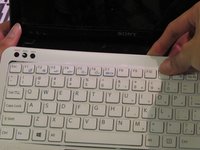
    • Gently lift the keyboard assembly up and out.

    I found that it was easier to remove the keyboard starting from the front edge (away from the screen) because the clips are shorter on this side. The only problem is that the cable is at the front so you have more danger of breaking it. Again, the picture is incorrect - don't try to remove the panel around the keyboard as shown, just go for the central keyboard unit.

    Steve - crwdns2934203:0crwdne2934203:0

  8. Sony Vaio SVE111B11L Motherboard Replacement, Fan: crwdns2935265:08crwdnd2935265:01crwdnd2935265:01crwdne2935265:0
    • Locate the fan and heat-sink.

  9. Sony Vaio SVE111B11L Motherboard Replacement: crwdns2935265:09crwdnd2935265:01crwdnd2935265:01crwdne2935265:0
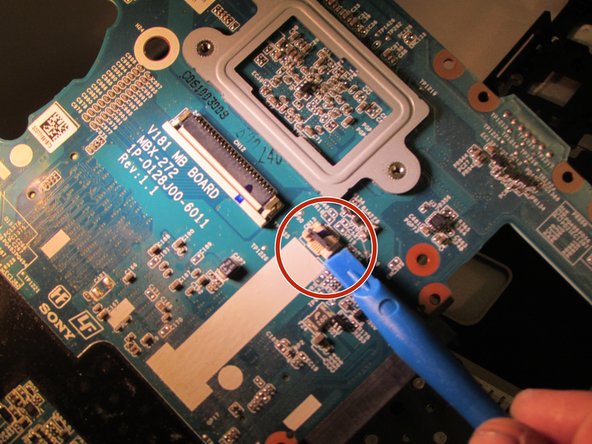
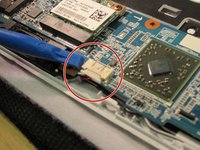
    • Locate the wires and connectors, and gently unplug them.

  10. Sony Vaio SVE111B11L Motherboard Replacement: crwdns2935265:010crwdnd2935265:01crwdnd2935265:01crwdne2935265:0
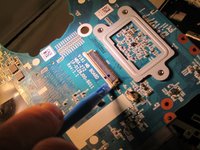
    • Locate and remove the 6.7 mm screws that hold the fan assembly.

  11. Sony Vaio SVE111B11L Motherboard Replacement: crwdns2935265:011crwdnd2935265:01crwdnd2935265:01crwdne2935265:0
    • Gently lift the fan assembly up and out.

  12. Sony Vaio SVE111B11L Motherboard Replacement, Motherboard: crwdns2935265:012crwdnd2935265:01crwdnd2935265:01crwdne2935265:0
    • Remove charging adaptor. Some charge may still be in the battery or computer.

    • DO NOT touch connectors or copper yellow connector.

    • Take the covers on the bottom of the laptop off.

  13. Sony Vaio SVE111B11L Motherboard Replacement: crwdns2935265:013crwdnd2935265:01crwdnd2935265:01crwdne2935265:0
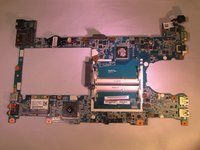
    • Locate and remove the screws holding the motherboard down.

    • Screws: L 4.6mm X D 1.85mm

  14. Sony Vaio SVE111B11L Motherboard Replacement: crwdns2935265:014crwdnd2935265:01crwdnd2935265:03crwdne2935265:0 Sony Vaio SVE111B11L Motherboard Replacement: crwdns2935265:014crwdnd2935265:02crwdnd2935265:03crwdne2935265:0 Sony Vaio SVE111B11L Motherboard Replacement: crwdns2935265:014crwdnd2935265:03crwdnd2935265:03crwdne2935265:0
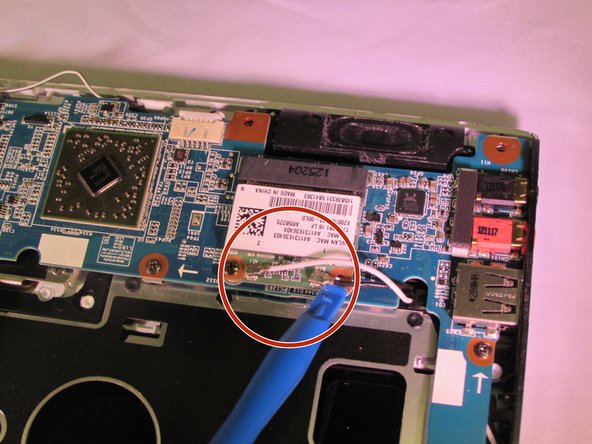
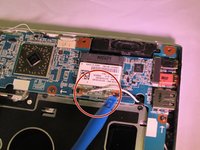
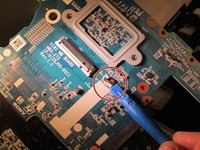
    • Locate the wires and connectors and remove them from the motherboard.

  15. Sony Vaio SVE111B11L Motherboard Replacement: crwdns2935265:015crwdnd2935265:01crwdnd2935265:02crwdne2935265:0 Sony Vaio SVE111B11L Motherboard Replacement: crwdns2935265:015crwdnd2935265:02crwdnd2935265:02crwdne2935265:0
    • Lift the mother board out and safely put it to the side.

crwdns2915888:0crwdne2915888:0

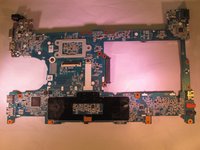
To reassemble your device, follow these instructions in reverse order.

crwdns2935227:0crwdne2935227:0

John Noll

crwdns2935283:009/29/16crwdne2935283:0

819 crwdns2915208:0crwdne2915208:0

crwdns2935297:05crwdne2935297:0

crwdns2915084:0crwdne2915084:0

Eastern Washington University, Team 1-5, Crane Fall 2016 crwdns2935289:0Eastern Washington University, Team 1-5, Crane Fall 2016crwdne2935289:0

EWU-CRANE-F16S1G5

crwdns2931471:04crwdne2931471:0

crwdns2935297:010crwdne2935297:0

crwdns2947410:01crwdne2947410:0

i have the same laptop, and i mistakenly remove the mother board cmos battery , and is not recognizing my laptop system hard drive.

in this case what can i do in other to restore it back.

onyebuchiadieze - crwdns2934203:0crwdne2934203:0

crwdns2917038:0crwdne2917038:0

crwdns2936625:0crwdne2936625:0:

crwdns2936751:024crwdne2936751:0 1

crwdns2936753:07crwdne2936753:0 3

crwdns2936753:030crwdne2936753:0 5

crwdns2942667:0crwdne2942667:0 2,076