crwdns2933423:0crwdne2933423:0

Sony PS-LX300USB Motor Replacement

crwdns2942213:0crwdne2942213:0

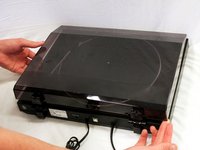
  1. Sony PS-LX300USB Motor Replacement, Dust Cover: crwdns2935265:01crwdnd2935265:01crwdnd2935265:01crwdne2935265:0
    • Turn the turntable around so that the back side is visible.

  2. Sony PS-LX300USB Motor Replacement: crwdns2935265:02crwdnd2935265:01crwdnd2935265:02crwdne2935265:0 Sony PS-LX300USB Motor Replacement: crwdns2935265:02crwdnd2935265:02crwdnd2935265:02crwdne2935265:0
    • Begin by releasing the left latch. Apply downward pressure to the square, black button using a flathead screw driver.

    • Once the latch is released, lift upward.

    • Use your left hand to hold the left side of the dust cover above the latch. This ensures the latch does not reconnect.

  3. Sony PS-LX300USB Motor Replacement: crwdns2935265:03crwdnd2935265:01crwdnd2935265:01crwdne2935265:0
    • Use a flat head screw driver to apply pressure to the black square button on the right side.

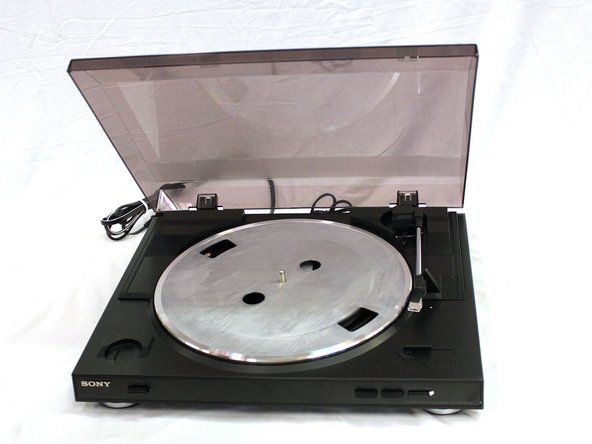
  4. Sony PS-LX300USB Motor Replacement: crwdns2935265:04crwdnd2935265:01crwdnd2935265:02crwdne2935265:0 Sony PS-LX300USB Motor Replacement: crwdns2935265:04crwdnd2935265:02crwdnd2935265:02crwdne2935265:0
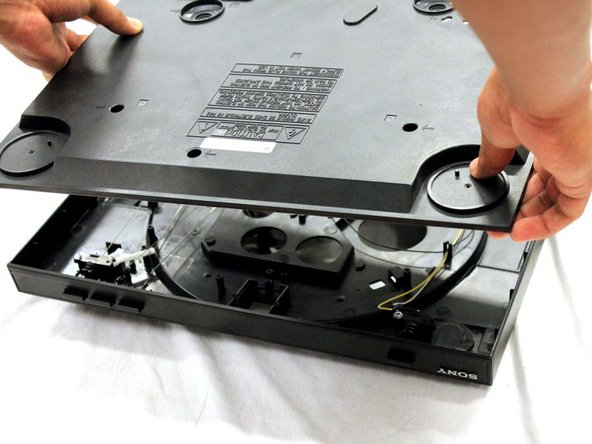
    • Once both the right and left buttons are released, pull the dust cover upwards.

    • The dust cover is now disconnected and ready for replacement.

  5. Sony PS-LX300USB Motor Replacement, Drive Belt: crwdns2935265:05crwdnd2935265:01crwdnd2935265:02crwdne2935265:0 Sony PS-LX300USB Motor Replacement, Drive Belt: crwdns2935265:05crwdnd2935265:02crwdnd2935265:02crwdne2935265:0
    • Lift the rubber mat, and put it to the side. It should be easy to remove, because it simply rests on a metal platter without anything securing it down.

  6. Sony PS-LX300USB Motor Replacement: crwdns2935265:06crwdnd2935265:01crwdnd2935265:01crwdne2935265:0
    • Turn the platter so that the motor pulley can be seen through one of the two outer holes in the platter.

    • If the drive belt is hooked around the motor pulley, unhook it.

    • When reassembling to device, don't forget to hook the new drive belt to the motor pulley.

  7. Sony PS-LX300USB Motor Replacement: crwdns2935265:07crwdnd2935265:01crwdnd2935265:01crwdne2935265:0
    • Grasping the platter by its two inner holes, lift it upwards.

    • Removing the platter may take a small amount of force. If the pulley is unhooked and the tone arm is safely to the side, don’t fear using a small amount of force in lifting the platter.

    • If you haven’t yet unhooked the drive belt, the motor pulley and the belt could sustain damage.

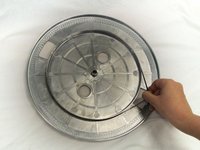
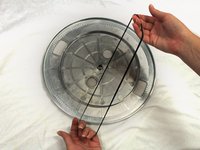
  8. Sony PS-LX300USB Motor Replacement: crwdns2935265:08crwdnd2935265:01crwdnd2935265:02crwdne2935265:0 Sony PS-LX300USB Motor Replacement: crwdns2935265:08crwdnd2935265:02crwdnd2935265:02crwdne2935265:0
    • Peel the drive belt from the inner ridge of the metal platter and put it to the side.

    • Sometimes, the drive belt can fall off the platter during deconstruction. If this is the case, simply take it out of the device wherever it is.

  9. Sony PS-LX300USB Motor Replacement, Motor: crwdns2935265:09crwdnd2935265:01crwdnd2935265:02crwdne2935265:0 Sony PS-LX300USB Motor Replacement, Motor: crwdns2935265:09crwdnd2935265:02crwdnd2935265:02crwdne2935265:0
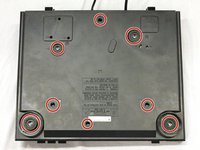
    • Use a PH2 screwdriver to remove the 8 screws from the bottom cover.

    • Now lift the bottom cover to remove it.

  10. Sony PS-LX300USB Motor Replacement: crwdns2935265:010crwdnd2935265:01crwdnd2935265:01crwdne2935265:0
    • The motor is in the right upper corner area of the turntable, shown in the red square.

  11. Sony PS-LX300USB Motor Replacement: crwdns2935265:011crwdnd2935265:01crwdnd2935265:01crwdne2935265:0
    • Using a solder iron, carefully desolder the wires that are connected to the old motor to be able to remove it. Making sure to pay close attention where each wire is connected.

    • From left to right: Black is all the way to the left. Red is next. White is third. Yellow is all the way to the right.

    • When reassembling, do not forget to solder in the wires in their previous places.

  12. Sony PS-LX300USB Motor Replacement: crwdns2935265:012crwdnd2935265:01crwdnd2935265:01crwdne2935265:0
    • Remove the old motor by turning it counterclockwise, freeing it from its position.

    • When reassembling, place the new motor in by aligning the two screws and turning the motor clockwise to secure it.

crwdns2915888:0crwdne2915888:0

To reassemble your device, follow these instructions in reverse order.

Christian Fuentes

crwdns2935283:009/27/17crwdne2935283:0

116 crwdns2915208:0crwdne2915208:0

crwdns2935295:0crwdne2935295:0

crwdns2915084:0crwdne2915084:0

Cal Poly, Team S8-G3, Banghart Fall 2017 crwdns2935289:0Cal Poly, Team S8-G3, Banghart Fall 2017crwdne2935289:0

CPSU-BANGHART-F17S8G3

crwdns2931471:05crwdne2931471:0

crwdns2935297:05crwdne2935297:0

crwdns2944067:00crwdne2944067:0

crwdns2917038:0crwdne2917038:0

crwdns2936625:0crwdne2936625:0:

crwdns2936751:024crwdne2936751:0 0

crwdns2936753:07crwdne2936753:0 3

crwdns2936753:030crwdne2936753:0 35

crwdns2942667:0crwdne2942667:0 3,360