crwdns2915892:0crwdne2915892:0
The laser in your Sony DVP-FX730 sends the DVD’s data to the lens, so that it can be translated into audio and video signals. If the device is having difficulty reading the disc, first check that it’s not due to a dirty or scratched disc. If the disc looks good, then the issue may be from a faulty or damaged laser. This guide offers step-by-step instructions for removing the laser, so that it can be replaced. All tools used in this guide are available from the IFIXIT website.
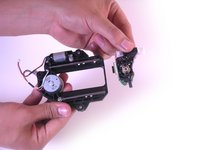
crwdns2942213:0crwdne2942213:0
-
-
Remove the five exposed 7.9 mm screws using a Phillips screwdriver.
-
Punch through the warranty sticker with the spudger.
-
Remove the screw underneath with the Phillips screwdriver.
-
-
-
Remove the rubber feet using the spudger.
-
Remove the screws that were covered by the rubber feet.
-
-
-
Hold on to the corners of the cover and gently lift the cover.
-
-
crwdns2935267:0crwdne2935267:0Tweezers$4.99
-
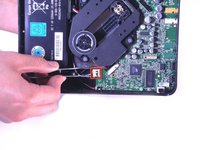
Gently remove the wires with tweezers by pulling up on the base they are attached to.
-
-
-
-
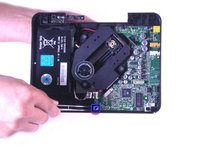
Remove the large connector.
-
Remove the small connector.
-
-
-
Remove Philips screws with the #0 Philips Screwdriver.
-
-
-
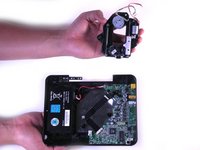
Lift up the black piece connected to the wires.
-
-
-
Remove the T6 screws with the T6 screwdriver.
-
-
crwdns2935267:0crwdne2935267:0Tweezers$4.99
-
Gently pull the rods out with tweezers.
-


To reassemble your device, follow these instructions in reverse order.
To reassemble your device, follow these instructions in reverse order.
crwdns2915084:0crwdne2915084:0

Cal Poly, Team 11-21, Maness Winter 2012 crwdns2935289:0Cal Poly, Team 11-21, Maness Winter 2012crwdne2935289:0
CPSU-MANESS-W12S11G21
crwdns2931471:04crwdne2931471:0
crwdns2935297:05crwdne2935297:0