crwdns2915892:0crwdne2915892:0
If the camera lens is not moving, damaged, or producing blurry images, use this guide to safely remove and replace the camera lens in your Sony Cyber-shot DSC-W570.
Before starting the replacement process, use compressed air to clean out any dirt and remove the SD card to clean that compartment as well.
An alternative solution may be to press and hold the shutter button down and at the same time press the power-on button. If the lens still doesn't open, retract, or extend, reset your device and follow the instructions carefully to ensure a successful replacement and restore your camera's functionality.
Before you begin this repair, make sure to power off your camera, unplug it from the charger, and remove the battery.
This guide involves removing a capacitor. While camera capacitors are relatively small, they can still store enough charge to give you a shock. To stay safe, the capacitor must be properly discharged.
This guide will show you how to create a simple, resistor-based tool to safely discharge the capacitor.
crwdns2942213:0crwdne2942213:0
-
-
Turn the camera upside down.
-
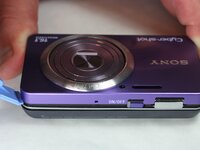
Locate the lock bar and slide to 'open' position.
-
No tools required.
-
-
-
Press the blue clip forward, releasing the battery.
-
Remove the battery and replace it with a new one.
-
-
-
Begin by facing the camera bottom side up to reveal the two 2.93 mm long screws
-
Remove these two screws using a Philips #00 screwdriver
-
-
-
Turn the camera sideways on its left side making sure the two 2.93 mm long screws are facing upwards
-
Remove the two 2.93 mm long screws using a Phillips #00 screwdriver
-
-
-
Turn the camera on its right side making sure it is facing upwards
-
Remove the last two 2.93 mm long screws using a Phillips #00 screwdriver
-
-
-
-
Face the device with the camera lens facing upwards
-
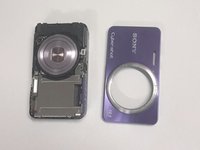
Gently pry off each corner of the cover to remove it
-
Once all corners are pried off, gently lift off the cover and place it on the side
-
-
-
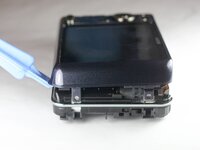
Flip the device, making sure the screen is facing upwards
-
Use the plastic opening tool to gently pry all along the corners and sides of the camera.
-
Gently lift off the entire back cover and place it on the side
-
-
-
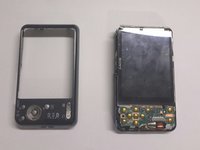
Taking off the previous cover will reveal the two cables connecting the LCD screen to the motherboard below the screen.
-
-
-
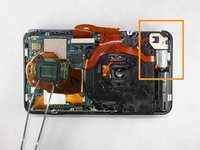
Remove the LCD screen from the side opposite the battery terminals.
-
Watch carefully for the two cords mentioned in the previous step. These will still be connected.
-
The side will flip up as shown in the next step.
-
-
-
Pull these two cords straight back to disconnect them from the respective housings.
-
Caution: The housing does not need to be moved or adjusted in any way. DO NOT pull the cords at an angle, it can destroy the cords and the housing. Pull Straight Back!
-
-
-
This is what the camera should look like after 2 cords and the screen have been removed.
-
The lens cord is being held to the side for a clearer view.
-
-
crwdns2935267:0crwdne2935267:0Tweezers$4.99
-
After camera is disassembled the capacitor will need to be removed. Use tweezers to gently pull away the ribbon from the connector.
-
-
-
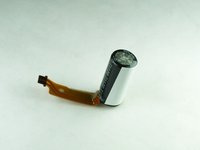
With the camera lying face down, separate the tape that connects the rest of the lens using tweezers.
-
Gently remove the lens display using your fingers out of the camera body.
-
The lens assembly is now removed from the camera body and is able to be replaced if necessary.
-


To reassemble your device, follow these instructions in reverse order. Take your e-waste to an R2 or e-Stewards certified recycler.
To reassemble your device, follow these instructions in reverse order. Take your e-waste to an R2 or e-Stewards certified recycler.
crwdns2935221:0crwdne2935221:0
crwdns2935229:04crwdne2935229:0
crwdns2915084:0crwdne2915084:0

USF Tampa, Team 9-1, Brown Winter 2015 crwdns2935289:0USF Tampa, Team 9-1, Brown Winter 2015crwdne2935289:0
USFT-BROWN-W15S9G1
crwdns2931471:05crwdne2931471:0
crwdns2935297:010crwdne2935297:0