crwdns2915892:0crwdne2915892:0
If your screen is cracked, broken, scratched, or otherwise in need of replacing, this guide will show you how to disassemble your camera, remove the screen, and replace it with a new one.
crwdns2942213:0crwdne2942213:0
-
-
Make sure the camera is turned off.
-
Press the ON/OFF button to turn off the camera.
-
-
-
Remove 2 screws on the side of the camera.
-
Remove 4 screws on the bottom of the camera.
-
Remove 1 screw next to the eyepiece.
There appear to be 3 different lengths of said 1.57mm screws. Take care to note where they come from
Step 7 uses one of the short screws. On reassembly, a long one will damage the small black panel it screws into. Referred to in step 9
-
-
-
Tilt the screen forward.
-
Remove the two 1.59mm #00 screws on the left with the Phillips #00 screwdriver.
-
-
-
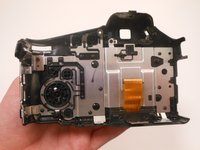
Pull the back panel of the camera upward.
Remove the four1.59mm #00 screws on the bottum of the body with the Phillips #00 screwdriver.
That’s already been done in stage 2.
-
-
-
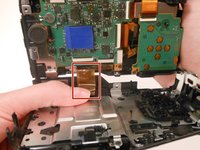
Open the back panel to view the inside of the camera.
-
Gently pull the orange ribbon cable to separate the two parts of the camera.
-
-
-
-
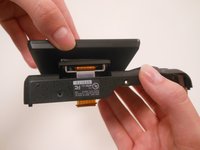
Flip the entire back panel so that the screen is facing upwards.
-
Lift the screen upwards to separate it from the back panel.
-
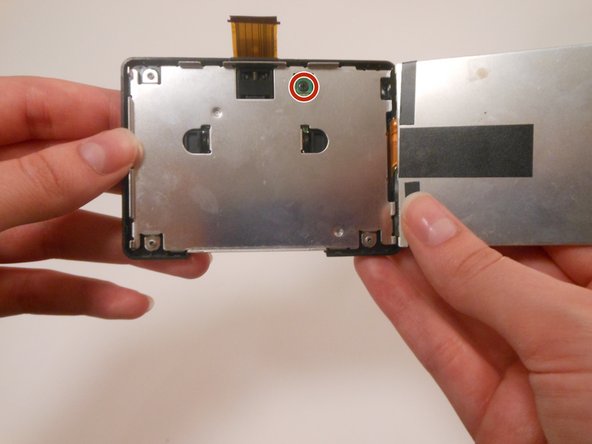
Turn the screen so that the side with the screw is facing you.
-
Remove the 1.59mm #00 screw with the Phillips #00 screwdriver.
Before you can remove the screen you must undo two screws on the inside of the back panel
On the HX200V , where all the instructions for the HX100V appear to be in order, the little black panels referred to in steps 7 and 9 are keyed together and are quite fiddly to get apart.. It is not as simple as lifting them apart as stated in the instruction for HX200V
-
-
-
Flip the screen over to view the backside.
-
Use a Phillips #00 screwdriver to remove the 1.59mm #00 screw.
-
-
-
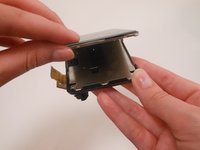
Flip the screen so that the screen is facing downwards and the orange ribbon cable is on top.
-
Lift the small, black panel to remove it from the screen.
-
-
-
Lift up the entire panel with the orange ribbon cable.
-
Lift the panel upwards and remove it.
-
-
-
Flip the screen so that the orange ribbon cable is facing downwards.
-
Press on the sliding panel and slide it upwards to remove it.
-
-
-
Lift the screen upwards to view the inside.
-
Use the Phillips screwdriver size #00 to remove the 1.59mm screw inside the green square.
Removing the screw is unnecessary, since it makes disconnecting and connecting the screen much harder
Very true … there is absolutely no need to remove the screw in the green square. Doing so makes it nigh impossible to connect the screen
-
-
-
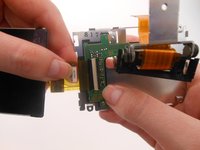
Using a Phillips #00 screwdriver, remove the three 1.59mm #00 screws from the back panel.
-
Lift up the black panel on the backside to remove.
-
-
-
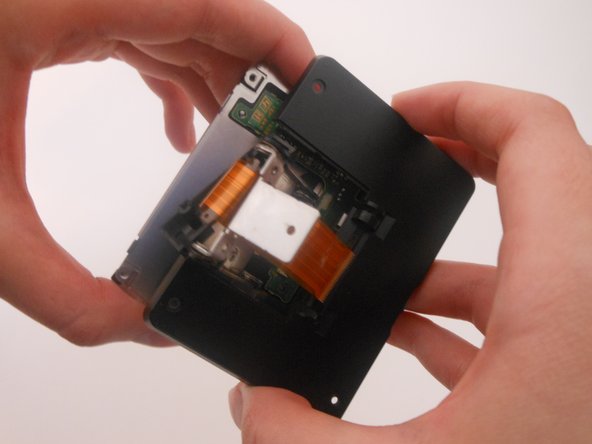
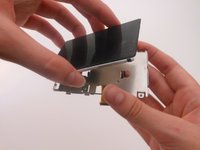
Lift the entire screen upwards.
-
Gently tug the orange ribbon cable to remove the screen from the silver panel.
I followed the steps and removed cracked LCD. upon reassemly of parts after connecting replacement LCD, I found it was very difficult to connect orange ribbon back to camera body because not enough room to work with and cable is too thin and flexible. So it is better to start from Step 7 after found out someone posted the method without detaching from camera body.
Btw, I reassembled with new LCD but camera wont turn on the LCD panel at all. Changed it back to old one, cracked but was still working, but it wont come up either. So I am stuck to know what could have gone wrong... :(
-


To reassemble your device, follow these instructions in reverse order.
To reassemble your device, follow these instructions in reverse order.
crwdns2935221:0crwdne2935221:0
crwdns2935229:08crwdne2935229:0
crwdns2915084:0crwdne2915084:0

Sam Houston State, Team 11-3, Blackburne Winter 2015 crwdns2935289:0Sam Houston State, Team 11-3, Blackburne Winter 2015crwdne2935289:0
SHSU-BLACKBURNE-W15S11G3
crwdns2931471:03crwdne2931471:0
crwdns2935297:08crwdne2935297:0
crwdns2947412:02crwdne2947412:0
I followed the steps and removed cracked LCD. upon reassemly of parts after connecting replacement LCD, I found it was very difficult to connect orange ribbon back to camera body because not enough room to work with and cable is too thin and flexible. So it is better to start from Step 7 after found out someone posted the method without detaching from camera body.
Btw, I reassembled with new LCD but camera wont turn on the LCD panel at all. Changed it back to old, only cracked screen, one but now it wont come up either. So I am stuck to know what could have gone wrong.
Where can I buy the cable in step 13?