crwdns2915892:0crwdne2915892:0
If your screen is cracked, smashed or stopped working, this guide will help you replace the screen for the Sony Alpha ILCE-6000
crwdns2942213:0crwdne2942213:0
-
-
Turn off the camera by sliding the power switch to OFF.
-
-
-
Flip the camera upside down and locate the battery compartment.
-
Slide the compartment lock to OPEN to unlock it.
-
-
-
Locate the blue lever that keeps the battery in place.
-
Push the blue lever back to release battery.
-
-
-
Once the battery is free, you are able to take the battery out of the compartment.
-
-
-
-
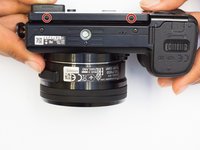
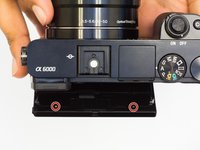
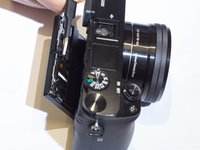
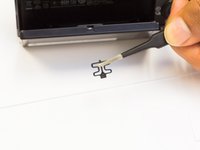
Flip the camera to the bottom side. Using screwdriver, remove the two screws located on the bottom of camera screen.
-
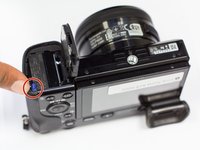
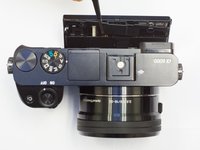
Flip the camera back over, locate the two other 3mm screws behind the screen and remove them.
Hi how do you remove the two screws behind the LCD? It is impossible to reach with the angles that the screen can turn. thanks.
Hi, johnny. I encounter the same problem, did you solve it?
I found that if i turned the camera on its front you can access the screw on the left a bit better when the screen is turned upwards, facing the sky, if you know what i mean….but otherwise the right one i mangaged to do from going in from the top.
hope that makes sense!
There is a gap in the back plate when you turn the body upside down and flip the screen facing down. When you look down from above the upside down body you’ll find the screw is reachable.
-
-
-
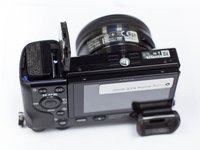
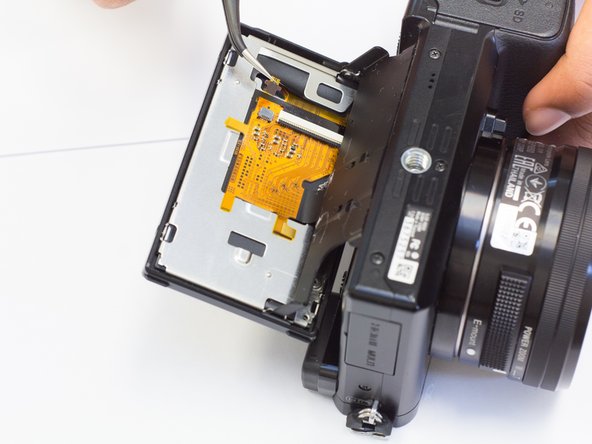
Gently pry open the screen backplate.
-
-
-
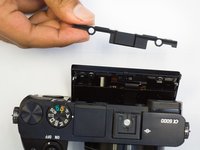
Gently pry off the plastic cover at the top of the screen.
-
-
-
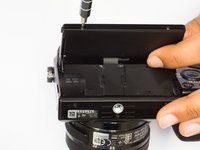
Carefully remove the clip located at the top of the screen.
-
-
-
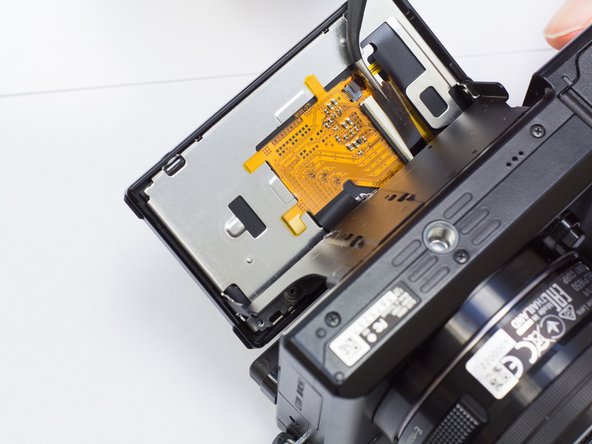
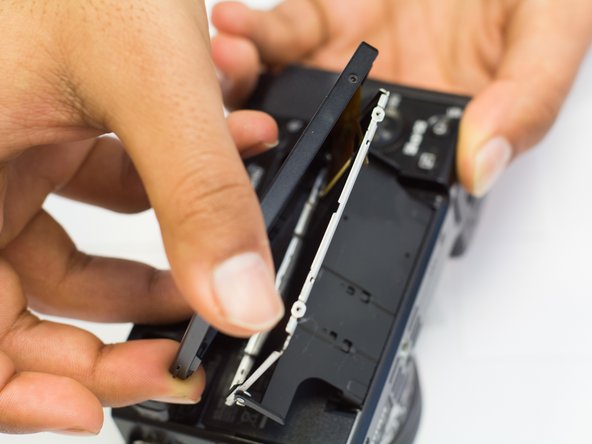
Flip the camera so that it is bottom side up. Pry off the inner support plate.
-
-
-
Gently wiggle the screen's ribbon cable until it comes free from the white slot.
Does the black connector open like the the whit one by lifting the black part?
No the small cable just slides in and out kept in with friction rather than a lever.
-
-
-
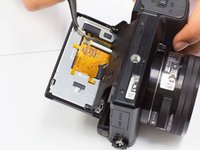
Pry apart the metal backplate and remove it.
-
-
-
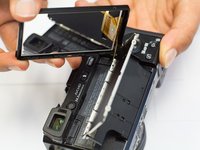
Gently remove the old screen, and replace it with the new one.
-


To reassemble your device, follow these instructions in reverse order.
To reassemble your device, follow these instructions in reverse order.
crwdns2935221:0crwdne2935221:0
crwdns2935229:07crwdne2935229:0
crwdns2915084:0crwdne2915084:0

UW Tacoma, Team 1-4, Rose Winter 2017 crwdns2935289:0UW Tacoma, Team 1-4, Rose Winter 2017crwdne2935289:0
UWT-ROSE-W17S1G4
crwdns2931471:04crwdne2931471:0
crwdns2935297:010crwdne2935297:0
crwdns2947412:04crwdne2947412:0
This is super helpful! Where did you purchase your replacement part from?
The white connector opens by prying up the black part. What about the little black connector?
Just comes out when you pull on it gently
Top left screw on back plate is a pain to put back in at an angle with magnetized JIS driver. Non magnetized or slightly loose fitting driver might help.
Trick is to get the screw fit in the thread at the right angle, then drive it in with the driver at an angle.