crwdns2933423:0crwdne2933423:0

Sonos Play 1 Motherboard Replacement

crwdns2942213:0crwdne2942213:0

  1. Sonos Play 1 Motherboard Replacement, Exterior Screen: crwdns2935265:01crwdnd2935265:01crwdnd2935265:02crwdne2935265:0 Sonos Play 1 Motherboard Replacement, Exterior Screen: crwdns2935265:01crwdnd2935265:02crwdnd2935265:02crwdne2935265:0
    crwdns2935267:0crwdne2935267:0
    Tweezers
    $4.99
    crwdns2942207:0crwdne2942207:0
    • Remove the rubber footing from the bottom of the device. Pry it up from one end using one of the plastic opening tools.

    • Once you pry open one end, use precision tweezers to remove rubber footing.

  2. Sonos Play 1 Motherboard Replacement: crwdns2935265:02crwdnd2935265:01crwdnd2935265:02crwdne2935265:0 Sonos Play 1 Motherboard Replacement: crwdns2935265:02crwdnd2935265:02crwdnd2935265:02crwdne2935265:0
    • Using a metal spudger, pry open a corner of the adhesive tape.

    • Use precision tweezers to remove the adhesive tape.

  3. Sonos Play 1 Motherboard Replacement: crwdns2935265:03crwdnd2935265:01crwdnd2935265:02crwdne2935265:0 Sonos Play 1 Motherboard Replacement: crwdns2935265:03crwdnd2935265:02crwdnd2935265:02crwdne2935265:0
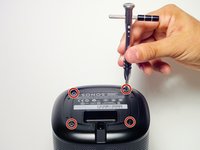
    • Remove the four 10 mm Torx security #10 screws that hold the base together.

    • Remove the base by lifting it vertically away from the bulk of the device.

  4. Sonos Play 1 Motherboard Replacement: crwdns2935265:04crwdnd2935265:01crwdnd2935265:02crwdne2935265:0 Sonos Play 1 Motherboard Replacement: crwdns2935265:04crwdnd2935265:02crwdnd2935265:02crwdne2935265:0
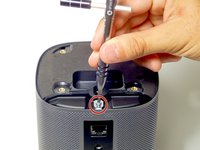
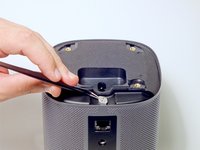
    • Remove the 10 mm Torx security #10 screw that holds down the exterior screen.

    • Using precision tweezers, remove the metal bracket.

  5. Sonos Play 1 Motherboard Replacement: crwdns2935265:05crwdnd2935265:01crwdnd2935265:01crwdne2935265:0
    • Remove the exterior screen by lifting it away from the bulk of the device.

  6. Sonos Play 1 Motherboard Replacement, Sonos Play 1 Top Cover Disassembly: crwdns2935265:06crwdnd2935265:01crwdnd2935265:01crwdne2935265:0
    • Remove the four 9 mm Torx Security #9 head screws. There are two on each side.

  7. Sonos Play 1 Motherboard Replacement: crwdns2935265:07crwdnd2935265:01crwdnd2935265:03crwdne2935265:0 Sonos Play 1 Motherboard Replacement: crwdns2935265:07crwdnd2935265:02crwdnd2935265:03crwdne2935265:0 Sonos Play 1 Motherboard Replacement: crwdns2935265:07crwdnd2935265:03crwdnd2935265:03crwdne2935265:0
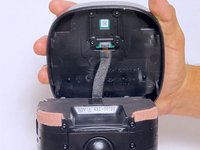
    • Using a plastic opening tool, pry open the top cap containing the power and volume button.

    • Vertically remove the top cap.

    • Be sure to not jerk the top cap when removing , as to not damage the cable linking the switchboard to the motherboard.

  8. Sonos Play 1 Motherboard Replacement: crwdns2935265:08crwdnd2935265:01crwdnd2935265:02crwdne2935265:0 Sonos Play 1 Motherboard Replacement: crwdns2935265:08crwdnd2935265:02crwdnd2935265:02crwdne2935265:0
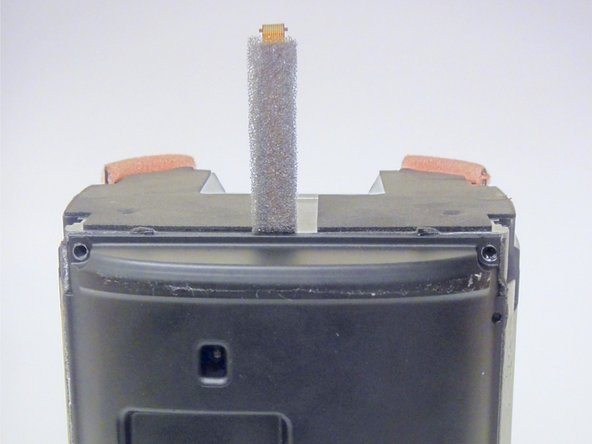
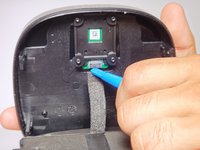
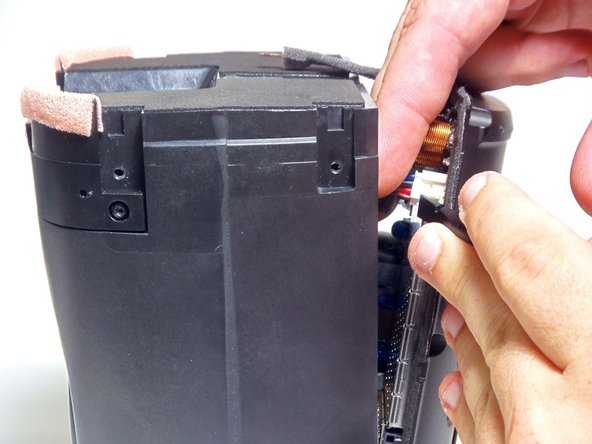
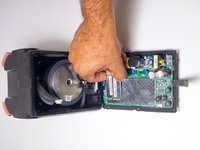
    • Using a plastic opening tool, pry open the circuit flap.

    • Once flap is loosened, use your hand to remove the circuit wire.

  9. Sonos Play 1 Motherboard Replacement, Disassembling Sonos Play 1 Rear Housing Cover: crwdns2935265:09crwdnd2935265:01crwdnd2935265:02crwdne2935265:0 Sonos Play 1 Motherboard Replacement, Disassembling Sonos Play 1 Rear Housing Cover: crwdns2935265:09crwdnd2935265:02crwdnd2935265:02crwdne2935265:0
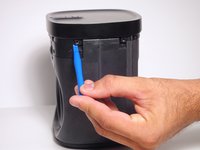
    • Using a plastic opening tool, remove the grey tape from both sides of the device.

  10. Sonos Play 1 Motherboard Replacement: crwdns2935265:010crwdnd2935265:01crwdnd2935265:02crwdne2935265:0 Sonos Play 1 Motherboard Replacement: crwdns2935265:010crwdnd2935265:02crwdnd2935265:02crwdne2935265:0
    • Remove the six 9 mm Torx #9 screws.

    • Using a plastic opening tool, detach the rear housing cover from the housing.

    • Try not to jerk the rear housing cover, as its wires are still connected to delicate electronics.

  11. Sonos Play 1 Motherboard Replacement: crwdns2935265:011crwdnd2935265:01crwdnd2935265:02crwdne2935265:0 Sonos Play 1 Motherboard Replacement: crwdns2935265:011crwdnd2935265:02crwdnd2935265:02crwdne2935265:0
    crwdns2935267:0crwdne2935267:0
    Tweezers
    $4.99
    crwdns2942207:0crwdne2942207:0
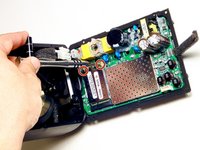
    • Using tweezers, grip the connector fixed to the motherboard's audio cable.

    • While pulling on the connector, detach the cable by pressing the connectors release.

  12. Sonos Play 1 Motherboard Replacement: crwdns2935265:012crwdnd2935265:01crwdnd2935265:01crwdne2935265:0
    • Using your fingers, grip the connector fixed to the motherboards power cable and detach it.

    • You will now be able to remove the rear housing cover.

  13. Sonos Play 1 Motherboard Replacement, Motherboard: crwdns2935265:013crwdnd2935265:01crwdnd2935265:02crwdne2935265:0 Sonos Play 1 Motherboard Replacement, Motherboard: crwdns2935265:013crwdnd2935265:02crwdnd2935265:02crwdne2935265:0
    • Remove the two 6 mm Torx #6 screws securing the communications board to the motherboard.

    • Using your fingers, detach and remove the communications board from the motherboard.

    • Be sure to keep the communications board parallel to the motherboard when removing as to prevent damage to the connector.

  14. Sonos Play 1 Motherboard Replacement: crwdns2935265:014crwdnd2935265:01crwdnd2935265:02crwdne2935265:0 Sonos Play 1 Motherboard Replacement: crwdns2935265:014crwdnd2935265:02crwdnd2935265:02crwdne2935265:0
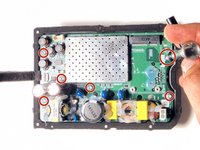
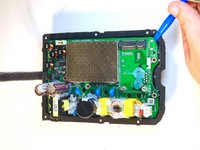
    • Remove the six 10 mm Torx #10 screws fastening the motherboard to the rear housing cover.

    • Using a plastic opening tool, remove the motherboard from the rear housing cover.

crwdns2915888:0crwdne2915888:0

To reassemble your device, follow these instructions in reverse order.

crwdns2935229:07crwdne2935229:0

Margarita

crwdns2935283:009/03/15crwdne2935283:0

180 crwdns2915208:0crwdne2915208:0

crwdns2935295:0crwdne2935295:0

crwdns2915084:0crwdne2915084:0

USF Tampa, Team 8-4, Eyestone Fall 2015 crwdns2935289:0USF Tampa, Team 8-4, Eyestone Fall 2015crwdne2935289:0

USFT-EYESTONE-F15S8G4

crwdns2931471:04crwdne2931471:0

crwdns2935297:016crwdne2935297:0

crwdns2944067:015crwdne2944067:0

Where do you get these replacement parts from - not directly from Sonos I understand.

iou_james - crwdns2934203:0crwdne2934203:0

…by the way I am looking for a new motherboard for a Sonos Play1 unit.

iou_james - crwdns2934203:0crwdne2934203:0

On a Play 1 r524 and r525 are blown. What are these.and how do I get replacements

houser_m.d - crwdns2934203:0crwdne2934203:0

Same here. r524 and r525 look blown. Have you been able to identify their values? Did you find any further damage? Have you been able to repair it?

Oliver Krause -

The parts has 1R00 printed on them. 1R= 1 Ohm resistor. You can open an old electronic gadget or look at an old PC-motherboard and see if you find one there. It’s normally hard find surface mounted resistors in local stores…

Patrick Tollgren lazarov -

crwdns2917038:0crwdne2917038:0

crwdns2936625:0crwdne2936625:0:

crwdns2936751:024crwdne2936751:0 9

crwdns2936753:07crwdne2936753:0 52

crwdns2936753:030crwdne2936753:0 194

crwdns2942667:0crwdne2942667:0 19,884