crwdns2933423:0crwdne2933423:0

Smart Soldering Iron Quick Start Guide

crwdns2942213:0crwdne2942213:0

  1. Smart Soldering Iron Quick Start Guide, Soldering iron component overview: crwdns2935265:01crwdnd2935265:01crwdnd2935265:01crwdne2935265:0
    • Here's an overview of all the parts that make up the Smart Soldering Iron:

    • Quick-Swap soldering tip

    • Soldering iron grip

    • Touch-Safe Indicator LED ring

    • Power switch

    • Soldering iron cap

    • Soldering iron USB-C cable

    • For a more in‑depth look at the different components of the soldering iron, click here for an exploded diagram.

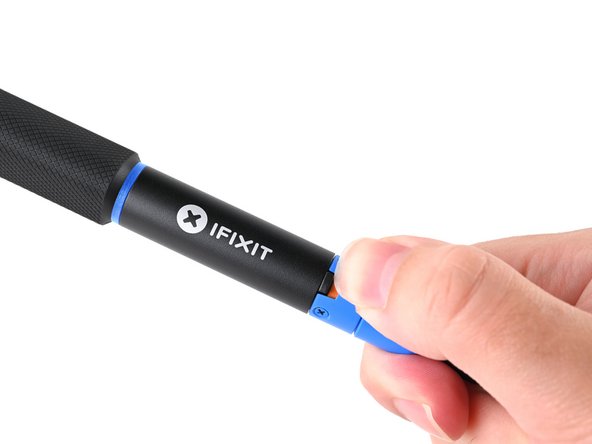
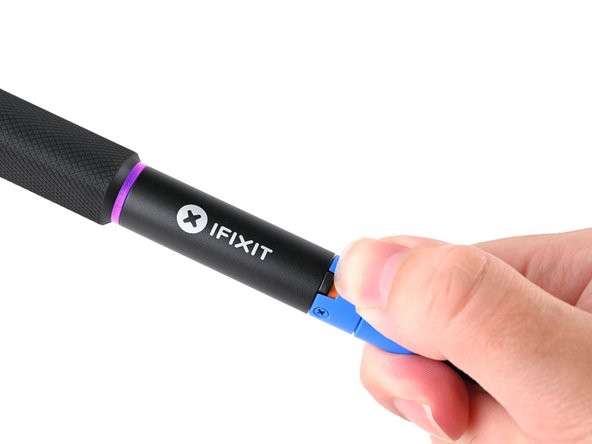
  2. Smart Soldering Iron Quick Start Guide, How to read the Touch-Safe Indicator LED: crwdns2935265:02crwdnd2935265:01crwdnd2935265:03crwdne2935265:0 Smart Soldering Iron Quick Start Guide, How to read the Touch-Safe Indicator LED: crwdns2935265:02crwdnd2935265:02crwdnd2935265:03crwdne2935265:0 Smart Soldering Iron Quick Start Guide, How to read the Touch-Safe Indicator LED: crwdns2935265:02crwdnd2935265:03crwdnd2935265:03crwdne2935265:0
    • The color of the Touch-Safe Indicator LED provides information about the status of the soldering iron tip. Note: the soldering iron grip is always safe to touch.

    • The LED only functions when the soldering iron is connected to a power source—so use caution when handling an unplugged iron if you don't know how hot it is.

    • Blue LED: The iron has cooled below 40 °C (100 °F), and the tip is safe to touch.

    • Purple LED: When pulsing, the iron is actively heating up or cooling down. When static, the iron is in Idle Mode. The iron tip is not safe to touch.

    • Orange LED: The iron has reached the set temperature and is ready to solder. The iron tip is not safe to touch.

  3. Smart Soldering Iron Quick Start Guide, Connect the USB-C cable: crwdns2935265:03crwdnd2935265:01crwdnd2935265:02crwdne2935265:0 Smart Soldering Iron Quick Start Guide, Connect the USB-C cable: crwdns2935265:03crwdnd2935265:02crwdnd2935265:02crwdne2935265:0
    • Make sure the soldering iron's power switch is in the blue OFF position.

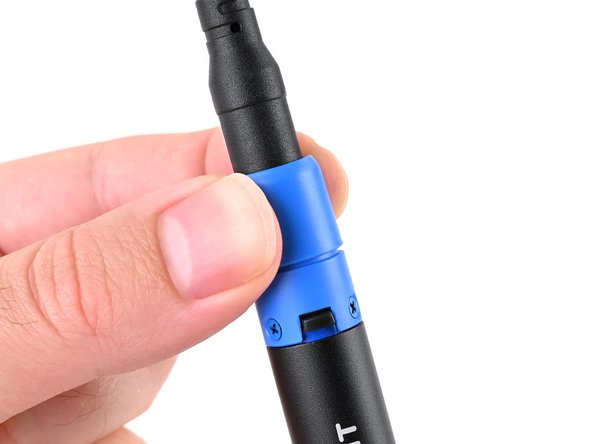
    • Match the end of the USB-C cable with the blue locking collar to the blue USB-C port on the soldering iron, and push to connect.

  4. Smart Soldering Iron Quick Start Guide, Secure the locking collar: crwdns2935265:04crwdnd2935265:01crwdnd2935265:03crwdne2935265:0 Smart Soldering Iron Quick Start Guide, Secure the locking collar: crwdns2935265:04crwdnd2935265:02crwdnd2935265:03crwdne2935265:0 Smart Soldering Iron Quick Start Guide, Secure the locking collar: crwdns2935265:04crwdnd2935265:03crwdnd2935265:03crwdne2935265:0
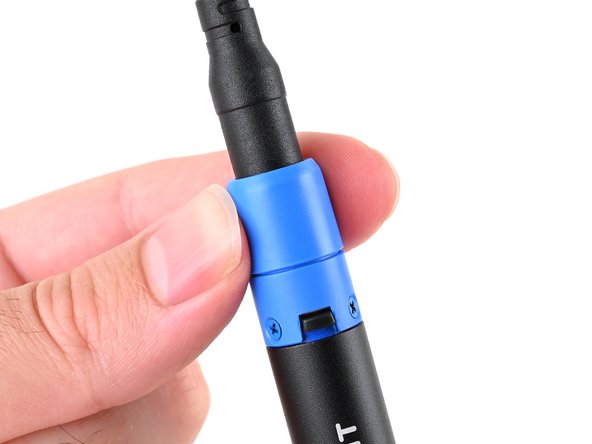
    • Align the nubs in the collar with the slots on the soldering iron.

    • Push the collar snug against the soldering iron, then twist clockwise to lock it in place.

  5. Smart Soldering Iron Quick Start Guide, Connect to a power source: crwdns2935265:05crwdnd2935265:01crwdnd2935265:02crwdne2935265:0 Smart Soldering Iron Quick Start Guide, Connect to a power source: crwdns2935265:05crwdnd2935265:02crwdnd2935265:02crwdne2935265:0
    crwdns2935267:0crwdne2935267:0
    FixHub | Power Series Portable Soldering Station
    $249.95
    • The Smart Soldering Iron works best when paired with a Portable Power Station, which allows fine control of the soldering iron's temperature and other settings.

    • For detailed setup instructions for the Portable Power Station, check out this guide.

    • However, it also works just fine with any power source capable of delivering at least 20W via USB-C PD.

    • Connect the end of the USB-C cable without the blue locking collar to a compatible USB-C power source.

  6. Smart Soldering Iron Quick Start Guide, Free fall detection accelerometer: crwdns2935265:06crwdnd2935265:01crwdnd2935265:01crwdne2935265:0
    • The Smart Soldering Iron is equipped with an accelerometer-based auto safety feature.

    • If the iron detects that it's been dropped, it will automatically cut power to the soldering tip to prevent damage or injury when it lands.

    • To clear the free‑fall state and resume soldering, press the blue button on the Power Station or power cycle the iron by unplugging and replugging into a USB-C power source.

  7. Smart Soldering Iron Quick Start Guide, Active Mode: crwdns2935265:07crwdnd2935265:01crwdnd2935265:03crwdne2935265:0 Smart Soldering Iron Quick Start Guide, Active Mode: crwdns2935265:07crwdnd2935265:02crwdnd2935265:03crwdne2935265:0 Smart Soldering Iron Quick Start Guide, Active Mode: crwdns2935265:07crwdnd2935265:03crwdnd2935265:03crwdne2935265:0
    • Never leave the soldering iron unattended while it's on.

    • Don't touch the heated tip of the soldering iron.

    • In Active Mode, the iron is heating to or maintaining the set working temperature. The LED will be pulsing purple or orange, respectively.

  8. Smart Soldering Iron Quick Start Guide, Idle Mode: crwdns2935265:08crwdnd2935265:01crwdnd2935265:01crwdne2935265:0
    • Don't touch the heated tip of the soldering iron while in Idle Mode.

    • After 30 seconds of no movement, the soldering iron enters Idle Mode, a low-power mode that reduces the tip temperature to 200 °C.

    • The Idle Mode LED is static (not pulsing) purple.

    • Picking up a resting iron wakes it from Idle Mode, and the tip will automatically heat back up to your set temperature.

    • When powered by a Portable Power Station, warming from Idle Mode temperature to set temperature will only take a few seconds.

    • While Idle Mode can be disabled, we recommend leaving it enabled to extend tip life.

  9. Smart Soldering Iron Quick Start Guide, Sleep Mode: crwdns2935265:09crwdnd2935265:01crwdnd2935265:01crwdne2935265:0
    • After Idle Mode, Sleep Mode occurs when the iron is completely motionless for a set amount of time.

    • The iron is off until it's moved again.

    • It's safe to touch the soldering iron tip in this state as long as the indicator ring is blue.

  10. Smart Soldering Iron Quick Start Guide, Hold the iron properly: crwdns2935265:010crwdnd2935265:01crwdnd2935265:01crwdne2935265:0
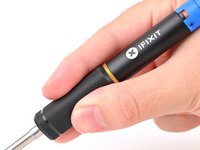
    • Never hold the soldering iron past the grip. Touching the metal soldering tip while the Touch-Safe Indicator LED is orange or purple can cause severe burns. Always assume the tip is hot.

    • Hold the soldering iron by the base of the handle with your fingers on the knurled grip.

  11. Smart Soldering Iron Quick Start Guide, Turn on the iron: crwdns2935265:011crwdnd2935265:01crwdnd2935265:03crwdne2935265:0 Smart Soldering Iron Quick Start Guide, Turn on the iron: crwdns2935265:011crwdnd2935265:02crwdnd2935265:03crwdne2935265:0 Smart Soldering Iron Quick Start Guide, Turn on the iron: crwdns2935265:011crwdnd2935265:03crwdnd2935265:03crwdne2935265:0
    • Never leave the soldering iron unattended while the power switch is in the orange ON position.

    • The sliding power switch has a built-in color indicator for each position:

    • Orange: ON

    • Blue: OFF

    • Slide the power switch to the orange ON position.

    • The LED will initially light up blue, then turn purple and pulse to show that the iron is warming up.

  12. Smart Soldering Iron Quick Start Guide, Remove the soldering iron cap: crwdns2935265:012crwdnd2935265:01crwdnd2935265:02crwdne2935265:0 Smart Soldering Iron Quick Start Guide, Remove the soldering iron cap: crwdns2935265:012crwdnd2935265:02crwdnd2935265:02crwdne2935265:0
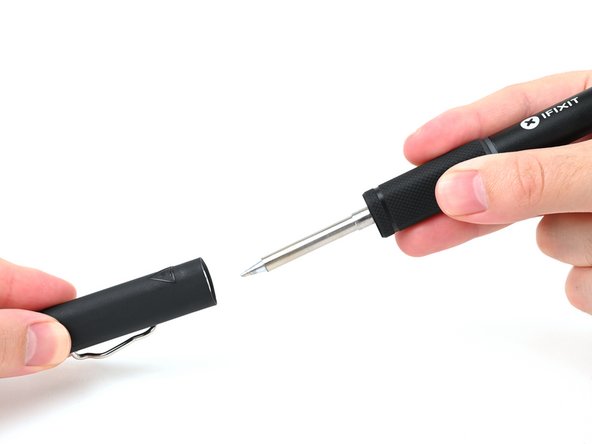
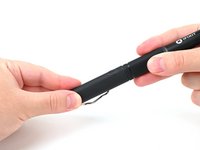
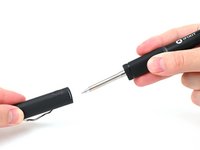
    • To be safe, keep the cap on your iron when not in use. The inside of the cap is heat-resistant and can be used to cover your iron, even when hot.

    • Hold the iron from both ends and pull to remove the cap.

  13. Smart Soldering Iron Quick Start Guide, Begin soldering: crwdns2935265:013crwdnd2935265:01crwdnd2935265:01crwdne2935265:0
    • When the Touch-Safe Indicator LED turns orange, your iron has reached its set temperature for soldering.

    • The iron comes set to 350 °C (660 °F) out of the box, but it'll remain at whatever temperature was last set using the Portable Power Station or other USB device.

    • Your iron is now ready for soldering!

crwdns2915888:0crwdne2915888:0

New to soldering? Follow this guide to get started.

Repair didn't go as planned? Try some basic troubleshooting, or ask our Answers community for help.

crwdns2935227:0crwdne2935227:0
Kara Piepenbrink

crwdns2935283:005/31/24crwdne2935283:0

4,285 crwdns2915208:0crwdne2915208:0

crwdns2935297:021crwdne2935297:0

crwdns2915084:0crwdne2915084:0

iFixit crwdns2935289:0iFixitcrwdne2935289:0

Staff

crwdns2931471:0121crwdne2931471:0

crwdns2935297:019,776crwdne2935297:0

crwdns2947412:00crwdne2947412:0

crwdns2917038:0crwdne2917038:0

crwdns2936625:0crwdne2936625:0:

crwdns2936751:024crwdne2936751:0 3

crwdns2936753:07crwdne2936753:0 23

crwdns2936753:030crwdne2936753:0 138

crwdns2942667:0crwdne2942667:0 1,018