crwdns2915892:0crwdne2915892:0
Of all the parts to replace on the Shark Pro Steam Pocket Mop, the heating element is likely the trickiest to replace since it's at the core of the mop. Nonetheless, this guide will make the process a breeze. As always, before doing any disassembly on your Shark Professional Steam Pocket Mop, make sure to unplug the mop and empty the water tank for your safety.
crwdns2942213:0crwdne2942213:0
-
-
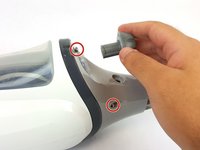
Unwrap the power cord from the handle.
-
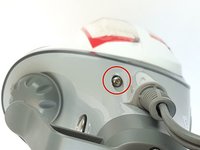
Remove the 56.0 mm Phillips head #2 screw located above the water tank cap.
-
Pull the handle to separate it from the body.
-
-
-
Remove the three 12.0 mm Phillips head #2 screws where the handle connects to the body.
-
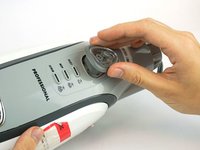
Remove the plastic cap.
-
-
-
Remove the three 16.0 mm T10 Torx screws near the top of the body and remove the water tank cap.
-
-
-
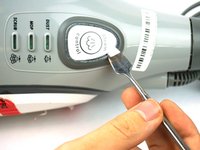
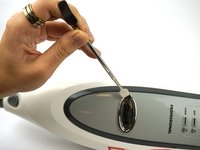
Remove steam control button cover with a metal spudger.
-
Remove the two 12.0 mm Phillips head #2 screws underneath.
-
Remove the plastic rim with clear plastic cover.
-
-
-
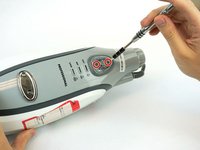
Remove the Shark logo decal on the front of body using a metal spudger.
-
Remove the two 12.0 mm Phillips head #2 screws underneath.
-
Pull out the plastic cover to remove.
-
-
-
Pop off the grey front plate to expose the control panel and screws necessary to open mop body.
-
-
-
-
Remove the three 12.0 mm Philips head #2 screws connected to the dark grey plastic trim.
-
-
-
Remove the four 16.0 mm T10 Torx screws located on the back of the mop.
-
-
-
Remove the two 12.0 mm Phillips head #2 screws that hold the power cord to the device.
-
-
-
Pop off the dark grey plastic trim cover.
-
-
-
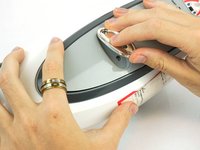
Pop open the white plastic mop body by pulling apart from the front and back side.
-
-
-
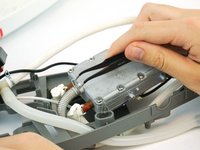
Remove the four 12.0 mm Phillips head #2 screws on the sides of the heating element.
-
-
crwdns2935267:0crwdne2935267:0Tweezers$4.99
-
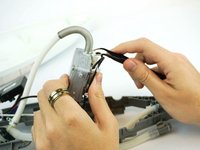
Pull out the heating element and use precision tweezers or pliers to pinch and loosen the two clamps.
-
Remove both tubes from the heating element.
-
-
-
Grip each wire at its base and pull to disconnect them from the heating element.
-
-
-
Remove two 12.0 mm Phillips head #2 screws from the heating element.
-
-
-
Pull apart wire connectors to fully detach the heating element.
-


To reassemble your device, follow these instructions in reverse order.
To reassemble your device, follow these instructions in reverse order.
crwdns2935221:0crwdne2935221:0
crwdns2935229:03crwdne2935229:0
crwdns2915084:0crwdne2915084:0

USF Tampa, Team S15-G1, Boczar Spring 2018 crwdns2935289:0USF Tampa, Team S15-G1, Boczar Spring 2018crwdne2935289:0
USFT-BOCZAR-S18S15G1
crwdns2931471:04crwdne2931471:0
crwdns2935297:014crwdne2935297:0
crwdns2947412:08crwdne2947412:0
Is the heating element available somewhere? I cannot find it anywhere.
Where can the heating element be purchased in order to replace? Can’t find anywhere.
i have a shark s3973d. and i need a heating elementand the two hosese connected
to the heating element. if no heating element. would like to order the hoses.
Once element is detached where do I get a new one
I just bought this shark steam vac less than 6months ago