crwdns2933423:0crwdne2933423:0

Shark ION Robot 750 Main Wheel Assembly Replacement

crwdns2942213:0crwdne2942213:0

  1. Shark ION Robot 750 Main Wheel Assembly Replacement, Outer Shell: crwdns2935265:01crwdnd2935265:01crwdnd2935265:03crwdne2935265:0 Shark ION Robot 750 Main Wheel Assembly Replacement, Outer Shell: crwdns2935265:01crwdnd2935265:02crwdnd2935265:03crwdne2935265:0 Shark ION Robot 750 Main Wheel Assembly Replacement, Outer Shell: crwdns2935265:01crwdnd2935265:03crwdnd2935265:03crwdne2935265:0
    • Make sure the device is completely powered off before working.

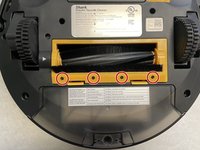
    • Flip over the vacuum on a flat and uncluttered service with the bottom facing upwards.

    • Remove all seven 9.1mm Torx T15 screws from the device’s front bumper.

    • Remove the nine 9.1mm Torx T6 bolts from outer shell.

  2. Shark ION Robot 750 Main Wheel Assembly Replacement: crwdns2935265:02crwdnd2935265:01crwdnd2935265:02crwdne2935265:0 Shark ION Robot 750 Main Wheel Assembly Replacement: crwdns2935265:02crwdnd2935265:02crwdnd2935265:02crwdne2935265:0
    • Slightly pull front bumper to expose internal wiring.

    • Unplug the device’s front bumper wiring and completely remove front bumper.

  3. Shark ION Robot 750 Main Wheel Assembly Replacement: crwdns2935265:03crwdnd2935265:01crwdnd2935265:02crwdne2935265:0 Shark ION Robot 750 Main Wheel Assembly Replacement: crwdns2935265:03crwdnd2935265:02crwdnd2935265:02crwdne2935265:0
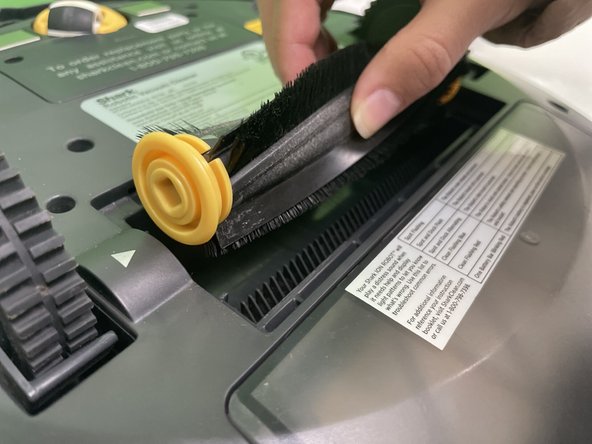
    • Remove the four 9.5mm Torx T6 bolts on the yellow brush frame.

    • Gently depress the two tabs on the frame, then lift the frame to remove it.

  4. Shark ION Robot 750 Main Wheel Assembly Replacement: crwdns2935265:04crwdnd2935265:01crwdnd2935265:02crwdne2935265:0 Shark ION Robot 750 Main Wheel Assembly Replacement: crwdns2935265:04crwdnd2935265:02crwdnd2935265:02crwdne2935265:0
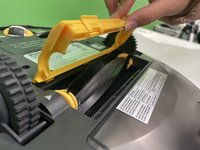
    • Pick up the brush and remove it from the vacuum.

    • Push the brush to your right and lift it.

  5. Shark ION Robot 750 Main Wheel Assembly Replacement: crwdns2935265:05crwdnd2935265:01crwdnd2935265:03crwdne2935265:0 Shark ION Robot 750 Main Wheel Assembly Replacement: crwdns2935265:05crwdnd2935265:02crwdnd2935265:03crwdne2935265:0 Shark ION Robot 750 Main Wheel Assembly Replacement: crwdns2935265:05crwdnd2935265:03crwdnd2935265:03crwdne2935265:0
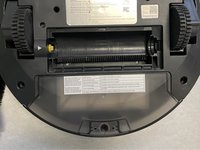
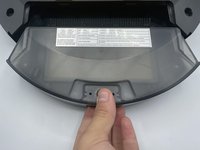
    • Press and hold the dust bin removal button to slide out the dust bin.

  6. Shark ION Robot 750 Main Wheel Assembly Replacement: crwdns2935265:06crwdnd2935265:01crwdnd2935265:01crwdne2935265:0
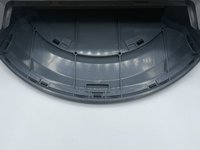
    • Lift the outer shell to expose the Shark’s interior.

  7. Shark ION Robot 750 Main Wheel Assembly Replacement, Main Wheel Assembly: crwdns2935265:07crwdnd2935265:01crwdnd2935265:02crwdne2935265:0 Shark ION Robot 750 Main Wheel Assembly Replacement, Main Wheel Assembly: crwdns2935265:07crwdnd2935265:02crwdnd2935265:02crwdne2935265:0
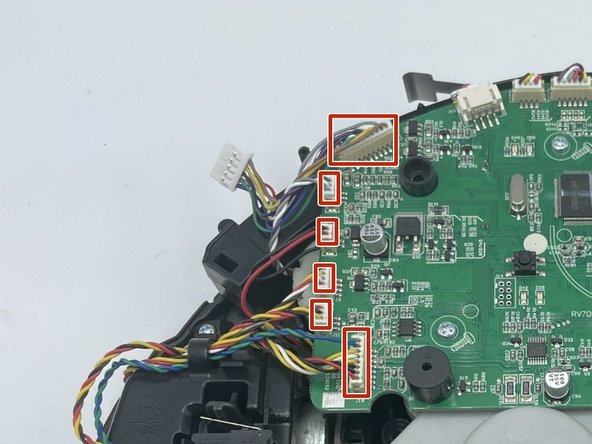
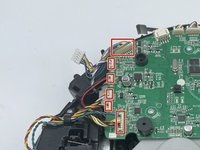
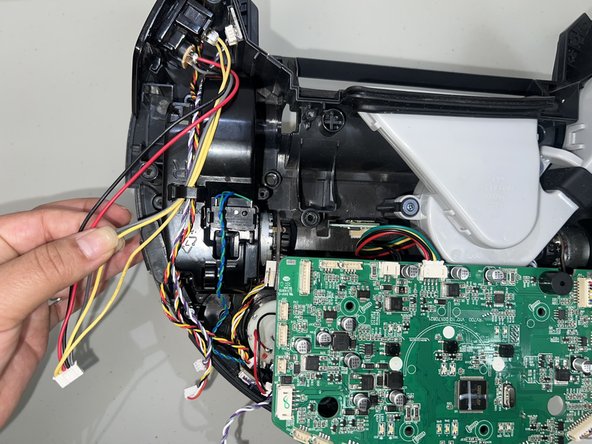
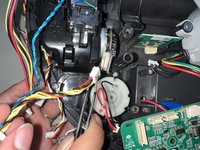
    • Disconnect each of the cable connectors attached to the motherboard to free the wheel assembly from the vacuum for both the left and right wheels.

    • For helpful details on disconnecting different types of connectors, check out the Recognizing and Disconnecting Cable Connectors guide.

  8. Shark ION Robot 750 Main Wheel Assembly Replacement: crwdns2935265:08crwdnd2935265:01crwdnd2935265:03crwdne2935265:0 Shark ION Robot 750 Main Wheel Assembly Replacement: crwdns2935265:08crwdnd2935265:02crwdnd2935265:03crwdne2935265:0 Shark ION Robot 750 Main Wheel Assembly Replacement: crwdns2935265:08crwdnd2935265:03crwdnd2935265:03crwdne2935265:0
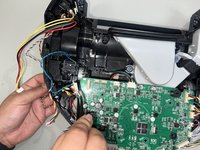
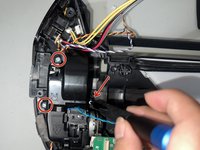
    • Use a spudger or your fingers to detach all of the cables from the connectors on the motherboard that connect to the wheels.

    • This guide demonstrates the right wheel removal but you can use this guide to remove the left wheel assembly as well.

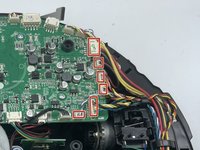
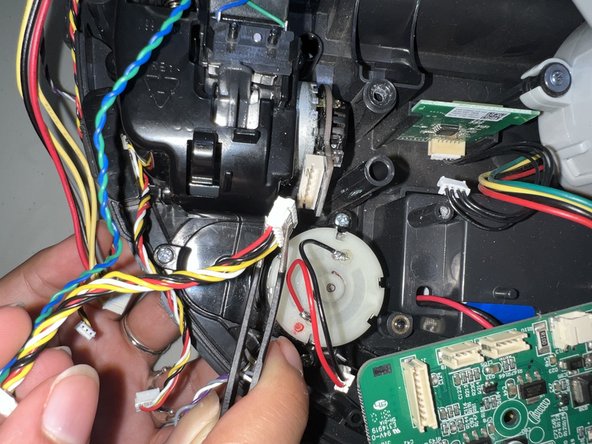
    • Unhook the remaining wires that are connected to the back of the wheel.

    • Do not rip the wires when removing them from the wheel and motherboard.

  9. Shark ION Robot 750 Main Wheel Assembly Replacement: crwdns2935265:09crwdnd2935265:01crwdnd2935265:03crwdne2935265:0 Shark ION Robot 750 Main Wheel Assembly Replacement: crwdns2935265:09crwdnd2935265:02crwdnd2935265:03crwdne2935265:0 Shark ION Robot 750 Main Wheel Assembly Replacement: crwdns2935265:09crwdnd2935265:03crwdnd2935265:03crwdne2935265:0
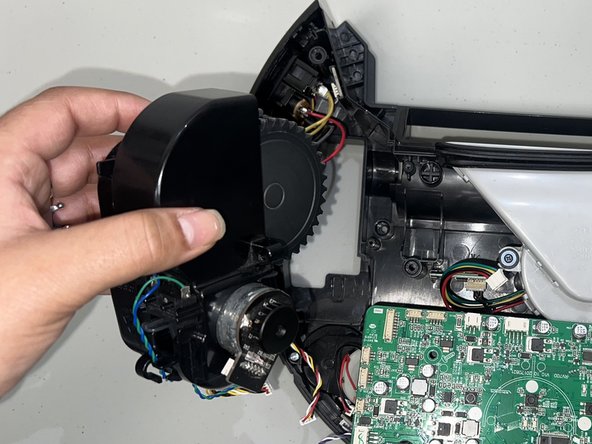
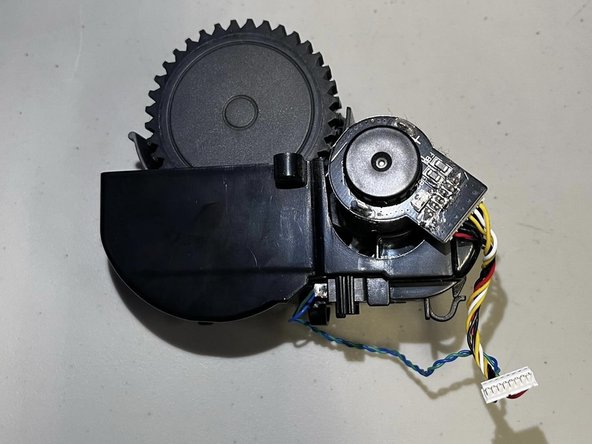
    • Use a Phillips #1 screwdriver to remove the three 12 mm screws that hold the right wheel in place.

    • Be careful not to strip the screws when removing them from the wheel. Take a look at this guide for Screwdriver Best Practices.

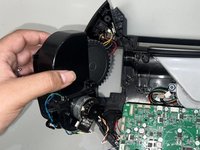
    • Remove the right wheel assembly from the socket.

crwdns2915888:0crwdne2915888:0

To reassemble your device, follow these instructions in reverse order. Take your e-waste to an R2 or e-Stewards certified recycler.

Talia Marquez

crwdns2935283:002/08/24crwdne2935283:0

97 crwdns2915208:0crwdne2915208:0

crwdns2935295:0crwdne2935295:0

crwdns2915084:0crwdne2915084:0

University of North Texas, Team 1-7, Coppersmith Spring 2024 crwdns2935289:0University of North Texas, Team 1-7, Coppersmith Spring 2024crwdne2935289:0

UNT-COPPERSMITH-S24S1G7

crwdns2931471:04crwdne2931471:0

crwdns2935297:04crwdne2935297:0

crwdns2947412:00crwdne2947412:0

crwdns2917038:0crwdne2917038:0

crwdns2936625:0crwdne2936625:0:

crwdns2936751:024crwdne2936751:0 0

crwdns2936753:07crwdne2936753:0 1

crwdns2936753:030crwdne2936753:0 17

crwdns2942667:0crwdne2942667:0 131