crwdns2915892:0crwdne2915892:0
Replacement of the motherboard requires removal of a few other components first. See the prerequisite guides before attempting just the motherboard.
crwdns2942213:0crwdne2942213:0
-
-
Heat the iOpeners in a microwave for 1-2 minutes.
-
Place heated iOpeners on screen edges to heat the adhesive.
-
-
-
Separate the screen assembly from the back by wedging the picks between the two components.
-
Slide the picks along the edge and leave them holding the device open all around the edges.
-
-
-
Place suctioning device near the corner of the screen and gently lift up to create a gap between the front panel assembly and the back.
-
Insert the picks to hold the two components apart once a gap is created.
-
-
-
Once all edges have been disconnected, carefully lift the screen off by pulling one side up.
-
-
crwdns2935267:0crwdne2935267:0Tweezers$4.99
-
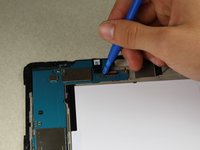
Using the tweezers, gently peel up on the silver tape covering the connector.
-
-
-
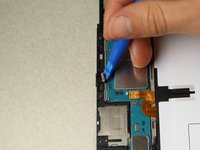
Use the plastic opening tool to get under the connector piece. This will allow you to remove the front panel assembly from the rest of the device.
-
-
-
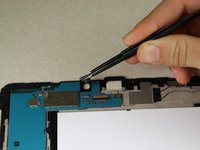
Detach the connecter from the inside of the device.
-
Lift the screen to separate the front panel assembly from the rest of the device.
-
-
-
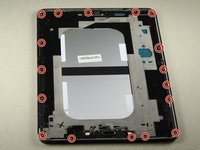
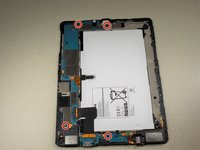
Remove the 17 silver 3.0 mm Phillips head screws located around the edge of the device using the screwdriver.
-
-
-
-
Remove the 2 centrally-located black 3.0 mm Phillips head screws using the screwdriver.
-
-
-
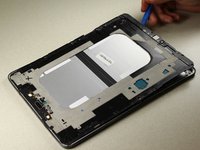
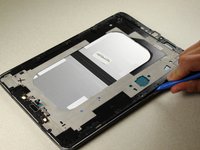
Use the plastic opening tools to gently separate the middle panel from the rest of the device.
-
Move the tool around under the edges until you can remove the panel by hand.
-
-
-
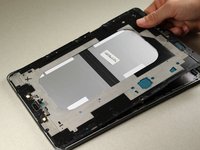
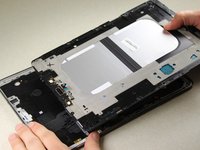
Lift up the central panel starting from one corner to separate it from the rest of the device.
-
Pull towards the top of the device as you lift out to ensure that the charging port connection is not damaged.
-
-
-
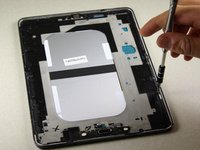
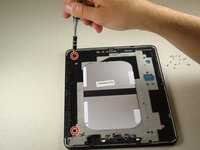
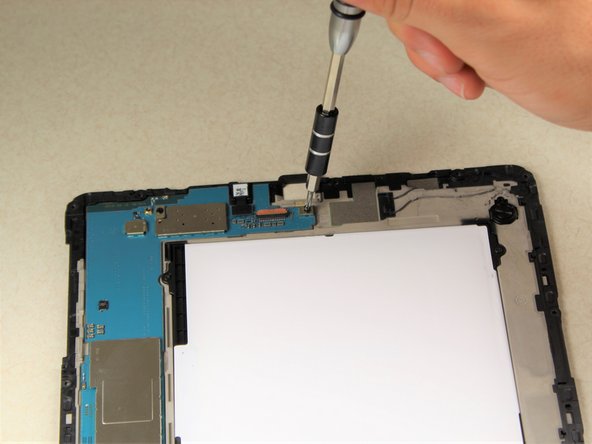
Using the screwdriver, remove the 4 black 3.0 mm Phillips head screws located on the upper and lower motherboard.
-
-
-
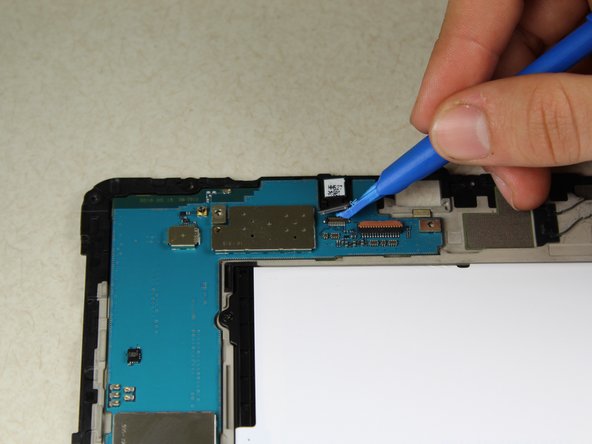
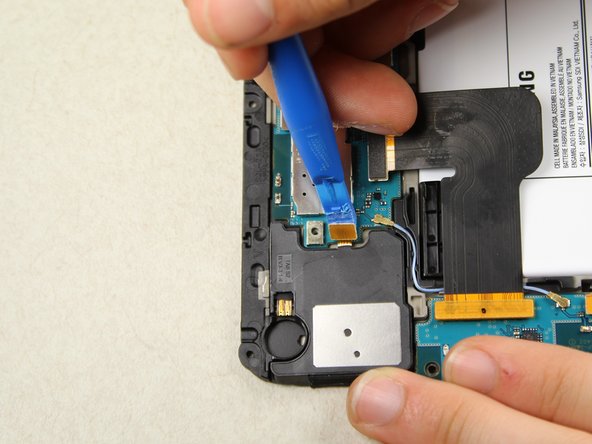
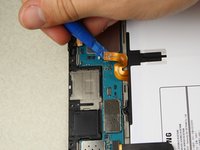
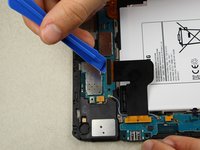
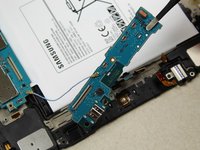
Using the plastic opening tools unlock the 11 connectors that must be undone before the motherboard can be removed.
-
-
-
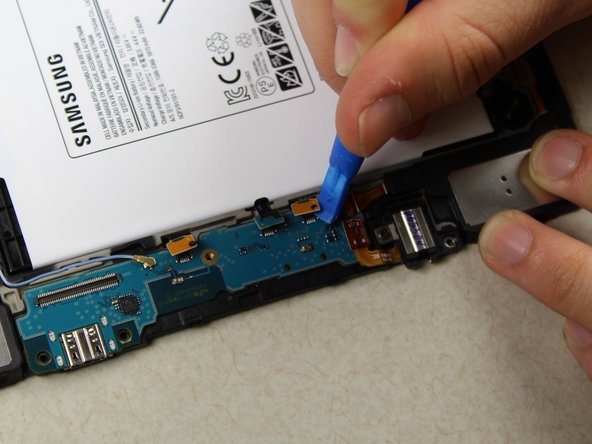
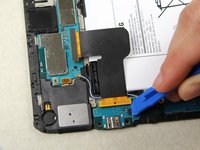
Using the plastic opening tool, continue disconnecting cables on upper motherboard.
-
-
-
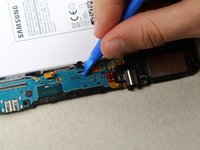
Continue disconnecting along the left side of the device.
-
-
-
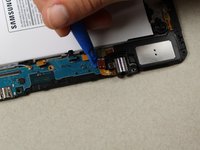
Continue removing cables on the lower motherboard.
-
-
crwdns2935267:0crwdne2935267:0Tweezers$4.99
-
Using tweezers, remove the green plastic film to reach the last cable.
-
-
-
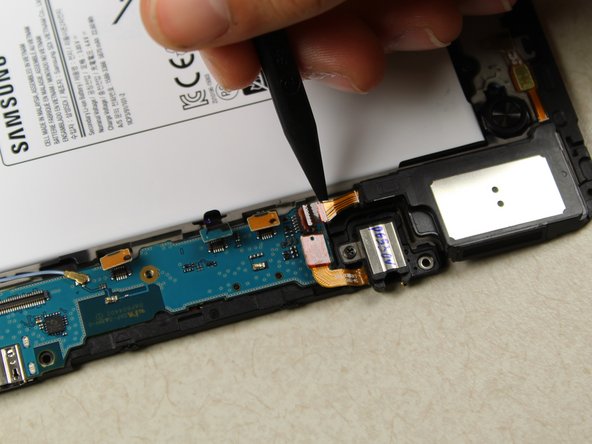
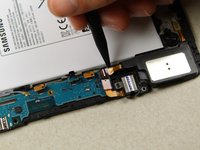
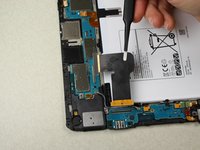
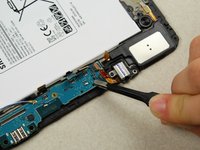
Carefully lift the orange flap using the black spudger. Then disconnect the cable from the motherboard.
-
-
-
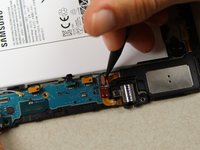
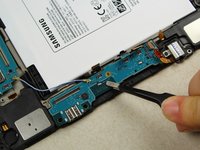
Using the tweezers, gently pull the cable off of the motherboard.
-
-
-
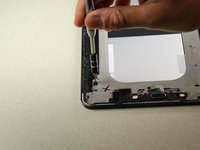
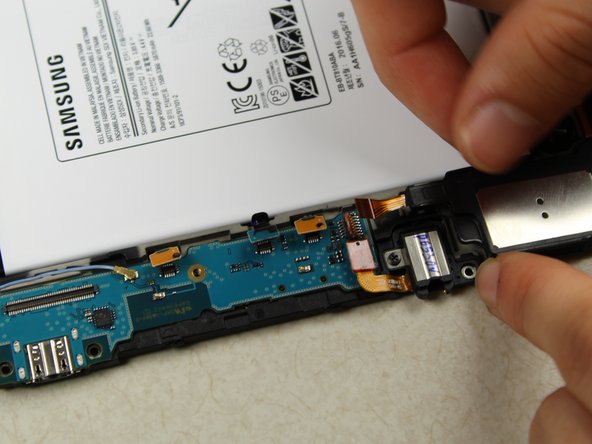
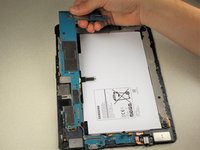
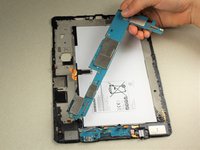
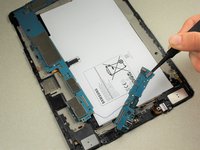
Carefully lift the top portion of the motherboard off of the back panel with your hands.
-
-
-
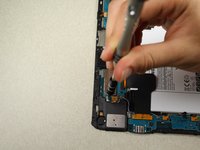
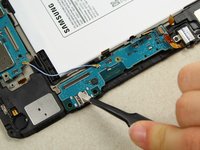
Using the tweezers, wiggle under the lower motherboard to remove adhesive.
-
Carefully grab the adhesives with the tweezers and lift up.
-
-
-
Gently lift up the lower motherboard.
-
-
-
Remove both pieces of the motherboard carefully from the back panel.
-


To reassemble your device, follow these instructions in reverse order.
crwdns2935221:0crwdne2935221:0
crwdns2935229:09crwdne2935229:0

crwdns2935287:0crwdne2935287:0

Cal Poly, Team S16-G5, Livingston Spring 2018 crwdns2935289:0Cal Poly, Team S16-G5, Livingston Spring 2018crwdne2935289:0
CPSU-LIVINGSTON-S18S16G5
crwdns2931471:05crwdne2931471:0
crwdns2935297:012crwdne2935297:0
crwdns2947412:02crwdne2947412:0
cool like it thanks for the help.
Very understandable, thank you very much! From the Philippines!