crwdns2915892:0crwdne2915892:0
In this guide, you will learn how to replace the motherboard on your Samsung Galaxy Tab 10.1. A faulty motherboard can lead to a multitude of performance issues, especially if your device doesn't turn on at all. There are a couple prerequisites we need to get out of the way first!
crwdns2942213:0crwdne2942213:0
-
crwdns2935267:0crwdne2935267:0Tweezers$4.99
-
Place the bottom of the tablet towards you.
-
Remove the 4.1mm screws near the charge port with a Tri-Wing screwdriver.
-
If there are plastic tabs covering these screws, use pointed tweezers to pry the tabs out.
-
-
-
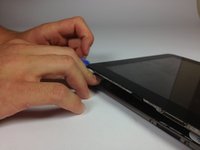
Start in the middle of the left side and insert a plastic opening tool between the rear panel and the front panel assembly.
-
Carefully run the plastic opening tool along the left and top edge to pry the rear panel away from the rest of the device.
-
-
-
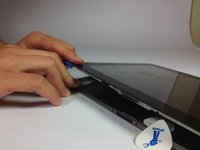
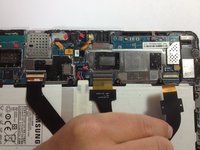
Using the plastic opening tools, continue to carefully run along the right and bottom edge, and then lift the screen from the back panel.
-
-
-
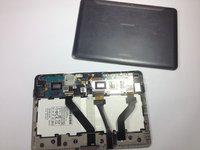
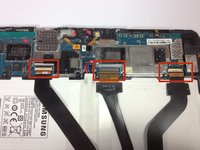
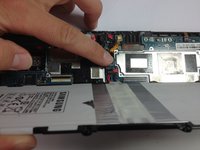
Flip up the retaining flaps on the ZIF connectors that secure the three large ribbon cables.
-
Carefully pull the three ribbon cables from their sockets on the motherboard.
Looking at the ZIF connectors in step 4....mine isn't charging. I suspect the problem lies in the jack for the USB/power cable. Would I be correct in thinking it's a matter of following to this point, then replacing the internal cable?
I took the cable all the way off and can't get on what to
I have sound but no pictures/screen what did I do wrong what should I check?
If you don't have a picture on the screen, it could be caused by an issue with the electrical connectivity on one or other of the power/ data cables. Carefully unplug, clean and re-seat each of the cables, ensure if you use cotton buds, that you use a high powered magnifying glass to check for any flecks left behind….
Re-seat the. Cables and try again.
I hope this works for you Rod…
By the way, to confirm a backlight issue, get a high power torch, or your mobile phone torch will do. Now shine this closely at an angle to the screen. You might see a faint non-illuminated screen!
Unplug the battery first else you may short the connections
-
-
-
-
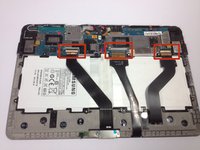
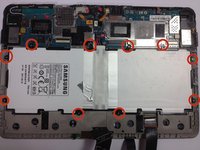
Remove the ten 3 mm Phillips #00 screws surrounding the battery.
-
-
-
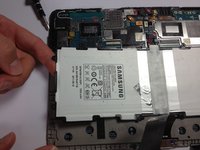
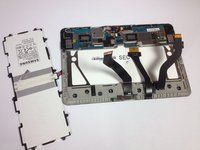
Lift the edge of the battery up with your finger or a spudger.
-
Detach the battery by holding the motherboard down while gently lifting the battery up.
Very simple, clever and effective presentation of opening rear cover.Thanks very much for simplicity. The way presented is user friendly.
Video presentation is mostly in dark ambient, it is useless. Once moore thank you very much.
The battery connector lifts up, not back. A plastic tool lifting under the five wires from the battery right at the base of the connector helps.
then what where do you buy a battery
ok after its all apart where do i buy the battery
@janiemontemayor Sorry about that—the link for the replacement battery was out of date. It's fixed now! Try the link at the top of this guide.
Welches Tablet hast du denn da? Mein 10.1 hat keine Schrauben an der Ladebuchse
-
-
-
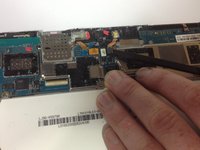
Hold down the motherboard with your finger and use a spudger to gently pry up the connection for the volume keys and power key.
Hi anyone can tell me where to find this button, please, thx
-
-
-
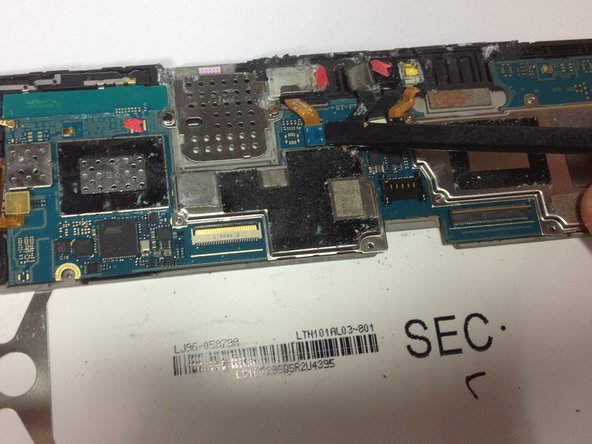
Using the flat end of a spudger, disconnect the black flash cable connector from the motherboard.
-
Disconnect the white rear-facing camera connector.
-
-
-
Use the flat end of a spudger to disconnect the orange front-facing camera connector.
-
Disconnect the blue Micro SD card/headphone jack connector from its socket on the motherboard.
-
-
-
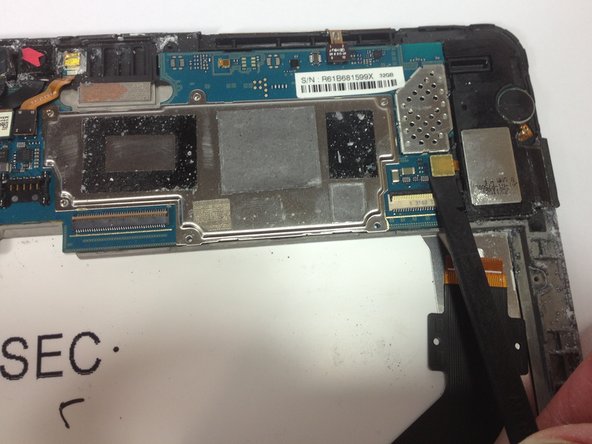
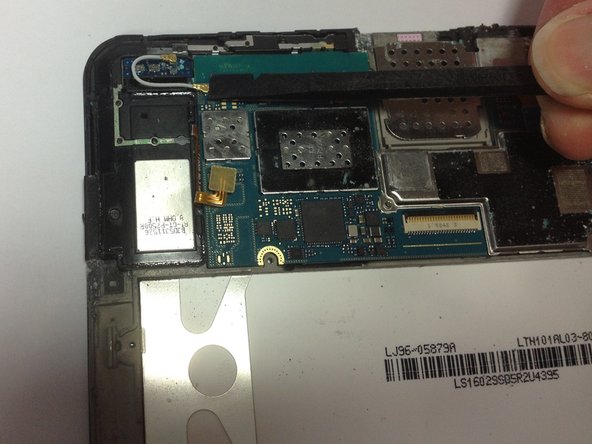
Using the flat end of a spudger, disconnect the orange speaker connectors for the left and right speakers.
-
Disconnect the gold antenna cable connector from its socket on the motherboard.
-
-
-
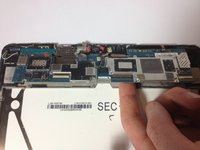
Lifting from the bottom edge, gently remove the motherboard.
-


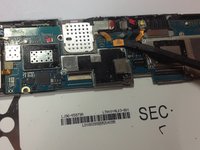


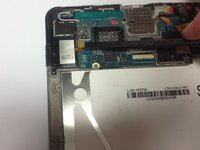


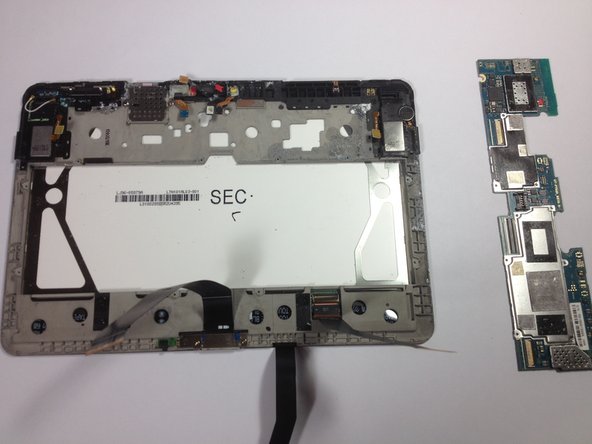
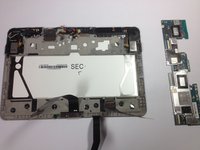
To reassemble your device, follow these instructions in reverse order.
To reassemble your device, follow these instructions in reverse order.
crwdns2935221:0crwdne2935221:0
crwdns2935229:018crwdne2935229:0
crwdns2915084:0crwdne2915084:0

Cal Poly, Team 13-5, Forte Fall 2013 crwdns2935289:0Cal Poly, Team 13-5, Forte Fall 2013crwdne2935289:0
CPSU-FORTE-F13S13G5
crwdns2931471:05crwdne2931471:0
crwdns2935297:017crwdne2935297:0
crwdns2947412:05crwdne2947412:0
Comment passe t'on de l'étape 6 à 7 ? (plastique gris qui fait le tour)
My 10.1 tablet switches on but the only thing showing on the screen is the “Samsung Galaxy 10.1” logo.
If the on/off button is held down for 20 seconds or so the screen goes blank for a few seconds then the logo reappears but nothing else happens. This logo only disappears when the battery is fully discharged.
After re-charging the battery the whole process is repeated
Any suggestions as to the problem
Jim
I'm having the same issue
have anyone found a solution?
What if I don't have screws on the outside of tablet?
Access denied! The screws near the port are covered by buttons. I wedged a pointed screw and hammered "gently" until they popped out. Problem solved!
Daniella - crwdns2934203:0crwdne2934203:0
My model doesn't have any screws!
Barry - crwdns2934203:0crwdne2934203:0
What can I do if my model DOESN'T HAVE ANY SCREWS? It has a loose LCD cable so SOME of my colours are all mixed up. This is really frustrating so please help
Janine Coetzee - crwdns2934203:0crwdne2934203:0
I have SG Tab Pro 10.1
There are no screws..... now what?
iloveto travel - crwdns2934203:0crwdne2934203:0
Great instructions! Easy to follow.
skritzberger - crwdns2934203:0crwdne2934203:0
My model has no screws.
Faith Odutola - crwdns2934203:0crwdne2934203:0
My model has no screws and doesn't look like the one pictured here. It's a model SM-T580.
Elsa Kramer - crwdns2934203:0crwdne2934203:0
Be careful removing the two screw plugs by the 30 pin connector. They are easy to scratch. I couldn’t get the plugs out with my tool kit and finally removed them with the point of an exacto knife.
Behind the two plugs are sticky pads that will need to be handled carefully and saved for reassembly.
If you order a tool kit online, be sure it has a Y1 tri-wing screwdriver. The one in my kit was not Y1 and would not remove the screws.
I had to order a new screwdriver.
George Tomlinson - crwdns2934203:0crwdne2934203:0
I don't see any screws I have a galaxy tab 4
Tammylynn Gmarter - crwdns2934203:0crwdne2934203:0
if your model doesn’t have these screws, it’s probably ok to just skip this step. at least that’s what i did on model gt-p7500, and that repair was successful (battery replacement). Janine, a friend asked me to fix his Tab where that had happened when he tried to replace the battery himself… i just took out the 3 big cables over the battery, and re-inserted them, and that fixed the problem. you should try that if you haven’t already..
divinity76 - crwdns2934203:0crwdne2934203:0
Mine doesn't have screws so what do I do now?
katrinawisner - crwdns2934203:0crwdne2934203:0
charging samsung battery dabka ilaaliyo
Maxamed Xuseen - crwdns2934203:0crwdne2934203:0