crwdns2915892:0crwdne2915892:0
This guide shows how to remove and replace the battery for the Samsung Galaxy S10+.
The battery is held in place with strong adhesive. High concentration (over 90%) isopropyl alcohol will make the battery removal process much easier.
If your battery is swollen, take appropriate precautions and do not heat your phone.
For your safety, discharge your battery below 25% before disassembling your phone. This reduces the risk of a dangerous thermal event if the battery is accidentally damaged during the repair.
crwdns2942213:0crwdne2942213:0
crwdns2936621:0crwdne2936621:0
-
-
Unplug and power off your phone before you begin.
-
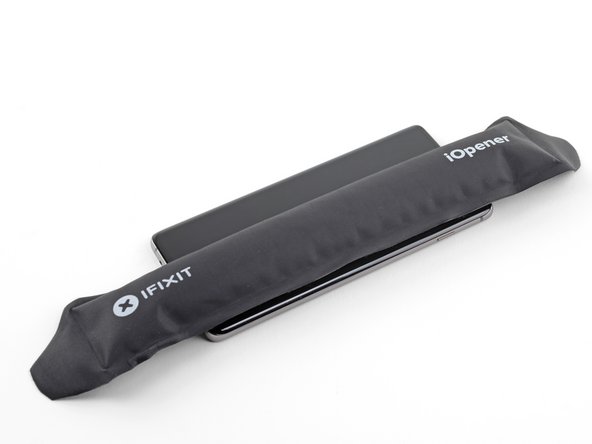
Heat an iOpener and apply it to the back cover's right edge for two minutes.
-
As you wait, take a look at the image of the removed back cover and take note of where the adhesive is located.
-
-
-
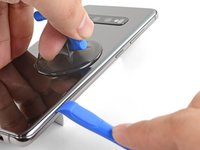
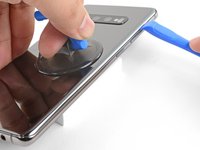
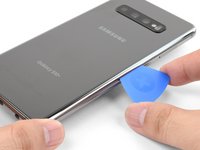
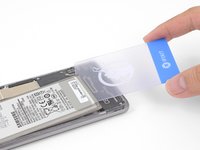
Apply a suction cup to the back of the phone, as close to the center of the right edge as possible (where the adhesive is narrowest).
-
Pull on the suction cup with strong, steady force to create a gap between the back cover and the frame.
-
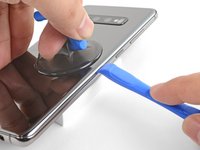
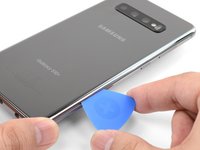
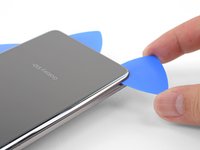
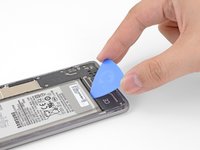
Insert the point of an opening pick into the gap.
-
If you are having trouble creating a gap, your best bet is to apply more heat to the edge and try the previous step again.
-
You can try applying a few drops of high concentration (over 90%) isopropyl alcohol into the seam to help loosen the adhesive.
I can’t get the back cover to seperate, I’ve been trying for several hours now, it just stays with the rest of the phone. I’m fairly certain my phone is hot enough as I touched the back and I can’t place my hand there for more than a few seconds at a time. It’s just not coming off and I’m so frustrated! Any help?
Hi Fiona,
The back adhesive can be very difficult! Have you tried the suggestions in step 3? It may take a few heat cycles to weaken the adhesive. You can use a hairdryer to heat it pretty hot along the edge.
My back cover glass is shattered but not coming apart! What do I do?
I was able to use my fingernails first (with the assistance of the suction cup) to get in the gap, and then, with my fingernails still in the gap there was enough room to put in the pick. I couldn't get the pick in there by itself even after 10 minutes of warming and suction cup prying... but my fingernails could get in, and then I used them to hold the space open and pull a little more so the pick could be inserted.
-
-
-
Rest the heated right edge of the phone on something that is about 0.5 inches (13 mm) thick. This angles the phone for the opening tool.
-
Brace the left edge of the phone with your fingers so that the phone won't slide. Pull on the suction cup with firm pressure.
-
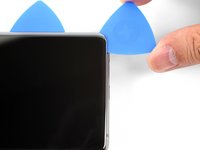
Press the edge of an opening tool into the seam between the back cover and the frame.
-
Slide the opening tool back and forth along the seam a few times.
-
-
-
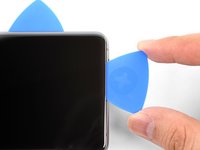
Slide the opening pick along the edge of the phone, slicing through the adhesive.
-
Leave a pick in the seam to prevent the adhesive from re-sealing.
-
-
-
Apply a heated iOpener to the bottom edge of the phone for two minutes.
-
-
-
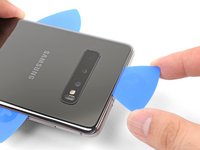
Insert an opening pick into the right edge near the bottom right corner.
-
Carefully slide the pick around the corner. Continue cutting along the bottom edge and around the bottom left corner.
-
Leave an opening pick in the seam to prevent the adhesive from re-sealing.
-
-
-
-
Continue heating and slicing around the remaining edges of the phone.
-
-
-
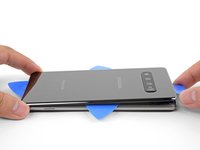
Once you have sliced around the phone, twist an opening pick in one of the edges to help separate the back cover from the frame.
-
Lift the back cover slowly. Use opening picks to slice any remaining adhesive.
-
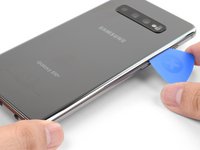
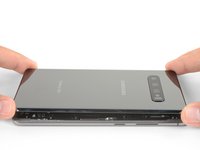
Remove the back cover.
-
-
-
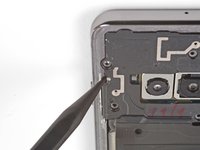
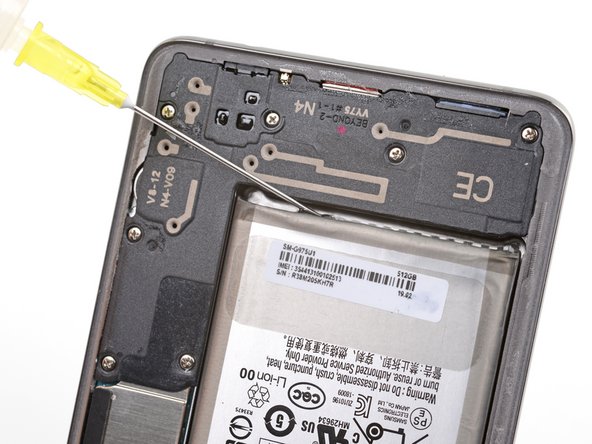
Remove the nine 4 mm Phillips screws securing the top midframe to the phone.
-
-
-
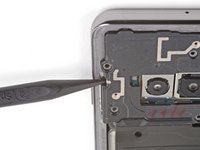
Insert the point of a spudger into the notch on the right edge of the midframe, near the Bixby button.
-
Pry up to loosen the midframe from the phone.
-
-
-
Insert the point of a spudger into the notch on the left edge of the phone, located near the power button.
-
Pry up to loosen the midframe from the phone.
-
-
-
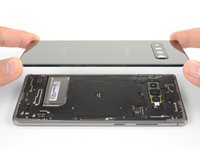
Lift the midframe from the top corners and remove it from the phone.
-
Align the midframe's top edge to the phone and lay the frame down on the phone.
-
Use fingers to apply pressure along the midframe perimeter to snap the midframe clips back into place. The edges should sit flush against the phone edge.
-
-
-
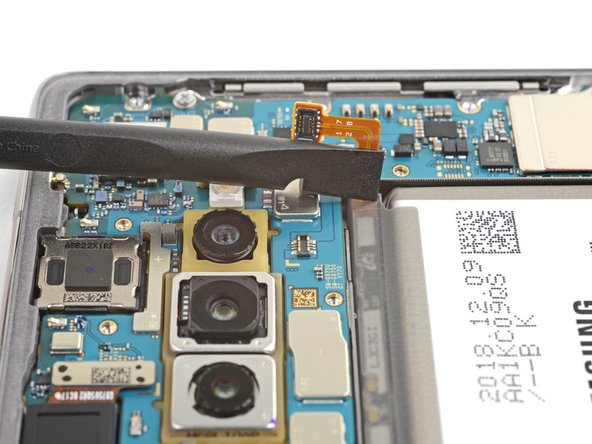
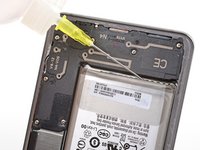
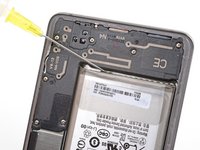
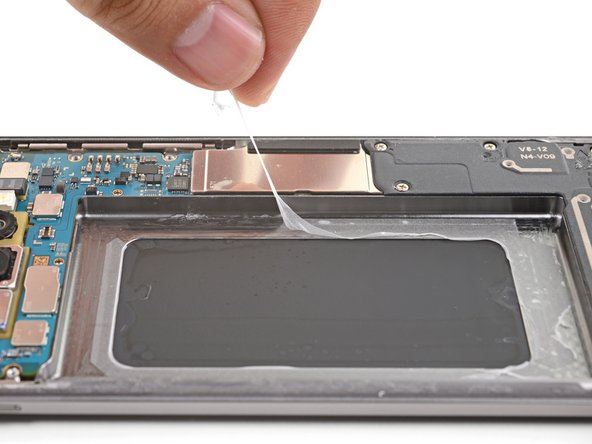
Insert the flat end of a spudger underneath the battery connector, which is attached to the motherboard below the rear-facing camera.
-
Pry upwards to disconnect the connector from its socket.
-
Gently push the battery's flex cable away from the motherboard socket to prevent accidental contact.
-
-
-
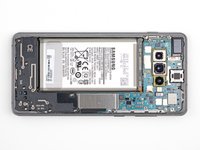
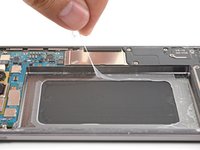
The battery is heavily glued in place. Note the marked areas under the battery:
-
The frame, where the battery is held by strong adhesive
-
A cutout in the frame, exposing the fragile display assembly underneath. Be careful when prying in this area, or you may damage the display.
-
-
-
Lift the bottom edge of the phone up and hold the phone in a tilted position.
-
Apply 1-2 drops of isopropyl alcohol into the crevice between the battery and the phone's bottom midframe.
-
Hold the phone in a tilted position for a minute to allow the isopropyl alcohol to soak into the adhesive.
-
Alternatively, heat an iOpener and apply it to the right side of the front of the phone for two minutes.
Probably do use the iOpener in this step. Actually waited for an hour for isopropyl alcohol to actually loosen the adhesive barely enough to rip the battery out.
-
-
-
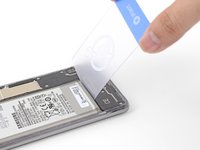
Insert the corner of an opening card into the crevice between the battery and the bottom midframe.
-
Pry the battery out of its recess using firm, constant pressure
-
Use an opening pick, an opening tool, or a spudger to pry the battery out. Do not use metal tools.
-
Repeat the isopropyl alcohol application step and try again.
-
Try applying more heat with an iOpener.
-
-
-
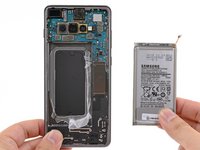
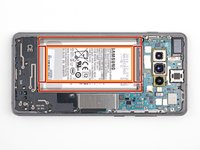
Remove the battery.
-
If you used isopropyl alcohol, wait ten minutes before installing the new battery to allow the alcohol to completely evaporate.
-
Apply pre-cut adhesive, or double-sided tape to the frame first before pressing the battery into the recess.
-
Do not apply adhesive on the exposed display back.
Does the back panels adhesive needs to be replaced or its good to reassemble on old one?
Yes! If you don’t want to use new adhesive, remove any large chunks of adhesive that might prevent the back cover from sitting down flush, heat the back cover, and apply pressure to secure it. It won't be waterproof, but the leftover adhesive is usually more than strong enough to hold.
It’s a little confusing going through the battery removal for the Samsung S10+ and then being sent to the Samsung S10 installation process instead of the Samsung S10+ install. Although moderately intuitive, it would be nice to have a specific article for a specific phone that identifies the actual process with the physical parts involved since The S10 and the S10+ are not the same back covers and the same parts involved.
Additionally, the inner wireless connector plate NEEDS to be connected to validate a connection otherwise the battery will not power the phone. This is a Requirement on the S10+.
Please address the adhesive issues in the instructions! Add some discussion of how much of the old adhesive to remove (if any) and how to do it. Also there is no mention of how to apply the new adhesive, either to the battery compartment or to seal the back plate with.
Hi Alan,
Thanks for pointing this out! I'll add some links to general adhesive guides to help alleviate this issue.
My new battery came without new adhesive. Now what?
My new battery came without new adhesive. Now what? I guess I was supposed to order the custom-cut battery adhesive separately, right? I should have known this from the start, now all the parts are just lying around... and it seems, I can't even buy it form your shop. Thanks for the insanity.
I also have received new battery without the new adhesive
Make sure you connect the battery correctly and test the charging system by plugging it in. I plugged it in and I got an overheating icon on my screen. I disconnected the battery and reconnected it and put firmly put it in place and tested it again and it charged successfully.
-


To reassemble your device, follow these instructions in reverse order.
For optimal performance, calibrate your newly installed battery after completing this guide.
Take your e-waste to an R2 or e-Stewards certified recycler.
Repair didn’t go as planned? Check out our Answers community for troubleshooting help.
crwdns2935221:0crwdne2935221:0
crwdns2935229:051crwdne2935229:0


crwdns2947412:016crwdne2947412:0
The hardest part was actually getting rid of all the adhesive residue everywhere. That step took the longest. The battery removal went very quickly, surprisingly so.
Worked great to replace my swollen battery, and thanks to it being swollen I could actually skip the steps to pry open the back cover. Anyway, from my experience everything is correct, the only downside is that I used a little more than a few drops to loosen the battery and after the whole annoyance of removing the glue and placing the new battery I turned on the phone to check everything was working and my back cameras were blurry.... yeah, too much alcohol, had to clean them up very well.... but the sad part is that some of the alcohol made it's way to the front cameras... now they are both blurry.
لم استطيع أشحن البطارية خارج أمريكا اذاً ما الفائدة ؟
I agree with isely - the toughest part was removing all the left over adhesive. Removing the battery was a bit of a pain as well, even with isopropyl alcohol. I recommend using heat to remove the battery.
To get rid of the excess adhesive, I recommend using a heat gun and peeling it up with your thumb. As long as it's malleable, you can slowly peel it up to create a ball of adhesive and hopefully get most of it off at once. I was trying Q-Tips with isopropyl alcohol and that mostly just spread around the adhesive and got fluff from the Q-Tip over the phone.
Finally, I recommend buying a precut adhesive card to glue it back in place. It took me quite a while to cut a bunch of strips with my 2mm double sided tape.
And my phone is ruined because, presumably, the alcohol leaked somehow and destroyed the lens. Gonna have to get a new phone now anyway. Please add proper precautions to the instructions to avoid wrecking the lens. I didn't make any careless splashes or drips.
Would I need to replace the water-resistant seal with another to retain IP68 water resistance?
In my case, the old Galaxy 10+ battery swelled up. Getting the back off was simple as the battery expansion pushed the back off for me. Getting all the glue off was a bit of a pain though.
Replacement battery is vastly different from original (no surprise there), but no instructions were given on how to stick the new battery down. A sheet of pre-cut adhesive strips [which were almost impossible to use] came with the kit. I improvised to make my own battery stick-down strips.
The new adhesive for the back plate was a bit daunting to get set "just right". Ended up with a little bit of the material sticking out the side of the back. Some careful use of a single-edge razor blade took care of that.
iFixit guys - good instructions, now tie the bow on it by showing how to secure -your- replacement battery in the phone and how to apply -your- backside adhesive. You've only covered 1/2 of the job in these instructions.
Otherwise, I'm pretty happy with the repair. Resurrected my old Galaxy S10+.
i got sort of lucky and was able to skip straight to step 9 because the glue holding the back on had melted due to a house i used to live in not having a functional AC and it hitting 85F+ inside(that was the main reason i wanted this at first), the battery turning into a forbidden capri sun and warping my case made me pull the trigger(it also might have made me needing needing the iso a moot point).
Total time: 4 hours . Took a lot of time scraping/wiping away glue residue. And the battery was soaking in isopropyl alcohol for a whole hour to be barely loos enough to be ripped out. Use the iOpener for the battery removal.
Total time: 4 hours . Took a lot of time scraping/wiping away glue residue. And the battery was soaking in isopropyl alcohol for a whole hour to be barely loos enough to be ripped out. Use the iOpener for the battery removal.
Just finished an install and I must say this went way smoother than I had expected. Had zero issues and everything (including cameras) all still functioning. Thank you Ifixit team for making it possible to change the battery with ease.
una volta, quando eravamo tutti cretini, si apriva il coperchio si estraeva la batteria e ne infilavamo una nuova, ma che cacio !!!
ancora ? quando eravamo imbecilli, bastava aprire il coperchio, gettare la batteria e inserirne una nuova.
Unfortunately this guide has broken my phone screen, i assume i used too much 100% isopropyl alcohol (probably in excess of 10mL) when removing the battery and it leaked and damaged the screen somehow. Now the screen only works at certain brightness' and has a green tint. Disappointed as there was no warning about using too much alcohol, plus I assumed alcohol was not damaging for electronics... will need to buy a new phone now :(
Everything went well, the only missing part is a guide to use the tesa tape. Quick tip: if you want do test the phone if it's working before reassembling everything, make sure to reconnect the NFC coil only, otherwise the phone won't turn on.
I got this done within an hour. The hardest part was getting the battery out and I didn't want to damage it with the picks or the spudge tool. I also replaced my camera lens while I was at it since it broke. I'm amazed that this phone considered waterproof with how little insulation this thing has. I'm going to be very cautious with any phone that says it's good underwater for a short period of time cause there's very little between water and the electronics of the phone.