crwdns2915892:0crwdne2915892:0
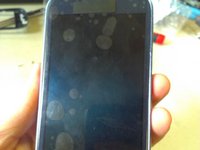
Here we are! We are going to know how to replace the assembly of display+touch screen
crwdns2942213:0crwdne2942213:0
-
-
First of all, remove the battery door, then the battery....
-
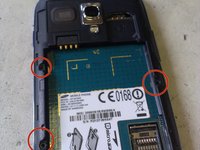
Then, unscrew all the screw from the bottom side. NOTE:All the screws has the same lenght
-
-
-
Now, with a flat screwdriver or the plastic triangle, separate the rear case from the front case.
-
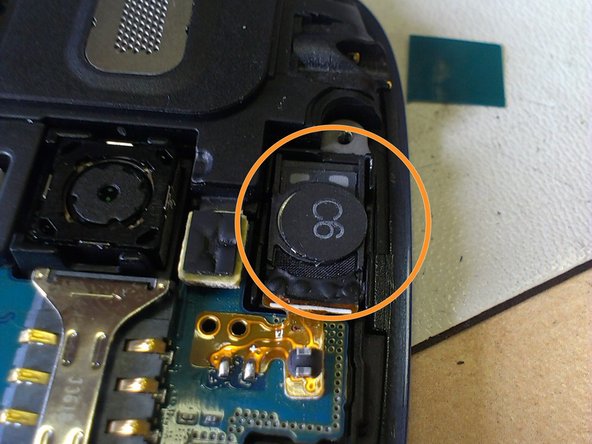
Here we have the call speaker. Its glued to the front, so we have to release it or desolder the 2 knobs on the flex cable.
-
-
-
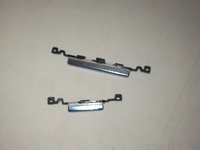
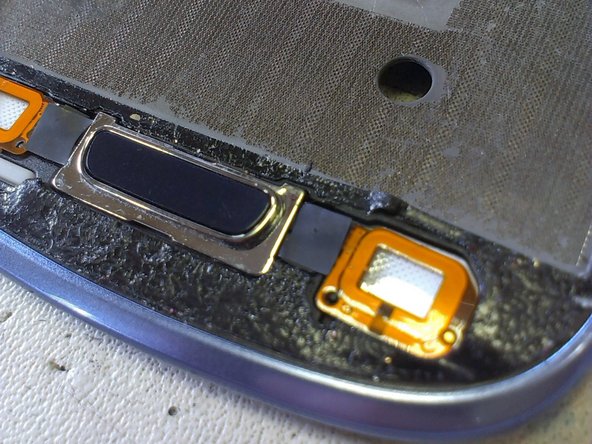
Remove the volume and power buttons.
-
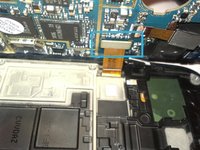
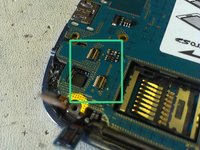
Release the lower buttons and MicroSD connectors.
-
-
-
-
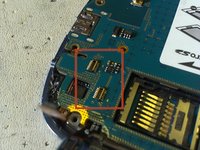
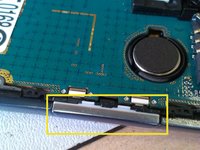
Now, lift from the right side the board, and be careful, below is the LCD connector.
-
It´s turn to the HOT STATION. If you don´t have one of this, you can do it with a Hairdryer or a Heat gun
-
I don´t have any photo of the proccess, so I´m sorry for that. You must heat all the LCD area, and with special attention on the top and bottom areas.
-
Please be careful with the 2 lower buttons, they have this orange flat cable!!
-
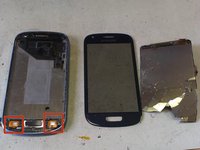
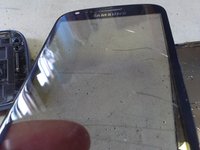
As you can see, the LCD is totally destroyed, but it was broken before, so...
-
-
-
Now, you can see that the touch screen were damaged too, so this is why I have purchased the whole unit assy.
-
-
-
Now, place the new module on the chassis, and be careful with the flex cables.
-
To assembly all togheter, do the steps backwards, and don´t forget to place the volume and power up buttons!
-
Remember to put back the speaker
-
-
-
Reconnect all the connectors to the main board, place the rear case, and tight all the screws!
-
YOU DID IT!!
-


To reassemble your device, follow these instructions in reverse order.
crwdns2935221:0crwdne2935221:0
crwdns2935229:048crwdne2935229:0

crwdns2947412:03crwdne2947412:0
Is gt-i8190 and gt-i8190n
This Youtube video give great detail of the s3 mini internal parts, to help guide you in your repair. https://youtu.be/iKBkAjj87b4
It's also helpful to know the various layers of the 'display' so you know which part to buy. I haven't given up yet, but my attempt to apply heat (hair dryer or sun) to remove the top layer of glass, which is held down with adhesive (hence the use of heat to 'melt' it a bit) was not successful. Ended up damaging the LCD underneath. Now I know I can get the complete assembly with LCD and top glass layer already assembled (as in this guide), so the heating process is not needed, just reassemble and screw the parts together!
Ebay is a great resource to find these various parts, by the way, in case iFixit doesn't carry them.
If you only need to replace the broken touch screen glass on top, then you first cover the whole glass with a wide tape to fix the splinters of the broken glas, then carefully melt the glue under the glass with a hair dryer, .. but be careful with the knife blade, or you will cut through the wire to the LCD .
The whole process you can watch in several YouTube tutorials for samsung galaxy s3 mini : https://www.youtube.com/results?search_q...