crwdns2915892:0crwdne2915892:0
Use this guide to remove or replace the screen on your Samsung Galaxy Note10.
Due to the Note10’s design, you will have to remove the back panel in order to disconnect the screen cable.
Before you begin this procedure, be sure to have a set of replacement adhesives for both the back panel and the screen.
crwdns2942213:0crwdne2942213:0
-
-
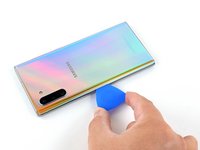
Prepare an iOpener and apply it to the left edge of the back panel for one minute.
-
-
-
Apply a suction cup to the heated edge of the back panel, as close to the edge as possible.
-
Pull up on the suction cup with strong, steady force to create a gap between the back panel and the frame.
-
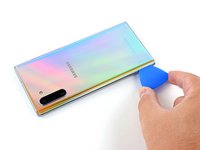
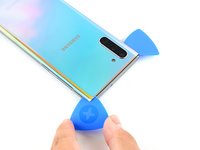
Insert the point of an opening pick into the gap.
-
-
-
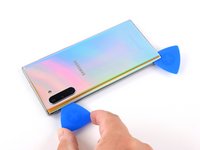
Slide the opening pick along the left edge towards the bottom left corner to slice the adhesive.
-
Leave the pick inserted in the bottom left corner to prevent the adhesive from re-sealing.
-
-
-
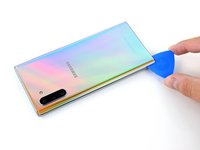
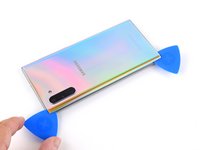
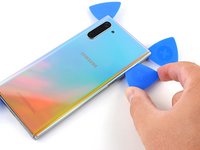
Insert a second opening pick and slide it across the left side towards the top left corner to slice the adhesive.
-
Leave the pick inserted in the top left corner to prevent the adhesive from re-sealing.
-
-
-
Prepare an iOpener and apply it to the top edge of the phone for one minute.
-
-
-
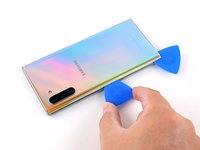
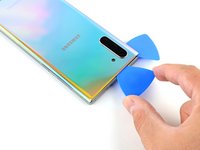
Insert a third opening pick into the gap on the top edge of the phone.
-
Slide the opening pick to the top right corner, slicing the adhesive.
-
Leave the pick inserted in the top right corner to prevent the adhesive from re-sealing.
I cracked this top right corner because the camera cutout causes it to be more prone to cracking. Make sure to use heat in that corner, and spray some >90% isopropyl alcohol in there to loosen up the adhesive. I would do this corner last.
-
-
-
Prepare an iOpener and apply it to the right edge of the phone for one minute.
-
-
-
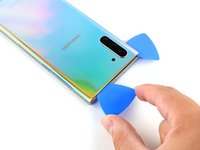
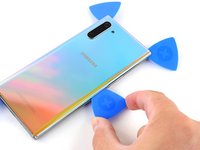
Insert a fourth and final opening pick into the gap on the right side of the phone, sliding it down towards the bottom right corner of the phone to slice the adhesive.
-
Slide an opening pick back and forth around the entire perimeter of the phone to release any missed adhesive, reheating if you find any extra-stubborn adhesive.
-
-
-
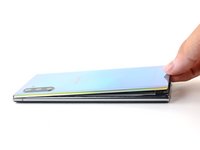
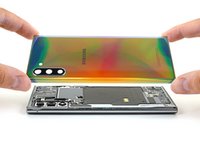
Lift up and remove the back panel.
-
-
-
Use a Phillips screwdriver to remove the five 4 mm screws securing the wireless charging coil.
-
-
-
crwdns2935267:0crwdne2935267:0Tweezers$4.99
-
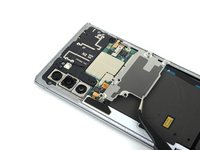
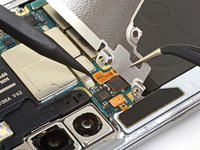
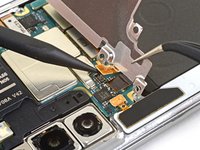
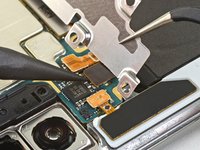
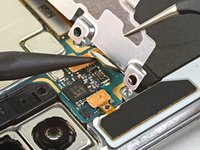
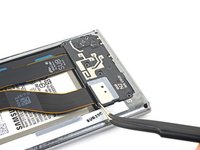
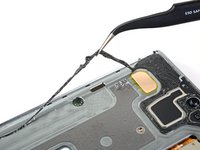
Use a pair of tweezers to lift up and flip back the metal shield covering the battery connector.
-
-
-
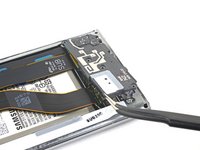
While holding the metal shield up and out of the way, use the pointed end of a spudger to pry up the battery connector to disconnect it.
-
-
-
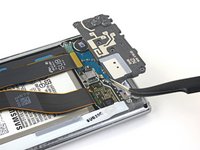
Use the pointed end of a spudger to disconnect the wireless charging coil connector from the motherboard.
-
-
-
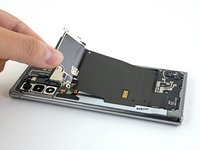
Tilt the metal shielding up so you can grip it with your fingers.
-
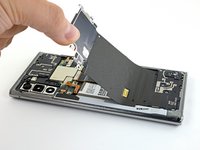
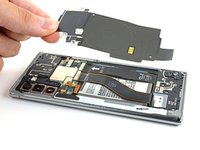
Peel the wireless charging coil up and away from the device.
-
Remove the wireless charging coil.
is it possible to replace with brand new wireless charging coil
How do you remove the metal plate to attach it to the new flex coil
Why do you want to do so?
-
-
-
Use a Phillips screwdriver to remove the five 4 mm screws securing the loudspeaker.
Actually, you don’t need to remove the loud speaker as long as you can do with 3 daughter board cables hanging off and distract a little bit, there is no effect with it bcoz the cable is flexible
-
-
crwdns2935267:0crwdne2935267:0Tweezers$4.99
-
Use a pair of tweezers to remove the loudspeaker.
-
-
-
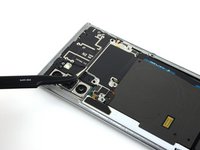
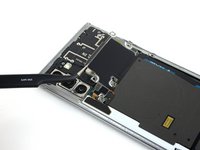
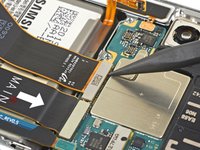
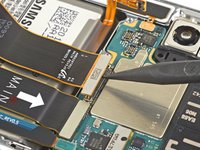
Use the pointed end of a spudger to disconnect the display cable from the motherboard.
-
-
-
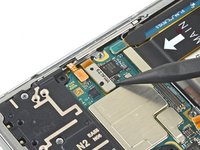
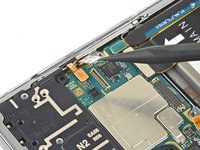
Use the pointed end of a spudger to disconnect the S-Pen touch layer cable connector from the motherboard.
-
-
-
Prepare an iOpener and apply it to the left edge of the display for one minute.
-
-
-
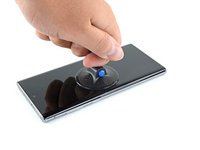
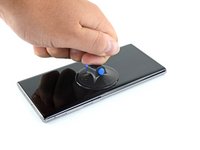
Apply a suction cup to the heated edge of the display, as close to the edge as possible.
-
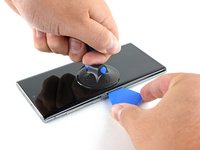
Pull up on the suction cup with strong, steady force to create a gap between the display and the frame.
-
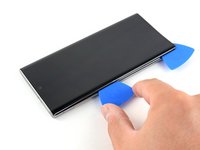
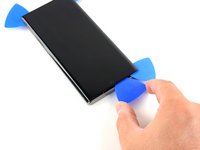
Insert the point of an opening pick into the gap.
-
-
-
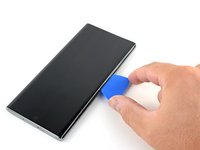
Slide the opening pick along the left side towards the bottom left corner to slice the adhesive.
-
Leave the pick inserted in the bottom left corner to prevent the adhesive from re-sealing.
-
-
-
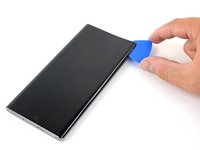
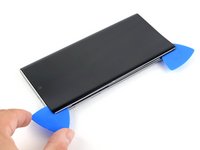
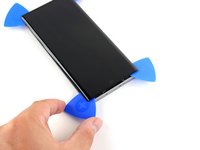
Insert a second opening pick and slide it along the left side towards the top left corner to slice the adhesive.
-
Leave the pick inserted in the top left corner to prevent the adhesive from re-sealing.
-
-
-
Prepare an iOpener and apply it to the bottom edge of the phone for one minute.
-
-
-
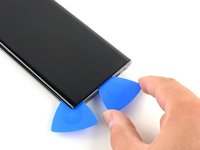
Insert a third opening pick into the gap on the bottom edge of the phone.
-
Slide the opening pick to the bottom right corner, slicing the adhesive.
-
Leave the pick inserted in the bottom right corner to prevent the adhesive from re-sealing.
-
-
-
Prepare an iOpener and apply it to the top edge of the phone for one minute.
-
-
-
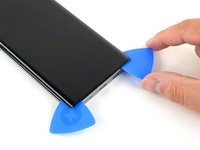
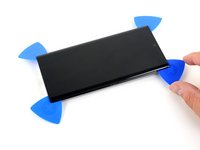
Insert a fourth opening pick into the gap on the top edge of the phone.
-
Slide the opening pick to the top right corner, slicing the adhesive.
-
Leave the pick inserted in the top right corner to prevent the adhesive from re-sealing.
-
-
-
Prepare an iOpener and apply it to the right edge of the phone for one minute.
-
-
-
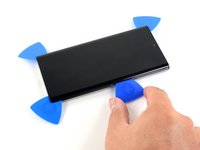
Slide the opening pick from the top right corner down towards the bottom right corner of the phone to slice the adhesive.
-
Slide an opening pick back and forth around the entire perimeter of the phone to release any missed adhesive, reheating if you find any extra-stubborn adhesive.
-
-
-
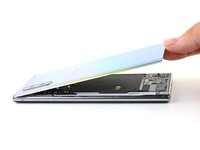
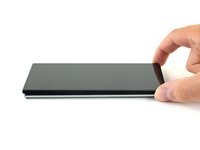
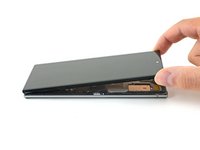
Lift the screen up from the edge with the front-facing camera.
-
-
-
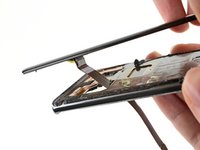
Thread the display and S-Pen touch layer cables through their cutouts on the phone frame.
-
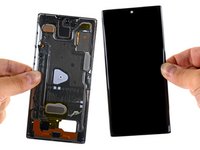
Remove the display.
-
Remove any leftover adhesive before installing a new display.
-
Be sure to test your repairs before installing new adhesives.
-
Compare your new replacement part to the original part—you may need to transfer remaining components or remove adhesive backings from the new part before installing.
To reassemble your device, follow the above steps in reverse order.
Take your e-waste to an R2 or e-Stewards certified recycler.
Repair didn’t go as planned? Try some basic troubleshooting, or ask our Answers community for help.
crwdns2935221:0crwdne2935221:0
crwdns2935229:040crwdne2935229:0
crwdns2947412:09crwdne2947412:0
Does the same method apply to Note 10+ as well ?
The method is similar but not identical. We will have Note10+ guides up within this month!
Would the phone still be water resistant?
Depending on adhesive you use to put back glass
For anyone thinking about doing this -
The screen on my wife’s Note 10 cracked. She lived with it for a little while, but of course the cracks spread and got worse over time. We decided to take a stab at fixing it ourselves.
From what I can tell, the instructions here are spot on. I was eventually able to fix the phone myself - looks brand new. You definitely don’t have to be a rocket scientist to do this - just some patience while you go through the steps.
My one regret is that I tried using a heat gun to soften the adhesive. While her screen was cracked, the LED display was still working. After using the heat gun, the LED display was no longer working - so I had to order a new one (they’re not cheap). At the time, I did not know about the iOpener. I would be very curious to give it a try. As long as it provides enough heat, it would probably work a lot better due to the increased control in heat application. For the price, it’s probably worth giving it a shot if you’re planning on doing this.
I only replaced the back glass, it’s the only one that is cracked, tho i already have the replacement for the middle frame, I got scared that i might brake the LCD (HAHA) but this guide is spot on
This is removing both the lcd and the screen correct?
If you are referring to a touch screen, it's not. This guide is for LCD/Digitizer assembly replacement.
Jojo -
Whilst removing the LCD of my note 10 I noticed i tore the s-pen flex ribbon cable. Is there an explanation on how to replace or repair that cable?. Is that even repairable?


