crwdns2915892:0crwdne2915892:0
Use this guide to remove or replace the battery on your Samsung Galaxy Note10+. If your battery is swollen, take appropriate precautions.
For your safety, discharge your battery below 25% before disassembling your phone. This reduces the risk of a dangerous thermal event if the battery is accidentally damaged during the repair.
crwdns2942213:0crwdne2942213:0
-
-
Prepare an iOpener and apply it to the left edge of the rear cover for one minute.
-
-
-
Apply a suction cup to the heated edge of the rear cover, as close to the edge as possible.
-
Pull up on the suction cup with strong, steady force to create a gap between the rear cover and the frame.
-
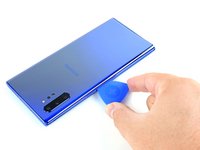
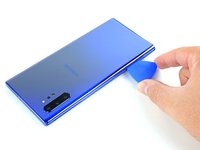
Insert the point of an opening pick into the gap.
-
-
-
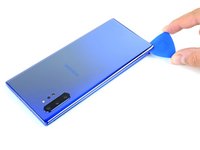
Slide the opening pick along the left edge towards the bottom left corner to slice the adhesive.
-
Leave the pick inserted in the bottom left corner to prevent the adhesive from re-sealing.
-
-
-
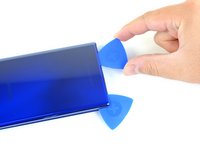
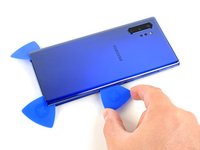
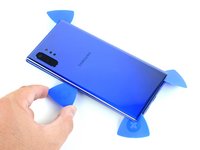
Repeat the previous heating and cutting procedure for the remaining three sides of the phone.
-
Leave an opening pick on each side as you continue to the next to prevent the adhesive from resealing.
-
-
-
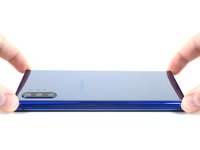
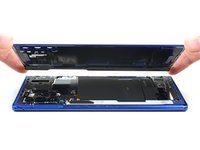
Lift the rear cover straight up to remove it.
Muy buena la guia. nada que añadir. para montar solo limpia el equipo donde estaba el tape anterior, y remoueve los el tape de la tapa nueva solo ponla y listo…
-
-
-
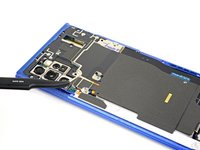
Use a Phillips screwdriver to remove the five 4 mm screws securing the wireless charging coil.
-
-
-
crwdns2935267:0crwdne2935267:0Tweezers$4.99
-
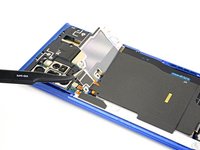
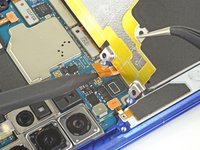
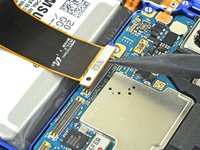
Use a pair of tweezers to lift up and flip back the metal shield covering the battery connector.
-
-
-
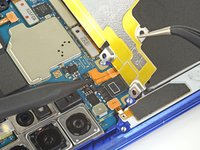
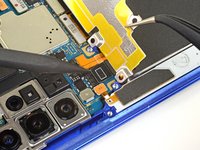
While holding the metal shield up and out of the way, use the pointed end of a spudger to pry up the battery connector to disconnect it.
-
-
-
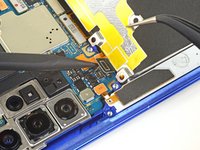
Use the pointed end of a spudger to disconnect the wireless charging coil connector from the motherboard.
-
-
-
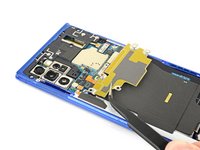
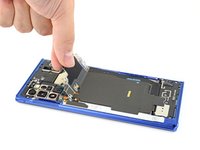
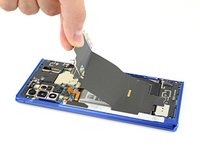
Tilt the metal shielding up so you can grip it with your fingers.
-
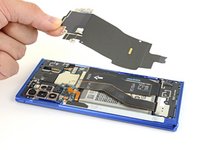
Peel the wireless charging coil up and away from the device.
-
Remove the wireless charging coil.
Can you reuse the wireless charging coil? I don’t see a replacement on the site. I just learning all this.
-
-
-
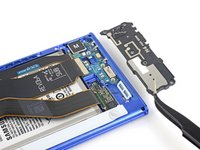
Use a Phillips screwdriver to remove the five 4 mm screws securing the loudspeaker.
-
-
crwdns2935267:0crwdne2935267:0Tweezers$4.99
-
Use a pair of tweezers to remove the loudspeaker.
-
-
-
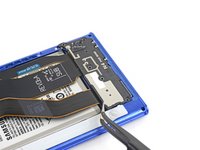
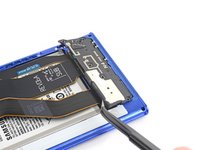
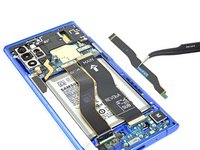
Use the pointed end of a spudger to disconnect the main interconnect cable from the motherboard.
-
Disconnect the secondary interconnect cable from the motherboard.
-
-
-
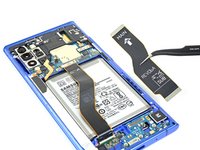
Use the pointed end of a spudger to disconnect the main interconnect cable from the daughterboard.
-
Disconnect the secondary interconnect cable from the daughterboard.
-
-
-
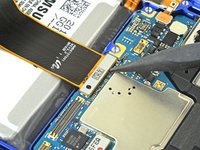
Use the pointed end of a spudger to disconnect the display cable connector from the motherboard.
-
-
-
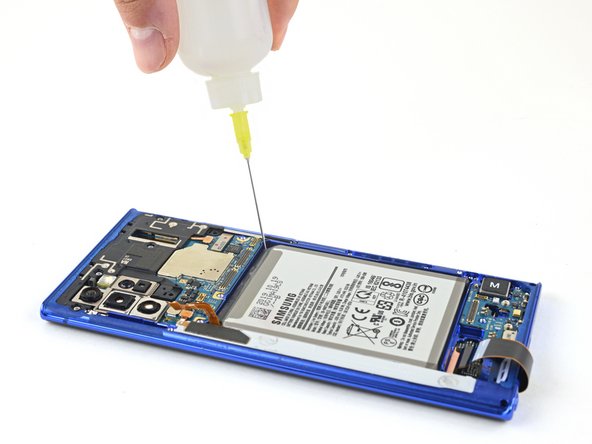
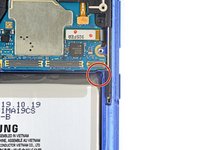
Apply 1-2 drops of high concentration (90% or greater) isopropyl alcohol underneath the battery at the tear-shaped indents near the corners of the battery well.
-
Wait about two minutes for the isopropyl alcohol to penetrate and weaken the battery adhesive before you proceed to the next step.
-
-
-
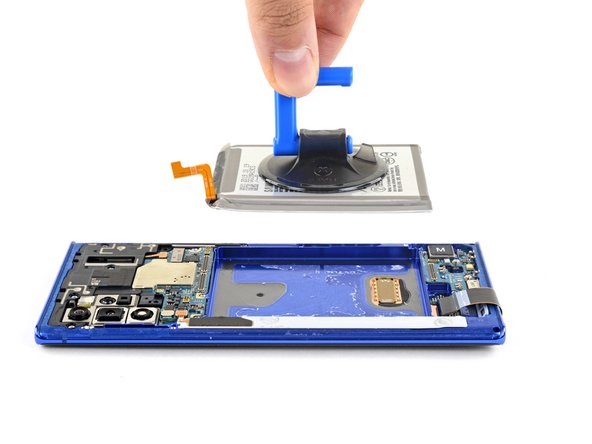
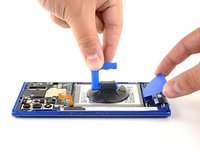
Apply a suction cup to the back of the battery.
-
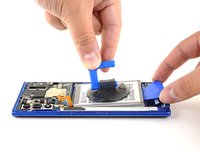
Pull up on the suction cup with strong, steady force to begin to separate the battery from the frame.
-
Insert the point of an opening pick into the gap created between the battery and frame.
-
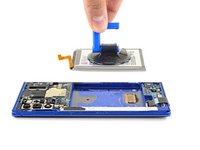
Pull up on the suction cup to remove the battery.
-
If you used isopropyl alcohol, wait ten minutes before installing the new battery to allow the alcohol to completely evaporate.
-
For optimal performance, calibrate your newly installed battery after completing this guide.
Compare your new replacement part to the original part—you may need to transfer remaining components or remove adhesive backings from the new part before installing.
To reassemble your device, follow the above steps in reverse order.
Take your e-waste to an R2 or e-Stewards certified recycler.
Repair didn’t go as planned? Try some basic troubleshooting, or ask our Answers community for help.
crwdns2935221:0crwdne2935221:0
crwdns2935229:030crwdne2935229:0
crwdns2947412:016crwdne2947412:0
What kind of adhesive would you recommend to adhere the back glass to the phone after repair?
Hey! Here’s a link to the rear cover adhesive!
Thank you! I have all my stuff ordered now. I can’t wait to follow this guide and get my battery back to new!
Do I only need the rear cover adhesive or the perimeter adhesive as well?
Hi,
I would like to replace my note 10 plus battery, wireless charging n nfc, please advise on what to buy from you.
Thanks
Alex
I performed the battery replacement following instructions to the letter, but now I'm stuck in a custom OS warning screen loop and nothing I do seems to get me out of it.
It finally came out of it on its own. When I started up, however, I quickly discovered why it happened in the first place: my volume buttons aren't working, so perhaps the adhesive is blocking them. Also, NFC and camera aren't working, so I have to figure it all out.
PDADoc -
Switch worked really good ACCEPT that my fingerprint reader is now broken (it doesnt readout anymore).
I think it got something to do with the alcohol getting under it (i used premium 99%)
Update: after several restarts and a slight heatbed treatment the sensor managed to store a fingerprint. It seems to work just fine, although i get a feeling, that the sensor definitely isnt working as reliable as before .... i keep you updated
Last Update: after working just fine the whole day the display randomly stopped working and is now completely dead. Phone is therefore destroyed.
Screen destroyed itself shortly after the repair. Phone was working just fine, than began to reject inputs, followed by ghost touches. Shortly after that the screen turned black and is unfunctional since.
Like I said, the phone was working just fine after the repair, so I can pretty much foreclose a installtion error.
Ifixit support sadly wasnt helping at all.
Fingerprint sensor didn't work until I move a small grey sticker from the original battery carefully placing it in the same spot on the new battery
i bought a battery pack and it is worse than my 2 years old battery
Por mi parte he cambiado la batería sin problema. Pero algo tenía que pasar 😅. La limpieza del adhesivo ha sido bastante "dura" y pues en una de estas aprieto la tapa demasiado fuerte y la rompo. Cosas que pasan. Ya he pedido otra. Por lo demás todo funciona a la perfección y de paso al tener el altavoz quitado se podía ver a través con una luz la suciedad acumulada durante años, así que aproveche para ver y limpiar todo lo que se podía. Luego quedará ver que tal funciona la batería con el tiempo y su duración.
Very important: Check if the replacement battery has a small grey glittering sticker on the side, which faces the display. If not, the fingerprint reader will stop working. Unfortunately, this sticker cannot be really transferred to the replacement battery.
Also important: To loosen the battery, carefully apply some isopropyl alcohol with a needle to the corners of the battery. Just don’t poke the battery. If you spill alcohol elsewhere, your device may stop working. In this case, leave it open and let it dry for some days. This should fix it in most cases.
Not all of the phone from the same models are the same.
Sometime if the phone is with you for five years of more, the back cover will come off easily.
Some screws might get stuck and won't get out, therefore be prepared and have lots of tools
After powering the phone you might see a line in the screen or the bottom of the screen is black, most likely you would need to reopen the phone and check all the connecters are fine.

























I have an adjustable hot plate. I bought it when I replaced the back and battery on a previous note. I am wondering about some type of shim so that the camera bump is not in contact with the hot plate. I am thinking about fender washers. Is there a better way?
Rusty Lingenfelter - crwdns2934203:0crwdne2934203:0
I actually had my back plate come off by itself after I washed my phone after UV activated glue got on it. I used alcohol and that somehow got on contact with the glue and weakened it. Granted, it was a 6 year old phone with a cover and it did get hot from time to time, so that might have had something to do with the weakened glue. In any case, I'm upset I didn't use this opportunity to change my battery. Instead I just glued it back on :(
Joe - crwdns2934203:0crwdne2934203:0