crwdns2915892:0crwdne2915892:0
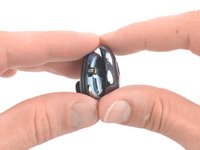
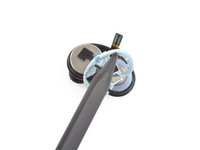
Use this guide to replace a worn-out or dead battery in your Galaxy Buds Live. The photos for this guide were taken with the left earbud, but the procedure is the same for both buds.
Galaxy Buds Live are rated IPX2 for ingress-resistance, meaning they are splash resistant. After this repair, they may lose their water protection.
crwdns2942213:0crwdne2942213:0
-
-
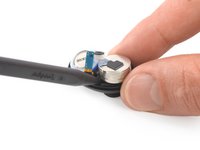
Place the tip of an opening pick between the plastic cases on the curved inside of the earbud.
-
Insert the pick at a steep angle.
-
-
-
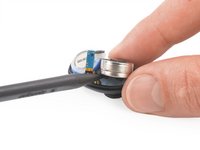
Keep the opening pick at a steep angle and slide it along the top to loosen the case.
I found that trying to do this while inserting the pick at a steep angle caused it to snap and chip the paint.
The easiest technique for me was to clamp the bud vertically, i.e. from top to bottom with just a regular clamp I use when gluing stuff – putting pressure vertically makes a little opening on the curve. Then I inserted the pick and removed it, which made the gap larger. Then I inserted a thin plastic spudger (iFixit Halberd Spudger) to keep the gap open, removed the bud from the clamp, and did a full circle with the pick.
-
-
-
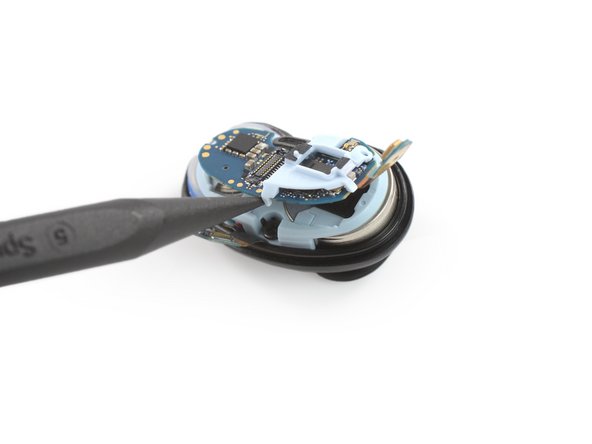
Use the pointed end of a spudger to lift up and disconnect the main connector.
-
-
-
-
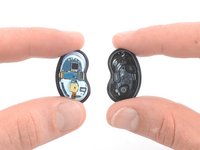
Use a spudger to gently lift up the motherboard.
-
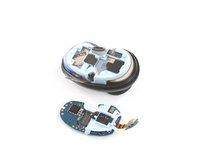
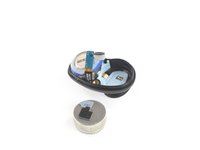
Remove the motherboard.
There is a bit of glue on the side opposite to the main connector, so you insert the spudger at the main connector and then slowly ang gently keep tilting the mainboard. There is a plastic clip on the other side, but it get release exactly with this tilting motion, so don’t worry about it too much – just need to get past that adhesion.
-
-
-
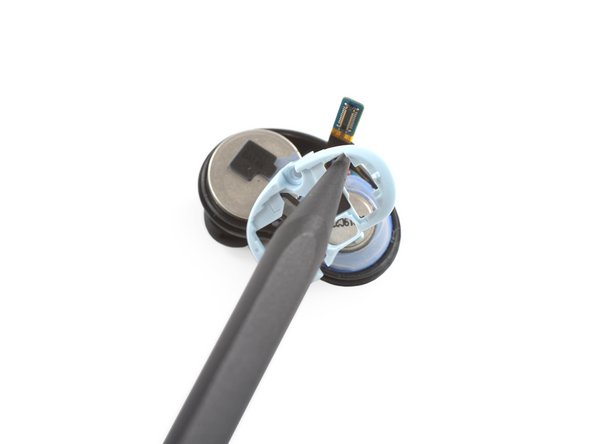
Use a Phillips screwdriver to remove the 3.4 mm-long screw which is securing the plastic frame.
-
-
-
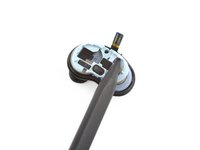
Use a spudger or your fingers to remove the plastic frame by pulling it upwards.
-
-
-
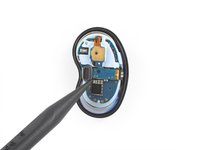
Use the pointed end of a spudger to slightly lift up the speaker driver obscuring the battery.
I don’t think this step is necessary, you can get the battery out and back in without worrying about the driver. When doing the first bud, I tried following this step and, instead of the whole thing being lifted, as in the photos, in my case, only that plastic thing on top god lifted, showing the coil or something like that inside, which I cannot imagine being good.
-
-
-
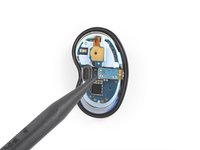
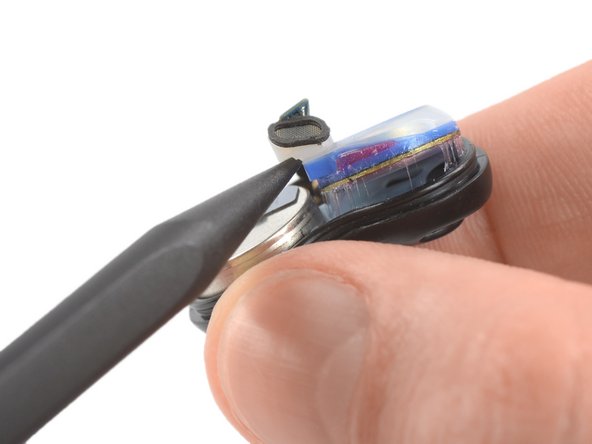
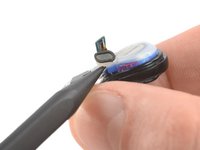
Insert the pointed end of a spudger underneath the battery.
-
Use constant, steady pressure to pry the battery up.
This is the hardest step. The adhesive holding the batter is only at the bottom, not around it. Not sure why but what helped me a lot was inserting the thin knify part of the Halberd Spudger at the side of the battery opposite to the main connector as deep as I could. And then just prying slowly and steadily from the main connector side, as in the photos.
-
-
-
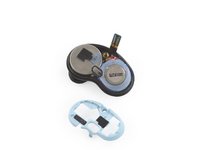
Remove the battery.
The black sticky stuff on the bottom of the battery seems to be just adhesive – you can scrape it off and transfer to the new battery, although I am not sure if this will make any difference.
The black-and-gray stuff on the top of the battery looks like it might actually have some function – padding or maybe transferring heat from the motherboard to the battery? Not sure, but I think it is good to transfer it. When scraping it off, start on the gray side, this way you’ll be able to pull the whole thing off. Do not stick it onto the new battery right away! Instead, wait until you screw the plastic frame in place – at which point you will see where exactly to stick the thing on the battery.
Mine won’t start after this. Does anybody know what I am doing wrong? All seems ok
-


To reassemble your device, follow these instructions in reverse order.
For optimal performance, calibrate your newly installed battery: Charge it to 100% and keep charging it for at least 2 more hours. Then use your device until it shuts off due to low battery. Finally, charge it uninterrupted to 100%.
Take your e-waste to an R2 or e-Stewards certified recycler.
Repair didn’t go as planned? Try some basic troubleshooting, or ask our Answers community for help.
crwdns2935221:0crwdne2935221:0
crwdns2935229:015crwdne2935229:0


crwdns2947412:04crwdne2947412:0
Thanks!!! This works great to clean the felt earwax filter underneath the metal grate as well!
Graxias. Podrías indicarme la referencia de la bateria?
Thanks for the guidance.
It was easy to open the bud and to take it apart.
Just notice that there's no marking for + or - anywhere, to know on what side to put the battery. and the new one that I've got was wider then the plastic circle on the original battery.
I have a question. I can see that there is a battery contact point under the battery but that should be one of the terminals, right? Where is the contact for the other terminal? Is it part of the motherboard that sits on top of the battery?
Before you begin, remove the rubber pads around the charging contacts (that help the bean stay in the ear). I did not and almost damaged mine while getting the battery out in the next steps.
Kirill Elagin - crwdns2934203:0crwdne2934203:0
I had very little luck with the “pick” tool but the ifixit opening tool (the blue one that comes in most kits) did the job nicely. The pick seemed too big to wedge in there and too flimsy to pop them open.
Cmaed - crwdns2934203:0crwdne2934203:0