crwdns2933423:0crwdne2933423:0

Samsung ATIV Book 4 Mouse Pad Replacement

crwdns2942213:0crwdne2942213:0

  1. Samsung ATIV Book 4 Mouse Pad Replacement, Mouse Pad: crwdns2935265:01crwdnd2935265:01crwdnd2935265:03crwdne2935265:0 Samsung ATIV Book 4 Mouse Pad Replacement, Mouse Pad: crwdns2935265:01crwdnd2935265:02crwdnd2935265:03crwdne2935265:0 Samsung ATIV Book 4 Mouse Pad Replacement, Mouse Pad: crwdns2935265:01crwdnd2935265:03crwdnd2935265:03crwdne2935265:0
    • Place the computer upside down.

    • Remove the two rubber pads, by prying up on them.

    • There may be adhesive holding them down.

    • Remove the seven 6.5mm screws on exterior of computer.

    • Remove panel by sliding it down and lifting it away from the computer.

  2. Samsung ATIV Book 4 Mouse Pad Replacement: crwdns2935265:02crwdnd2935265:01crwdnd2935265:01crwdne2935265:0
    • Remove the four 4.4mm screws that are underneath the panel.

    • Remove the two 6.5mm screws that were underneath the rubber pads.

  3. Samsung ATIV Book 4 Mouse Pad Replacement: crwdns2935265:03crwdnd2935265:01crwdnd2935265:02crwdne2935265:0 Samsung ATIV Book 4 Mouse Pad Replacement: crwdns2935265:03crwdnd2935265:02crwdnd2935265:02crwdne2935265:0
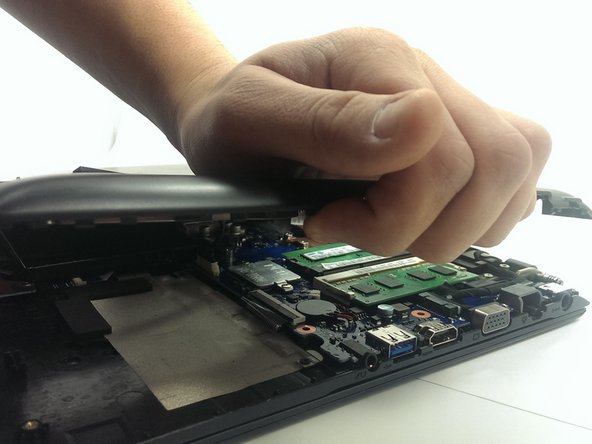
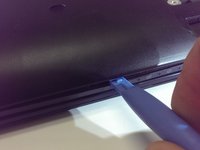
    • Using plastic opening tool, pry plastic panel away from computer.

    • Start prying at one point and work your way around the entire computer until panel is free come computer.

    • Remove the panel from computer once all tabs are broke free.

  4. Samsung ATIV Book 4 Mouse Pad Replacement: crwdns2935265:04crwdnd2935265:01crwdnd2935265:02crwdne2935265:0 Samsung ATIV Book 4 Mouse Pad Replacement: crwdns2935265:04crwdnd2935265:02crwdnd2935265:02crwdne2935265:0
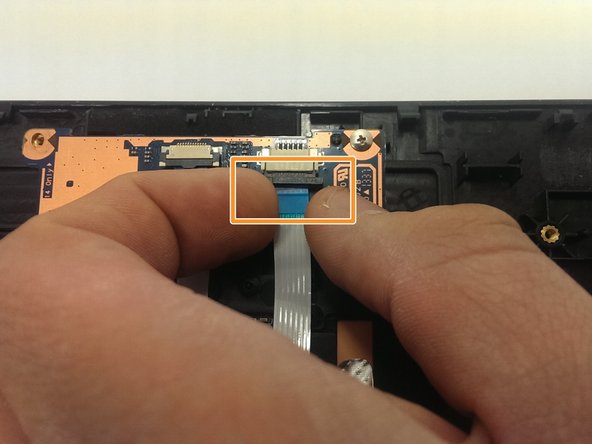
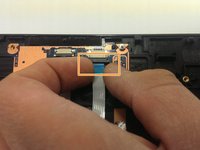
    • Pull this tab outwards, as shown, to release the wire harness.

    • With the tab now pulled out, pull lightly on the blue tape, to remove the harness.

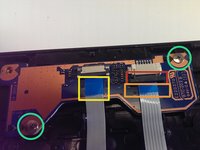
    • Pull on the blue tape to remove wire harness.

    • This harness may require a little more force to remove, but will slide right out.

    • Remove the two 3.5mm screws and remove the defective hardware.

    • This step may be easier if the battery is taken out. Follow the battery replacement guide to do so.

crwdns2915888:0crwdne2915888:0

To reassemble your device, follow these instructions in reverse order.

Daniel

crwdns2935283:003/19/15crwdne2935283:0

342 crwdns2915208:0crwdne2915208:0

crwdns2935297:03crwdne2935297:0

crwdns2915084:0crwdne2915084:0

Michigan Tech, Team 1-7, Lauer Spring 2015 crwdns2935289:0Michigan Tech, Team 1-7, Lauer Spring 2015crwdne2935289:0

MTU-LAUER-S15S1G7

crwdns2931471:02crwdne2931471:0

crwdns2935297:05crwdne2935297:0

crwdns2944067:00crwdne2944067:0

crwdns2917038:0crwdne2917038:0

crwdns2936625:0crwdne2936625:0:

crwdns2936751:024crwdne2936751:0 0

crwdns2936753:07crwdne2936753:0 2

crwdns2936753:030crwdne2936753:0 10

crwdns2942667:0crwdne2942667:0 1,094