crwdns2933423:0crwdne2933423:0
crwdns2947577:0crwdnd2947577:0crwdne2947577:0

Rotor Riot Face Button Replacement

crwdns2942213:0crwdne2942213:0

  1. Rotor Riot Face Button Replacement, Remove the iPhone mount: crwdns2935265:01crwdnd2935265:01crwdnd2935265:03crwdne2935265:0 Rotor Riot Face Button Replacement, Remove the iPhone mount: crwdns2935265:01crwdnd2935265:02crwdnd2935265:03crwdne2935265:0 Rotor Riot Face Button Replacement, Remove the iPhone mount: crwdns2935265:01crwdnd2935265:03crwdnd2935265:03crwdne2935265:0
    • Use your fingers to remove the screw on the back side of the controller securing the iPhone mount.

    • Remove the iPhone mount.

    crwdns2952109:0crwdne2952109:0
  2. Rotor Riot Face Button Replacement, Unscrew the back cover: crwdns2935265:02crwdnd2935265:01crwdnd2935265:01crwdne2935265:0
    • Use a T6 Torx screwdriver to remove the eight 9.2 mm-long screws securing the back cover.

    • Don't try to remove the back cover all the way yet! It's still connected to the mainboard.

    crwdns2952109:0crwdne2952109:0
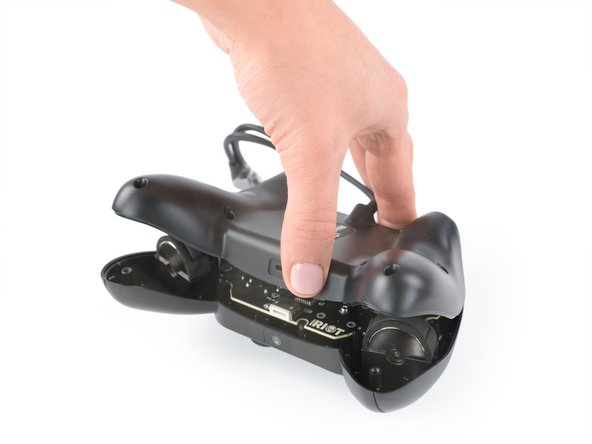
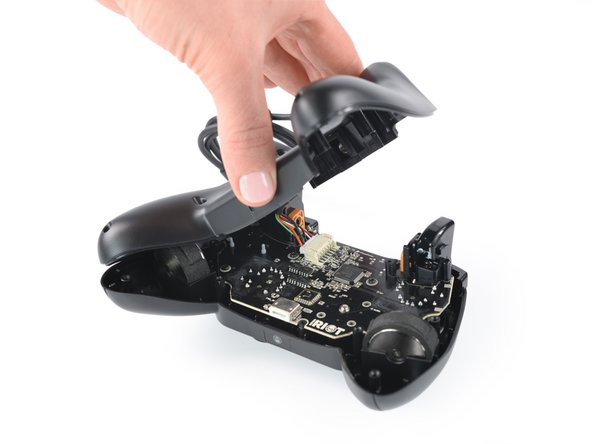
  3. Rotor Riot Face Button Replacement, Swing open the back cover: crwdns2935265:03crwdnd2935265:01crwdnd2935265:03crwdne2935265:0 Rotor Riot Face Button Replacement, Swing open the back cover: crwdns2935265:03crwdnd2935265:02crwdnd2935265:03crwdne2935265:0 Rotor Riot Face Button Replacement, Swing open the back cover: crwdns2935265:03crwdnd2935265:03crwdnd2935265:03crwdne2935265:0
    • Lift up the back cover of the controller.

    • Lift the back cover to a 45 degree angle and place it next to the controller.

    • Don't strain the interconnect cable during this procedure.

    crwdns2952109:0crwdne2952109:0
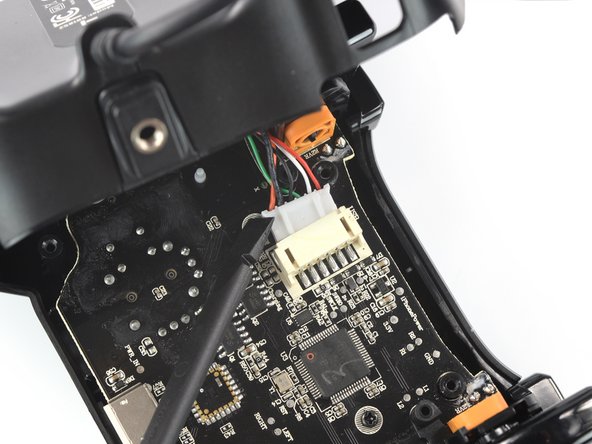
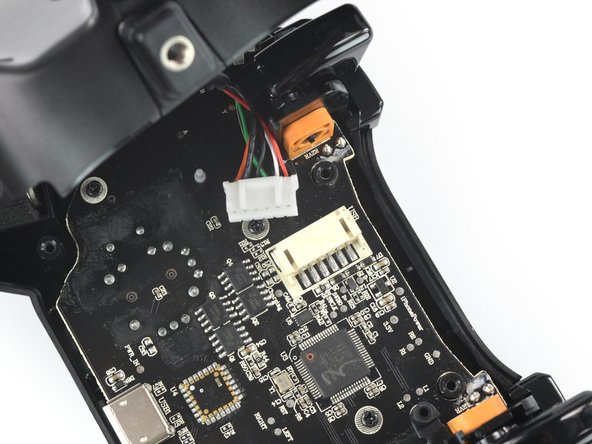
  4. Rotor Riot Face Button Replacement, Disconnect the phone connector cable: crwdns2935265:04crwdnd2935265:01crwdnd2935265:03crwdne2935265:0 Rotor Riot Face Button Replacement, Disconnect the phone connector cable: crwdns2935265:04crwdnd2935265:02crwdnd2935265:03crwdne2935265:0 Rotor Riot Face Button Replacement, Disconnect the phone connector cable: crwdns2935265:04crwdnd2935265:03crwdnd2935265:03crwdne2935265:0
    • Use a spudger to disconnect the phone connector cable from the mainboard.

    crwdns2952109:0crwdne2952109:0
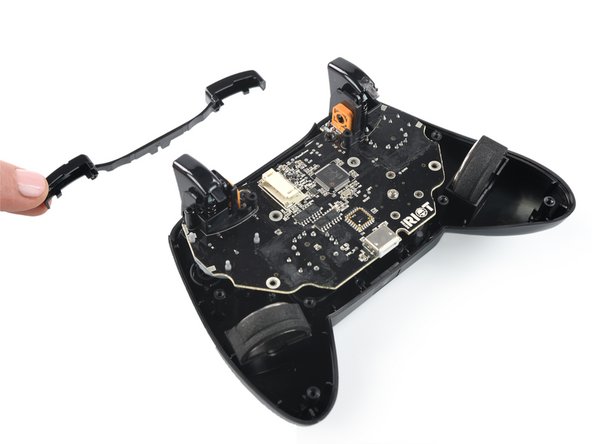
  5. Rotor Riot Face Button Replacement, Remove the back cover: crwdns2935265:05crwdnd2935265:01crwdnd2935265:01crwdne2935265:0
    • Remove the back cover.

    crwdns2952109:0crwdne2952109:0
  6. Rotor Riot Face Button Replacement, Remove the shoulder buttons: crwdns2935265:06crwdnd2935265:01crwdnd2935265:02crwdne2935265:0 Rotor Riot Face Button Replacement, Remove the shoulder buttons: crwdns2935265:06crwdnd2935265:02crwdnd2935265:02crwdne2935265:0
    • Remove the shoulder buttons by lifting them out of the case.

    crwdns2952109:0crwdne2952109:0
  7. Rotor Riot Face Button Replacement, Unscrew the mainboard: crwdns2935265:07crwdnd2935265:01crwdnd2935265:01crwdne2935265:0
    • Use a Phillips screwdriver to remove the four 7.0 mm-long screws securing the mainboard.

    crwdns2952109:0crwdne2952109:0
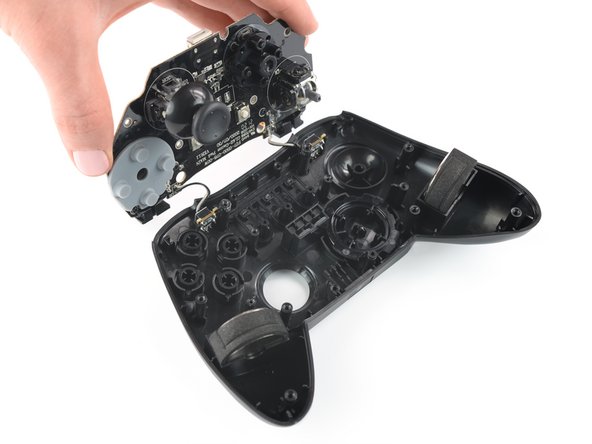
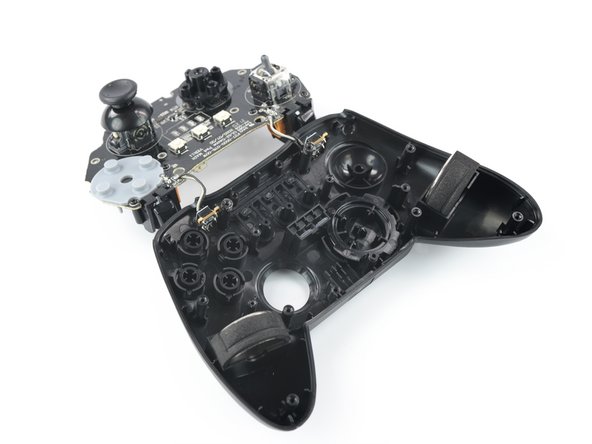
  8. Rotor Riot Face Button Replacement, Flip over the mainboard: crwdns2935265:08crwdnd2935265:01crwdnd2935265:03crwdne2935265:0 Rotor Riot Face Button Replacement, Flip over the mainboard: crwdns2935265:08crwdnd2935265:02crwdnd2935265:03crwdne2935265:0 Rotor Riot Face Button Replacement, Flip over the mainboard: crwdns2935265:08crwdnd2935265:03crwdnd2935265:03crwdne2935265:0
    • Flip over the mainboard and place it above the controller housing.

    • Avoid tensioning the trigger button cables during this procedure and don't try to remove the mainboard all the way yet! It is still connected to the controller housing.

    crwdns2952109:0crwdne2952109:0
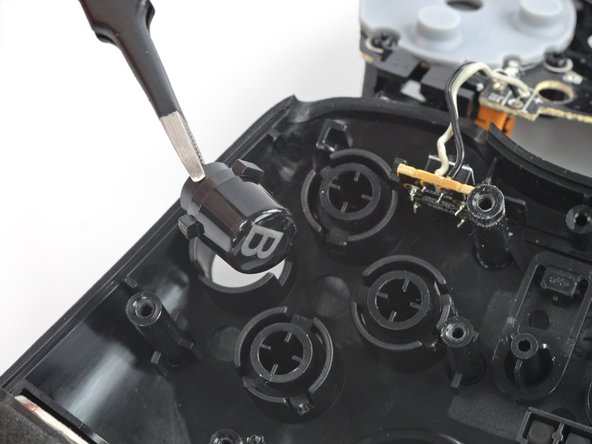
  9. Rotor Riot Face Button Replacement, Remove the face buttons: crwdns2935265:09crwdnd2935265:01crwdnd2935265:02crwdne2935265:0 Rotor Riot Face Button Replacement, Remove the face buttons: crwdns2935265:09crwdnd2935265:02crwdnd2935265:02crwdne2935265:0
    crwdns2935267:0crwdne2935267:0
    Tweezers
    $4.99
    • Use a pair of tweezers to remove the face buttons from the housing.

    • The alignment pegs on each button are designed to prevent incorrect installation. Make sure your new buttons fit properly in the controller case.

    crwdns2952109:0crwdne2952109:0
crwdns2915888:0crwdne2915888:0

To reassemble your device, follow these instructions in reverse order.

Take your e-waste to an R2 or e-Stewards certified recycler.

Repair didn’t go as planned? Try some basic troubleshooting, or ask our Answers community for help.


Adriana Zwink

crwdns2935283:012/18/19crwdne2935283:0

66 798 crwdns2915208:0crwdne2915208:0

crwdns2935297:0167crwdne2935297:0

crwdns2935287:0crwdne2935287:0

iFixit crwdns2935289:0iFixitcrwdne2935289:0

Staff

crwdns2931471:0123crwdne2931471:0

crwdns2935297:025 707crwdne2935297:0

crwdns2947412:00crwdne2947412:0

crwdns2917038:0crwdne2917038:0

crwdns2936625:0crwdne2936625:0:

crwdns2936751:024crwdne2936751:0 2

crwdns2936753:07crwdne2936753:0 9

crwdns2936753:030crwdne2936753:0 48

crwdns2942667:0crwdne2942667:0 346