crwdns2915892:0crwdne2915892:0
Use this guide to replace the complete Retina Display assembly on your Retina MacBook 2017, including the top shell and Apple logo.
crwdns2942213:0crwdne2942213:0
-
-
Power on your Mac and launch Terminal.
-
Copy and paste the following command (or type it exactly) into Terminal:
-
sudo nvram AutoBoot=%00
-
Press [return]. If prompted, enter your administrator password and press [return] again. Note: Your return key may also be labeled ⏎ or "enter."
-
sudo nvram AutoBoot=%03
-
-
crwdns2935267:0crwdne2935267:0Magnetic Project Mat$19.95
-
Remove the following eight screws securing the lower case:
-
Two 1.8 mm P5 Pentalobe screws
-
Four 2.9 mm P5 Pentalobe screws
-
Two 6.1 mm P5 Pentalobe screws
-
-
-
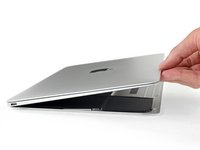
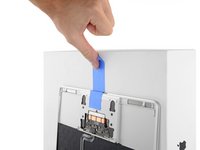
Wedge your fingers between the upper case and the lower case, starting from the rear of the MacBook between the hinges.
-
Keeping a firm grip, lift steadily until the lower case separates slightly from the upper case.
-
-
-
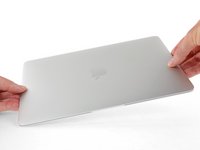
While holding the lower case in place, carefully flip the MacBook over so the Apple logo faces up.
-
-
-
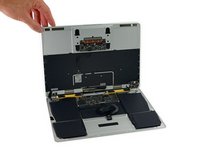
Lift the upper case and display together from the front edge and raise it to about a 45˚ angle.
-
-
-
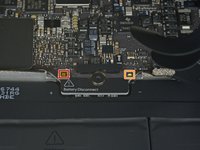
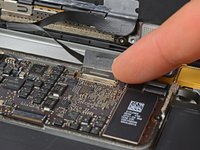
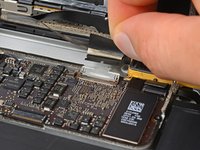
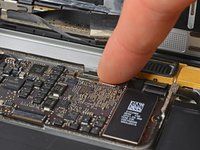
Use the flat end of a spudger to press and hold the small gold 'battery disconnect' button.
-
If the power LED is lit up, continue holding the button until the LED goes dark, and then release. This may take up to 10 seconds.
-
If the LED does not light, release the button after 5-10 seconds. Press and hold it again for 5-10 seconds, and release. Finally, press and hold it a third time for 5-10 seconds, and release.
-
-
-
Close the MacBook and carefully flip it upside-down.
-
-
-
Lifting from the front edge, open the lower case to an angle of about 45°.
-
-
crwdns2935267:0crwdne2935267:0Tweezers$4.99
-
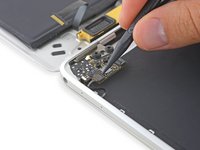
Use tweezers to peel back the tape covering the trackpad cable ZIF connector.
-
-
-
Use a spudger to carefully flip up the retaining flap on the trackpad cable ZIF connector.
-
-
-
Disconnect the trackpad ribbon cable from the trackpad by pulling it gently through its slot in the frame.
-
-
-
Carefully close the MacBook and flip it over once again, so that the Apple logo faces up.
-
Lifting from the front edge, raise the upper case/display assembly to about a 90° angle, and prop it up against something sturdy so you don't have to hold it.
-
Add a piece of tape near the track pad to secure the upper case and prevent accidental movement.
-
-
-
-
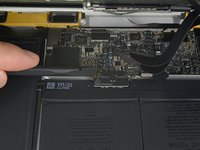
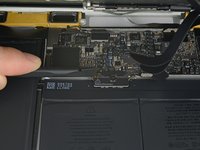
Remove the single 2.9 mm T5 Torx screw securing the battery connector to the logic board.
-
-
crwdns2935267:0crwdne2935267:0Battery Blocker$3.99
-
As an added precaution, you may physically disconnect the battery by inserting a battery isolation pick between the logic board and the battery connector.
-
-
-
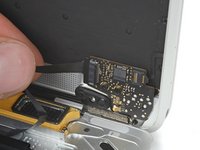
Remove the two screws securing the USB-C port cable bracket:
-
1.1 mm Phillips #00 screw
-
3.5 mm T5 Torx screw
-
-
-
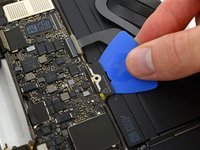
Use the flat end of a spudger to disconnect the USB-C port cable bracket by prying it straight up from the logic board.
-
-
-
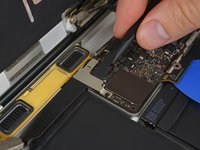
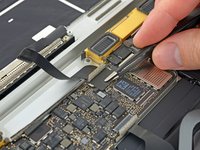
Use a spudger to flip open the retaining flap on the audio jack board cable ZIF connector.
-
-
-
Disconnect the audio jack board ribbon cable by pulling it straight back out of the ZIF connector.
-
-
crwdns2935267:0crwdne2935267:0Tweezers$4.99
-
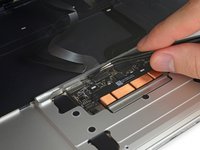
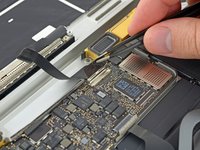
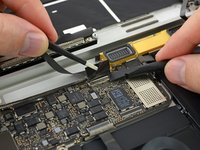
Use tweezers to peel back the tape covering the display cable connector.
-
-
-
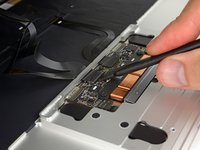
If so, use the flat end of a spudger to hold down the retaining flap while peeling the tape away with the tweezers.
-
-
-
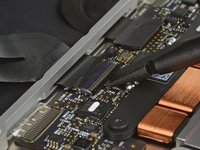
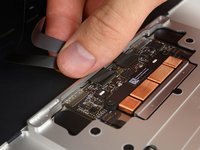
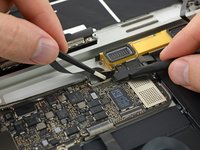
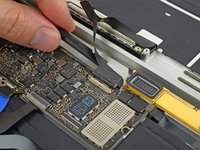
Use the flat end of a spudger to flip open the retaining flap on the display cable connector.
-
Try to keep it clear of the tape, or it may re-adhere and make cable removal difficult.
-
-
crwdns2935267:0crwdne2935267:0iOpener$14.99
-
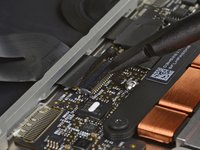
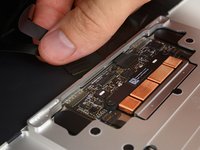
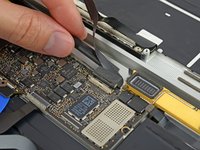
Carefully slide the flat end of a spudger underneath the display cable to separate the adhesive holding it to the lower case.
-
-
-
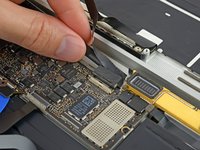
Hold the retaining flap open.
-
Disconnect the display cable by gently pulling it straight out of its connector.
-
-
-
Separate the upper case assembly from the lower case assembly.
-
-
-
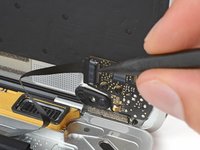
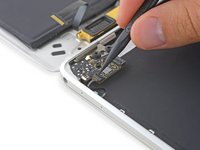
Use a spudger to flip open the ZIF connector retaining flap for the dual microphone assembly ribbon cable.
-
-
-
Disconnect the microphone assembly ribbon cable by pulling it straight out of its connector.
-
-
-
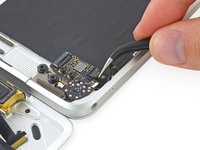
Remove the two 3.2 mm T5 Torx screws securing the audio jack board to the case.
-
-
-
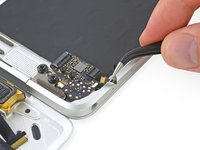
Remove two 2.5 mm Phillips #00 screws securing the USB-C port.
-
-
crwdns2935267:0crwdne2935267:0Tweezers$4.99
-
Use tweezers to lift the USB-C port just over the hinge screws.
-
Slide the port out and up over the display hinge to remove it.
-
-
-
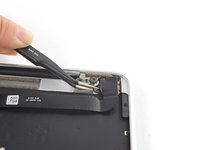
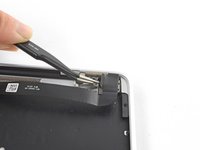
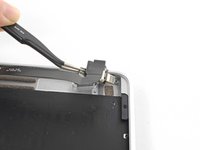
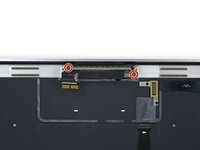
Remove the two 3.3 mm T5 Torx screws securing the display cable assembly.
-
-
-
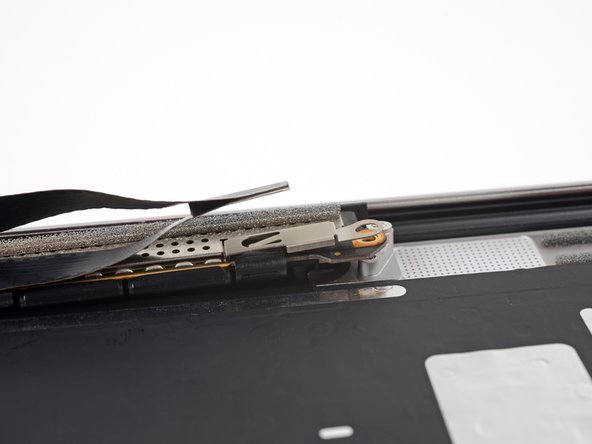
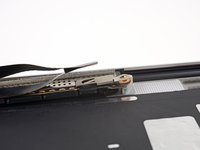
Fully open the display.
-
Set the MacBook down on its right edge with the display facing away from you, as shown.
-
-
-
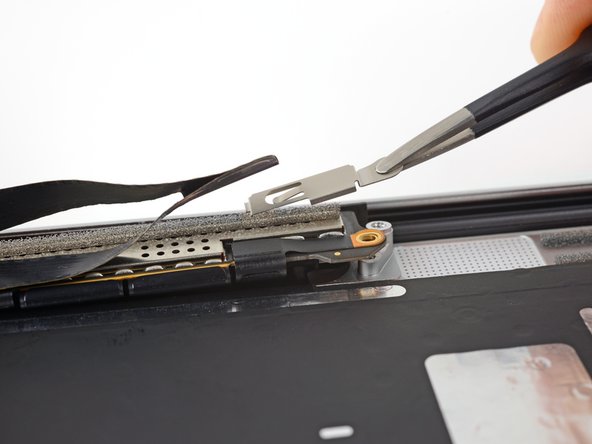
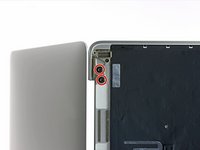
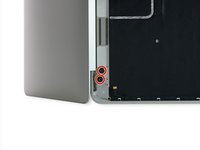
Remove the four 4.8 mm T8 Torx screws securing the display hinges.
-
-
-
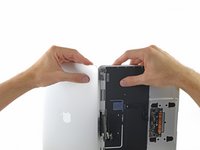
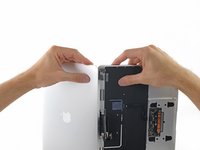
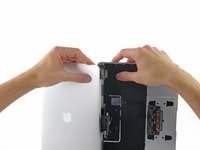
Holding the display assembly with one hand and the upper case with the other, push them together slightly to move the hinges out of their recesses in the the upper case.
-
Push the upper case forward while pulling back gently on the display.
-
Once the two display hinges have cleared the upper case, remove the display and set it aside.
-


To reassemble your device, follow these instructions in reverse order.
crwdns2935221:0crwdne2935221:0
crwdns2935229:017crwdne2935229:0

crwdns2935287:0crwdne2935287:0

Tobias Isakeit - Repairability Engineer crwdns2935289:0Tobias Isakeit - Repairability Engineercrwdne2935289:0
Business
crwdns2934841:01crwdne2934841:0
crwdns2935297:01,145crwdne2935297:0
crwdns2947412:04crwdne2947412:0
Does anyone know the cross year compatibility of these screens. Some vendors list them as 2017 specific, some as 2016-17 and some as 2015-17?
I have a 2017 macbook upgraded to i7 etc and i love it, today i fitted an adhesive cover top and bottom but tried to trim excess where I hadn’t done a good fit with a craft knife AND I appear to have sliced into a cable joining top to bottom, it appears to be 1 of 4 around the centre of the mac, been quoted £600 to replace complete top ,is this necessary? , all advice gratefully appreciated.
This doesn't seem to be the 2017 a1708 model.
No, it's the 12" MacBook, A1534. The A1708 is the 13" MacBook Pro.
rogerh -