crwdns2915892:0crwdne2915892:0
You need to open or replace your Dell XPS 13 9380 back panel, this guide is for you!
crwdns2942213:0crwdne2942213:0
-
-
Use a Torx T5 driver to unscrew the eight screws securing the back panel.
-
Use a spudger to pry up and loosen the back panel.
-
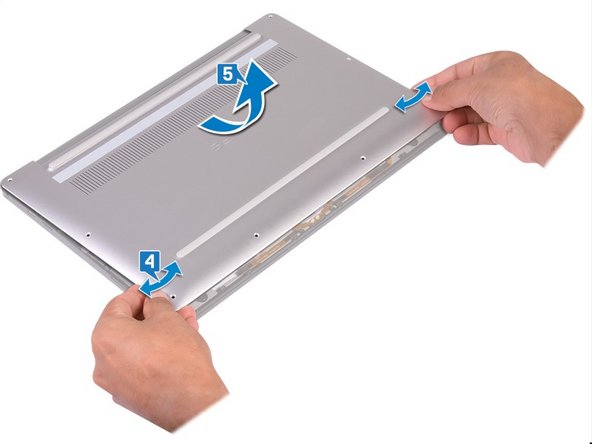
Lift the back panel up slightly from the non-hinged edge.
-
Pull the back panel away from the hinged edge, wiggling it back and forth to loosen the clips.
-
When the back panel clips are free, remove the back panel.
-
-
To reassemble your device, follow the instructions in reverse order.
To reassemble your device, follow the instructions in reverse order.
crwdns2935221:0crwdne2935221:0
crwdns2935227:0crwdne2935227:0
crwdns2934873:0crwdne2934873:0
100%
crwdns2934885:0crwdne2934885:0 crwdns2934875:0crwdne2934875:0
crwdns2934877:0crwdne2934877:0 ›
crwdns2947410:01crwdne2947410:0
The torx bit used is a T5, the screw is an m2x3 — if you’re buying a kit you want the T5 torx bit


