crwdns2915892:0crwdne2915892:0
In these devices, the fluid flow is controlled by a block consisting of four solenoid valves. If only one solenoid coil or the valve interior is defective, it can be replaced individually. However, if the valve body is defective, often due to a crack, the entire block must be replaced. When purchasing the replacement part, pay attention to the exact designation, as there are different versions.
The instructions can also help with devices from Philips and Gaggia—the devices are all from the same manufacturer and are very similar in design.
crwdns2942213:0crwdne2942213:0
-
-
Remove all attachments such as the water tank, brewing unit, bean compartment lid, and drip tray. Remove all coffee beans.
-
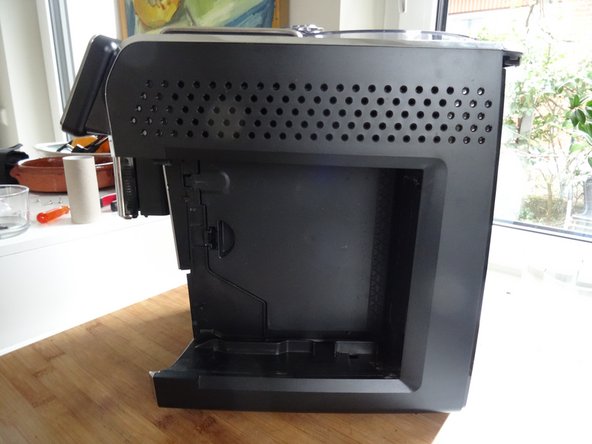
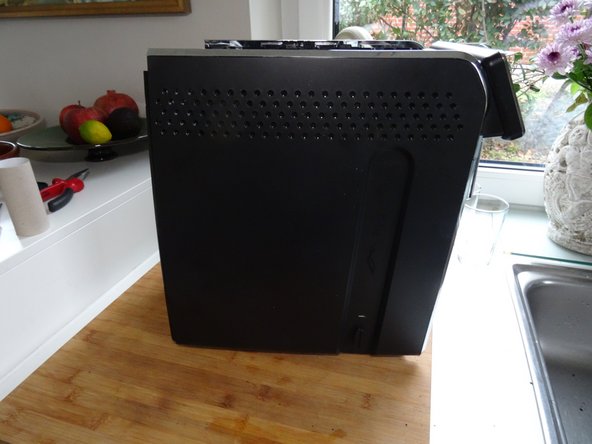
Turn the machine over so that the back is facing you. Remove the two Torx T10 screws at the bottom. Pull the back out slightly at the bottom and lift it down.
-
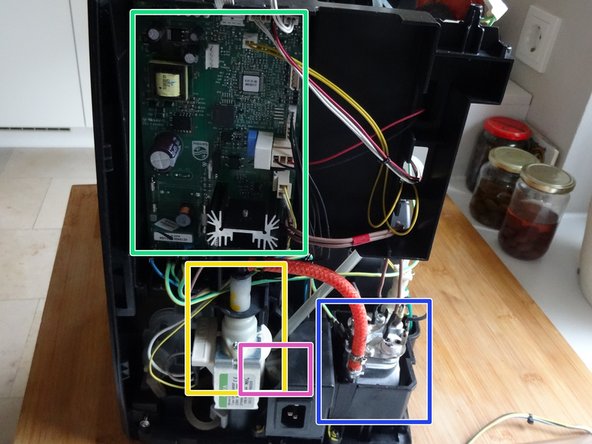
Important components are immediately visible:
-
The main circuit board
-
The pump
-
The flow meter
-
The boiler
-
-
-
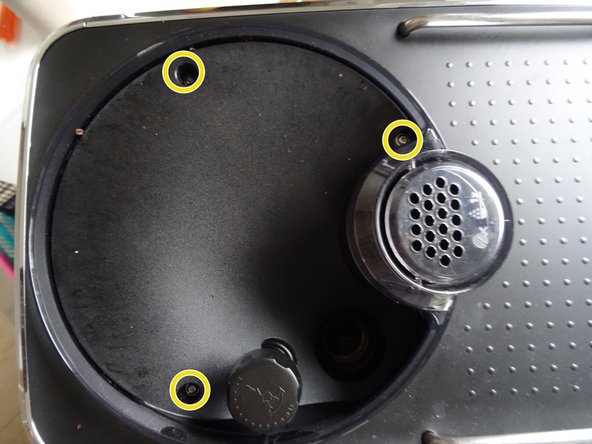
Unscrew the Torx T10 screw on the finger guard in the coffee bean compartment.
-
Lift out the finger guard.
-
Unscrew the three Torx T10 screws in the coffee bean compartment.
-
-
-
-
Lift the upper cover slightly at the rear edge.
-
Then lift the cover completely off.
-
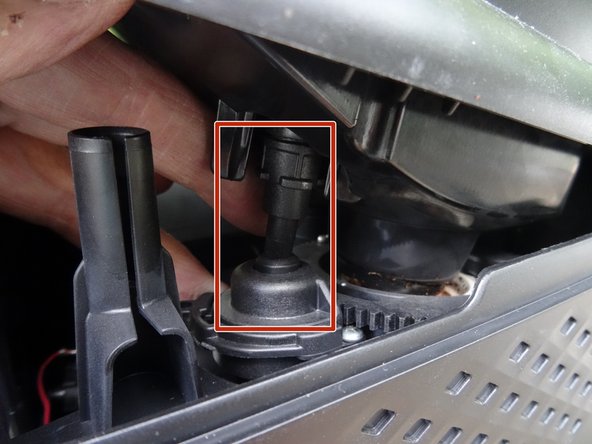
When reassembling, make sure that the grinder adjustment is correctly positioned.
-
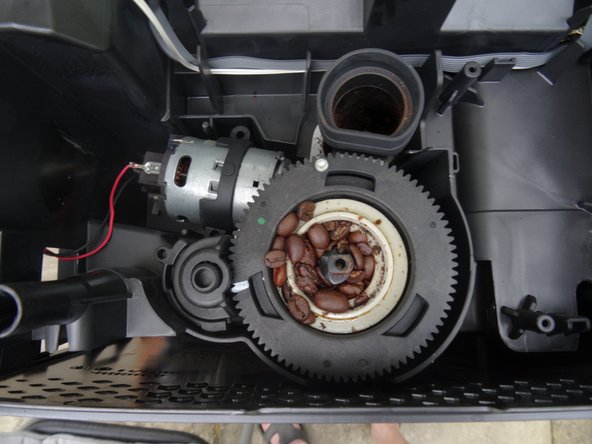
Figure 3 shows the grinding mechanism, which can now easily be removed.
-
-
-
Unscrew the two Torx T10 screws at the bottom of the front.
-
Slide the right side panel back slightly and remove it.
-
Slide the left side panel back slightly and remove it.
-
-
-
Hier weitere wichtige Bauteile:
-
The boiler
-
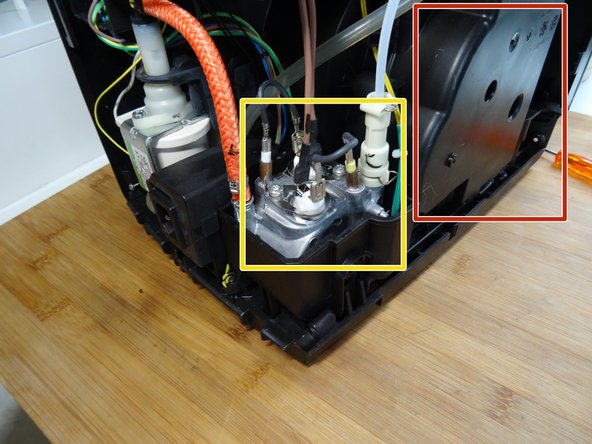
Valve block, consisting of four solenoid valves
-
Grinder
-
Drive
-
-
-
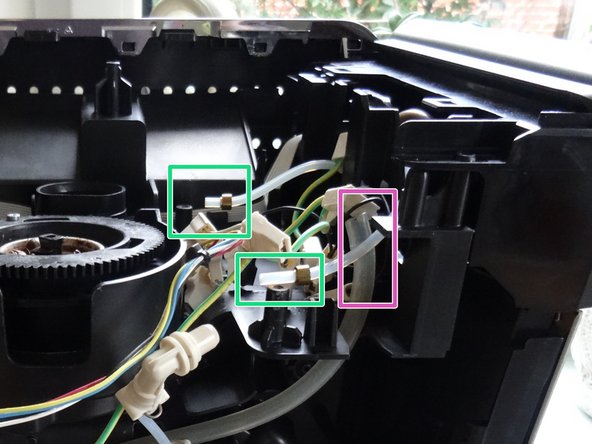
Remove the three Torx T10 screws that secure the valve block. Lift the valve block out slightly.
-
All cable bundles are connected to the new valve block. Simply follow the two cable bundles to the main circuit board and disconnect them there. Detach the bundles. They have not been removed in the third image, but it is easier without them.
-
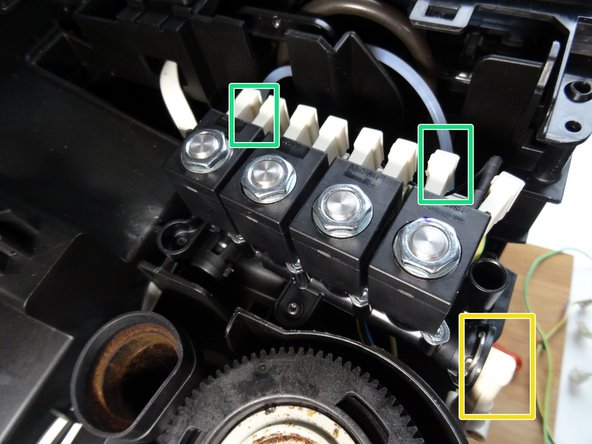
Pull out the large clamp on the inlet of the pump and remove the white plastic inlet. Pay attention to the sealing ring inside. Get a new one or use it for the new valve block.
-
Remove the small clips on the two pressure hoses and pull off the two pressure hoses. Pay attention to the two sealing rings inside each one. Get four new ones (this is better) or reuse them for the new valve block.
-
Slide off the white silicone tube.
-
The valve block is free, you can remove it.
-


Follow the steps in reverse order to reassemble your device.
Follow the steps in reverse order to reassemble your device.
crwdns2934873:0crwdne2934873:0
100%

crwdns2934883:0oldturkey03crwdne2934883:0 crwdns2934875:0crwdne2934875:0
crwdns2934877:0crwdne2934877:0 ›
crwdns2915084:0crwdne2915084:0

Repair is War on Entropy crwdns2935289:0Repair is War on Entropycrwdne2935289:0
Community
crwdns2931471:031crwdne2931471:0
crwdns2935297:01,552crwdne2935297:0