crwdns2915892:0crwdne2915892:0
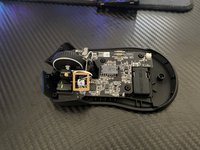
Have you ever bought a new Razer Mamba mouse due to the scroll wheel not working or acting clunky on an old mouse? Well, this guide will help people save money by helping them fix their clunky scroll wheel without having to replace their entire mouse. All that is needed to fix your mouse is a couple of tools and hydrogen peroxide. This guide will be fairly simple but will leave your mouse working brand new without having to buy a new one.
crwdns2942213:0crwdne2942213:0
-
-
Remove the single screw using a Phillips #000 screwdriver.
-
Peel back the sticker on the mouse to reveal the two screws behind it.
-
Remove the two screws using a Phillips #000 screwdriver.
-
-
-
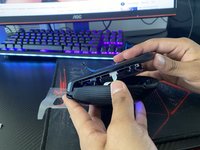
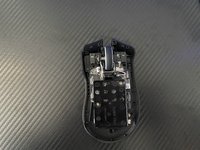
Use an iFixit opening tool to pry open your mouse.
-
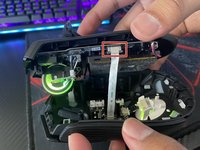
Detach the ribbon cable by squeezing the two grey latches and pulling it out gently.
Don't squeeze the gray latch - lift it up, and it will move away from the connector letting the cable come out easily, and insert easily at the end.
-
-
-
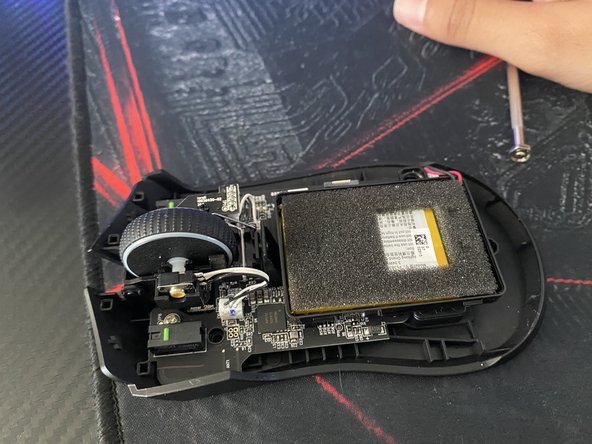
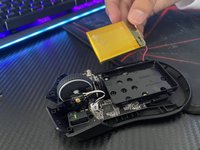
Use your hands to lift the battery out of the mouse.
-
Use your fingers to detach the cable from the mouse.
-
-
-
-
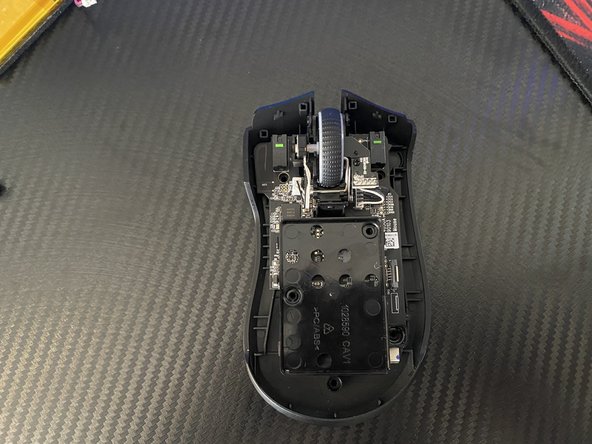
Unscrew the five 1.4 mm screws using the Phillips #000 screwdriver.
-
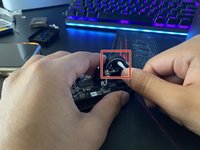
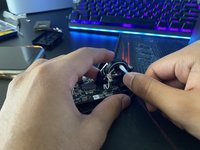
Detach the wire that is connected to the scroll wheel.
Could not detach this connector at all, but had no problem leaving it in.
These five screws are also Phillips Head 0, not 000
-
-
-
Dip a cotton swab in hydrogen peroxide.
-
Clean the scroll wheel by dabbing the cotton swab around it.
-
-
-
Reinsert the wire back into its socket.
-
Insert and tighten the five 1.4 mm screws with the Phillips #000 screwdriver.
-
-
-
Connect the battery wire back into the latch.
-
Put the battery back into the battery holder.
-
-
-
Connect the wire back into the latch.
-
Screw back the three screws using a Phillips #000 screwdriver.
-
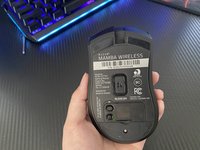
Replace the sticker that was covering the top two screws.
My Mamba Elite has had a dodgy scroll wheel for a few months and it's barely a year old. Do you know if Isopropyl Alochol would work in place of hydrogen peroxide to clean the wheel?
Pressing on the front of the base allows you to click in the base and the top shell more easily - spent 10 minutes struggling to force it together, went easily once I put pressure from the front.
This guide worked beautifully! Mouse scroll wheel is back to behaving as it should. Added comments at most steps clarifying some aspects to make it easier for others.
-


crwdns2935221:0crwdne2935221:0
crwdns2935229:07crwdne2935229:0
crwdns2915084:0crwdne2915084:0

CSU Los Angeles, Team 4-99, Briggs Spring 2022 crwdns2935289:0CSU Los Angeles, Team 4-99, Briggs Spring 2022crwdne2935289:0
CSULA-BRIGGS-S22S4G99
crwdns2934841:01crwdne2934841:0
crwdns2935297:02crwdne2935297:0
crwdns2947412:03crwdne2947412:0
Listen screw driver is incorrect. Poor disassembly instructions that can easily lead to further irreparable damage to the mouse. Incredibly disappointing
Cry me a river! If the screwdriver is incorrect i.e., doesn't fit into the screw correctly, don't attempt to make it work but instead try a different sized screwdriver. Wow! What a concept! Quit with the dramatics and just be glad that Kevin took the time to make this guide.
Thank you for the teardown guide.
For anyone attempting this I have a couple notes to help you.
1. Unless you need to clean under the battery you DO NOT need to remove the battery and unscrew the 5 #000 Philips screws. As stated in this guide. This step is pointless and there is no need to take the time doing this. The screw seated to the left of the scroll wheel housing is crazy difficult to put back - unless you have tweezers. The scroll wheel can be cleaned without this step!
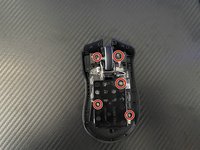
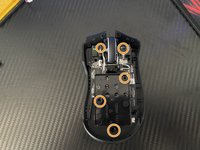
2. The 3 screws securing the mouse housing/body under the stickers are NOT #000 Phillips, they are T6 Star heads.
I completed this fix, but my scroll wheel still glitches and has a ton of jitter. I'm convinced this is a hardware/design issue.
External three screws are all T6 screws. You also have to remove the bottom pad, and the top sticker has two layers - make sure you peel the main sticker and not the surface clear sticker.
A S - crwdns2934203:0crwdne2934203:0