crwdns2915892:0crwdne2915892:0
This guide will take you through the steps of removing the touchscreen.
crwdns2942213:0crwdne2942213:0
-
-
Locate the bay door for the battery on the left side of the laptop.
-
-
-
Slide the latch to the right and then down to unlock it.
-
Pull out the battery.
-
-
-
Remove the four hinge screws from the back of the computer.
-
-
-
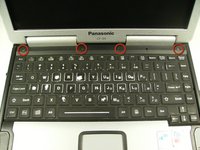
Open the laptop and remove the four indicated screws with a Phillips size 0 screwdriver.
-
Pry off the plastic strip which was previously held in place by the screws.
-
-
-
Remove the four hinge screws to allow the hinges to rotate up and move.
-
-
-
-
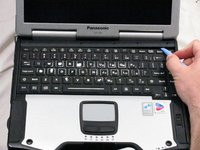
Remove 16 screws from the top of the closed laptop.
-
12 Phillips size 1 screws
-
2 Phillips size 0 screws
-
2 Torx size 6 screws (T6)
I found that the Torx screw on my model to be T8.
Is the touchscreen & the LCD 1 piece? or are they separate?
-
-
-
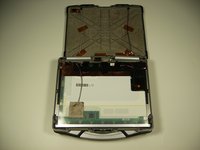
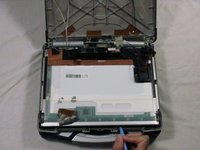
Gently break the adhesive seal between the front and rear display cases with a plastic opening tool.
-
-
-
Pull the top halve of the casing up revealing the inside of the screen
-
-
-
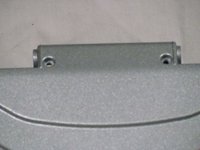
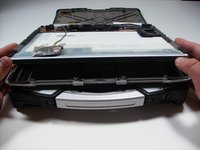
The top half of the case can be removed by sliding the tabs out from under the hinges.
-
This makes unplugging the screen wiring much easier
-
-
-
There are 4 wires that need to be unplugged to remove the screen.
-
-
-
For the first wire, peel back the silver cover tape to reveal the connection.
-
-
-
Pull the wiring away from the connection to release it.
-
-
-
Remove the 3 strips of black tape as shown to reveal connections 2 and 3.
-
Pull the wiring for each away from the connections to remove.
-
-
-
The 4th connection is already visible.
-
-
-
Using a plastic opening tool, lift the screen as shown from the case and pull free.
-


To reassemble your device, follow these instructions in reverse order.
To reassemble your device, follow these instructions in reverse order.
crwdns2935221:0crwdne2935221:0
crwdns2935229:05crwdne2935229:0
crwdns2915084:0crwdne2915084:0

Cal Poly, Team 27-93, Amido Spring 2010 crwdns2935289:0Cal Poly, Team 27-93, Amido Spring 2010crwdne2935289:0
CPSU-AMIDO-S10S27G93
crwdns2931471:04crwdne2931471:0
crwdns2935297:026crwdne2935297:0
crwdns2947410:01crwdne2947410:0
This guide is good for replacing the LCD screen, but it is not complete for the touchscreen panel, which requires some more delicate and precise steps. I think the title of the guide needs to be changed.
Thanks