crwdns2915892:0crwdne2915892:0
Mit dieser Anleitung kannst du den Akku deines OnePlus 7 Pro tauschen.
crwdns2942213:0crwdne2942213:0
-
crwdns2931653:01crwdne2931653:0 OnePlus 7 Pro Akkuabdeckung
crwdns2944590:01crwdnd2944590:08crwdnd2944590:0crwdnd2944590:0crwdne2944590:0
-
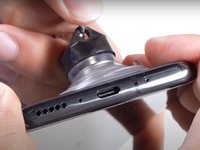
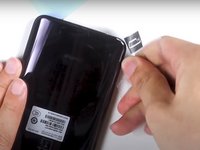
Drücke das SIM-Auswurfwerkzeug (oder eine aufgebogene Büroklammer) vorsichtig in das kleine Loch auf der linken Seite der Oberkante.
-
Drücke das SIM-Auswurfwerkzeug hinein, um den SIM-Einschub auszuwerfen.
-
Enterferne den SIM-Einschub vom Gerät.
-
-
-
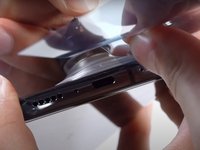
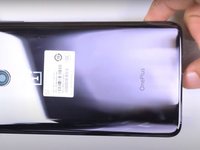
Nutze einen Heißluftfön, um den Kleber an den Kanten der Rückseite aufzuweichen, wo die Rückabdeckung mit dm restlichen Gerät verbunden ist.
-
-
-
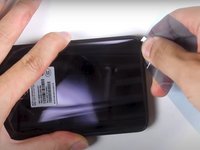
Platziere den Saugheber an der Rückseite so weit unten wie möglich. Hebe den Saugheber mit einer starken, gleichmäßigen Kraft an, bis ein kleiner Spalt zwischen Rückseite und Handy entsteht.
-
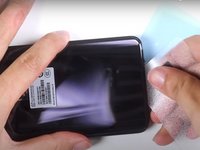
Setze einen Jimmy, ein Plektrum oder eine Kunststoffkarte unter die Kante der Rückabdeckung ein.
-
-
-
Benutze eineKunststoffkarte oder das Jimmy-Werkzeug, um den Kleber rund um das Handy zu durchtrennen.
-
-
-
-
Entferne die Rückabdeckung des Smartphones.
You should wait with removing the remaining adhesive until after step 7.
If you want to re-use your old battery cover you can expect it to take additional 30-60 minutes of your time.
-
-
-
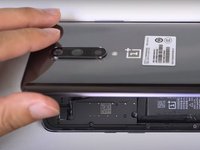
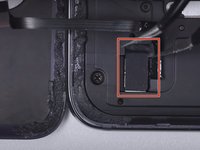
Entferne das schwarze Stück Klebeband, das das Flachbandkabel des Laser-Autofokus und des Blitzes bedeckt.
-
Hebe die Abdeckung über Laser-Autofokus und Blitz mit einer Pinzette ab und entferne sie.
-
-
-
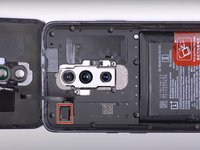
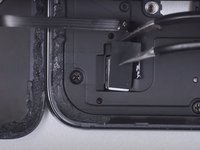
Benutze das flache Ende eines Spudgers, um das Flachbandkabel des Laser-Autofokus und des Blitzes abzutrennen.
-
-
-
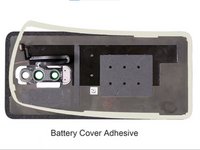
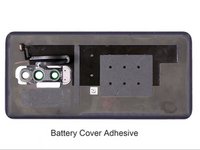
Entferne die Schutzfolie von der neuen Akkuabdeckung
Is anyone able to source this? It's not in the parts list, I can't find it.
It is on Aliexpress. Type Back Cover Adhesive or Back Cover Glue for OnePlus 7 Pro and select the one that goes to Aliexpress. It is $1.89 and $3.89 shipping. Shipping time is usually two weeks.
Why is this listed as a step? Just use the old cover after removing the remaining adhesive.
-
-
-
Entferne alle 14 Schrauben der oberen Platte.
-
Sind alle Schrauben entfernt, kannst du mit Platte mit dem "Spudger Tool" abnehmen.
-
-
-
Entferne den Stecker des Akkus mit dem "Spudger Tool"
-
-
-
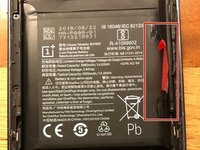
Greife die Lasche und ziehe den Akku mit gleichmäßiger Kraft heraus.
-
-
-
Nach Einsatz des neuen Akkus und Zusammenbau empfiehlt es sich, den Akku ohne Unterbrechungen zunächst auf 100% und danach noch zwei weitere Stunden zu laden. Daraufhin, einmal komplett zu entladen und wieder ohne Unterbrechung auf 100% zu laden.
-


Arbeite die Schritte in umgekehrter Reihenfolge ab, um dein Gerät wieder zusammenzubauen.
Arbeite die Schritte in umgekehrter Reihenfolge ab, um dein Gerät wieder zusammenzubauen.
crwdns2935221:0crwdne2935221:0
crwdns2935229:020crwdne2935229:0
crwdns2947412:09crwdne2947412:0
It didnt mention how to open the back cover in the first place? Which is the hardest part and the one that require the most skills and specialized tools.
The article links another article talking about the cover. Both do not cover how to apply the new part, specifically, how to install the new battery in this case. I think vitally important. :) @fabianjung
DO NOT use the jimmy tool or anything metal to scrape the glue off!!! You will scratch and remove the paint on the back cover!
5/10 as a guide IMHO.
Why isn't a replacement adhesive gasket part of the requirements (in addition to the replacement battery)??!
The seal will most likely be severely compromised after being opened.
Update: 7/10. Taking the back off went easily/smoothly after lying on a 3D printer bed (@80C) for about 10mins, then using a hot air gun (@90C) and a metal spudger and plastic picks to gently break the adhesive holding the back to the body.
No issue removing the inside cover and pulling out the battery.
Having a replacement adhesive gasket/tape is a good idea when re-assembling though. The original guide didn't mentioned this.
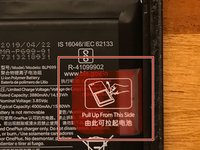
The original guide is also missing the case where the new battery comes with its own pull tab wrap (the wrap with the black dots underneath). I was googling a lot but I couldn't find an answer so I just went ahead. In the end you have to remove that plastic wrap left behind in the guide. The phone has some black patches with glue that should stay once you remove this pull tab wrap. Then just place the new battery in the slot and presto! It was darn easy but I was afraid I was going to need additional adhesive.
In the end the only additional adhesive you need is for the back glass cover, unless you're replacing it in which case most likely already comes with its own adhesive strip.
Cracked the back case trying to remove it, even after hitting it with a heat gun for a minute or two. I didn't really want to get it hotter. As-is you need either a new battery cover (about $20) or a new gasket seal because the original glue will be shot. Otherwise this went pretty well. Actually pulling the battery takes some patience. It's really glued in there.
My replacement battery didn't come with it's own pull tab and adhesive wrap, so I had to improvise a little. Also it was almost 1cm shorter than the old battery, which is not ideal.
Even if you're experienced, this guide is impossible to complete within 15-30 minutes. If you plan to re-use your original battery cover and remove as much adhesive as you can to get a perfect seal again it will take even longer. I managed to remove almost all the old adhesive with isopropyl alcohol, a small plastic scraper and a cloth. This part alone took me 1.5 hours.
Solange nur der Akku gewechselt werden soll, ist das Entfernen der Sim nicht zwingend notwendig.
AllesKaputt - crwdns2934203:0crwdne2934203:0