crwdns2915892:0crwdne2915892:0
This guide is designed to teach an ifixit user to replace the sensor lens for an Olympus E-PL1 camera.
crwdns2942213:0crwdne2942213:0
-
-
Push the gray tab down, using a spudger if necessary, and the battery will come out.
-
-
-
There are a total of six screws that must be removed using the the #000 Philips screwdriver.
-
As per picture one: there is one 4.9 mm Philips head screw on the left side of the camera.
-
As per picture two: on the bottom of the camera, there are three 3.4 mm Philips head screws; these are located on the darker area of the case.
-
As per picture three: there are two 5.3 mm Philips head screws on the right side, one is beneath the USB cover.
Does this method can be applied on Olympus Pen E-P1 Model? Do you have a tutorial like this on that said model I’ve mentioned?
-
-
-
Open the case by peeling off the back panel.
-
-
-
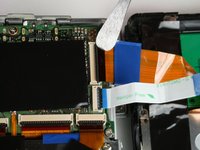
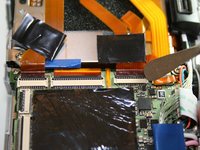
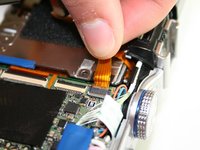
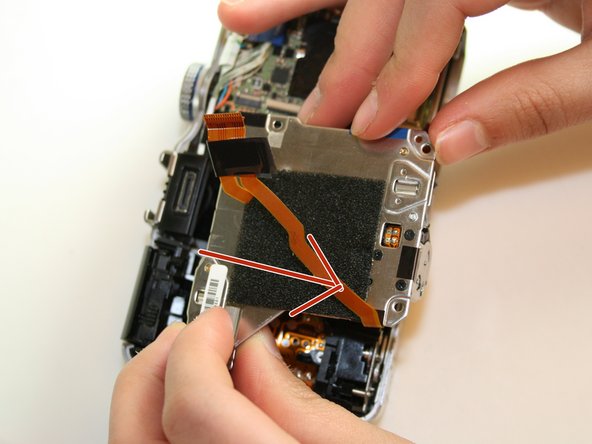
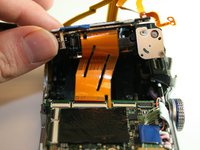
Disconnect the two ribbon cables as shown in picture one.
The cables (2) on the camera back are quite short. Because of this, removal is quite easy while reconnecting can be challenging. You might have an easier time if you use some masking tape connecting the back to the front loosely to support the back as it takes both hands to reconnect the cables.
-
-
-
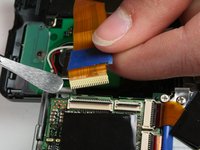
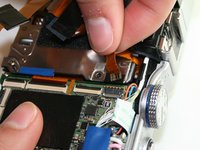
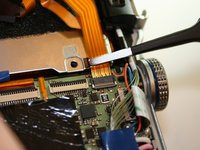
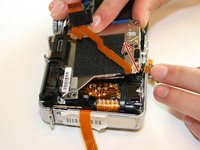
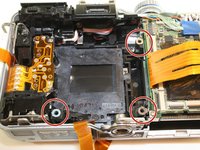
Using a spudger, remove the ribbon cables by pushing the black tab back and gently pulling the cable out.
-
Do this process for the two ribbon cables shown in the third photo.
-
-
-
crwdns2935267:0crwdne2935267:0Tweezers$4.99
-
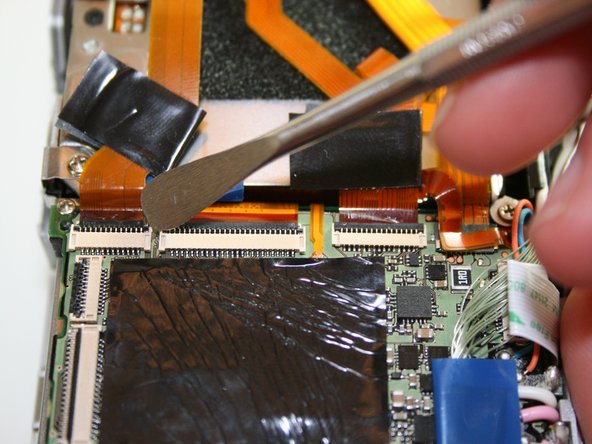
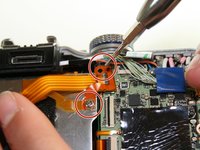
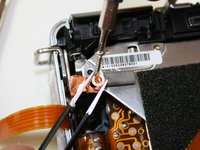
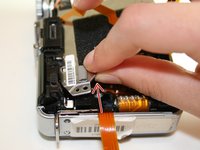
Using the #000 Phillips screwdriver, remove the 4.3 mm screw as shown by the screwdriver and the 6.0 mm screw holding down the ribbon.
-
Using tweezers, gently lift the ribbon off the sticky pad.
Both of the screws have copper washers. Steel one from bottom red circle is actually one of eight washers from beneath sensor board (step 13).
-
-
-
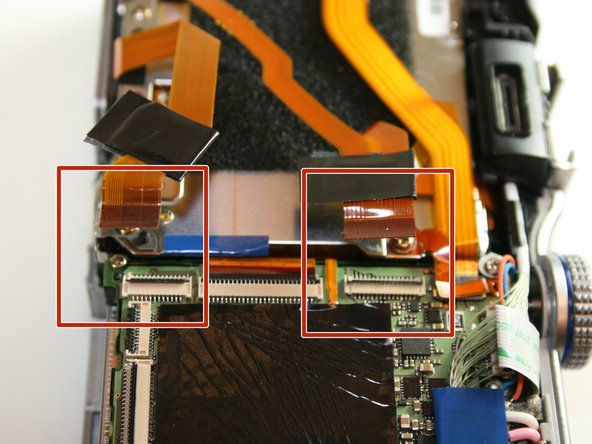
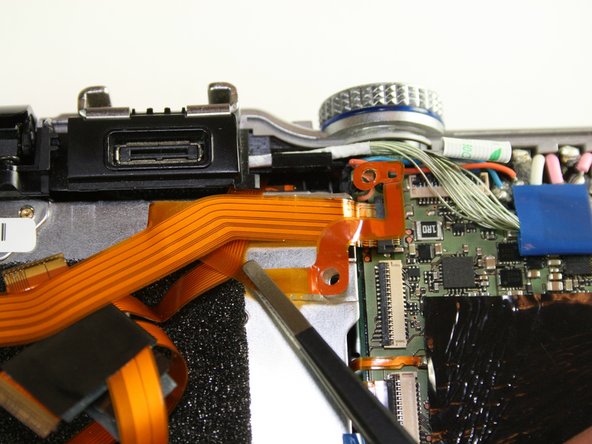
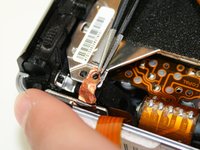
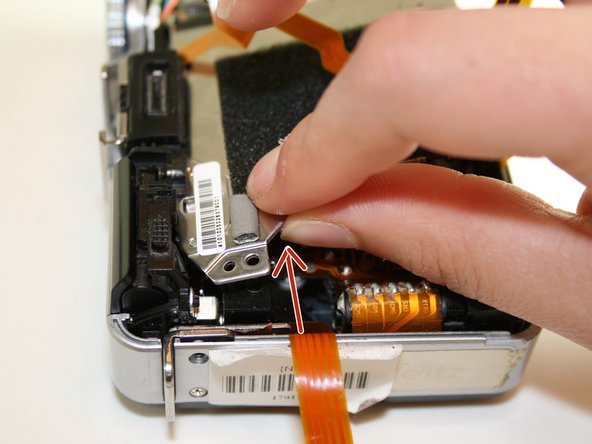
Unlike previous connectors, this cable has a light grey clip holding it in place on opposite side of the connector in regards where the ribbon is inserted. Flip it up and then using your fingers, gently pull the top ribbon cable out.
Flip up the grey lid opposite the cable and then gently pull it out
-
-
-
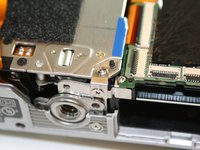
Using a #000 Phillips screwdriver, remove the 6.0 mm screw on the bottom left hand corner. You can locate the screw on the picture as the green circle.
-
-
-
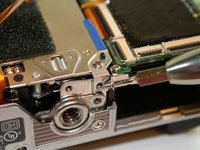
In the upper left hand corner, use the #000 Phillips screwdriver to remove the 6.0 mm screw.
-
Using tweezers gently lift the copper grounding strip.
-
-
-
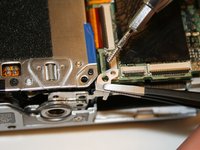
Remove the bracket in the lower right hand corner. In order to do so, you must remove two different screws.
-
Using the #000 Phillips screwdriver, remove the 2.4 mm screw on the bottom.
-
Using the #000 Phillips screwdriver, remove the 6.0 mm screw on the top and lift off the bracket.
-
-
-
Now you can lift out the sensor assembly. The following steps will explain how to lift it out.
-
First, sightly lift the bottom half following the direction of the arrow.
-
Second, lift the top left up side up. It may be a little stuck so you will have to wiggle it out.
-
Finally, pull the entire assembly towards the bottom and away from the case.
BEFORE you start lifting sensor assembly board read comments from next step. It is very important.
-
-
-
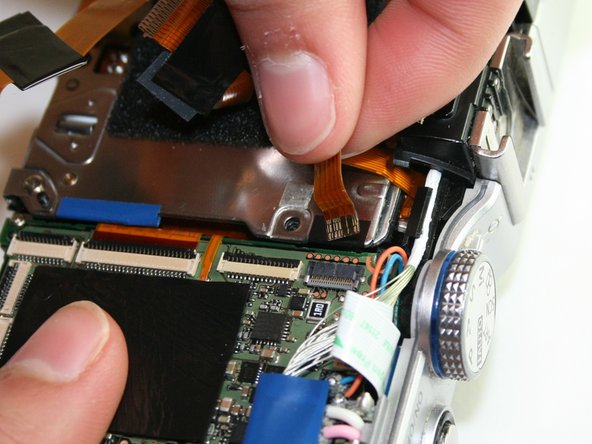
This is the sensor assembly with the photo showing the connected ribbon cable.
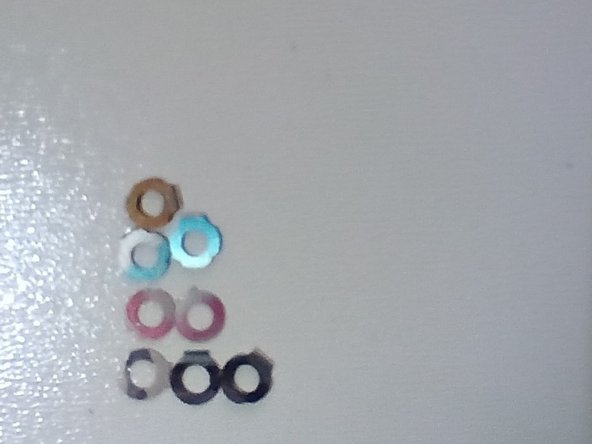
after removing sensor assembly, besides these three washers I found three more. Where could they come from?
All the washers come from underneath the 6 mm screws. I had 8 washers alltogether. Allways two together.
I have six (6) washers as well. Three (3) have black marking, two (2) have green marking, and one (1) has purple marking. If there are multiple washers per position I would need two more. I measured the thickness of each one thinking that they are shims to correct the sensor to be parallel to the shutter. If so, the colors on each one don't coincide with a particular thickness. Perhaps the color identifies a position of one of the four mounting bosses, then there are only three colors for four bosses. Perhaps one boss had no washer at all. In any case, it is unlikely the sensor will be back as it was since all but one washer was found lying in the underlying area.
As far as I know there are 8 washers, in 4 pairs. There is one pair under every hole, and they absolutely love to fall inside camera while you lift the sensor.
Also, they are not same thickness, and color of the paint on them is not related to thickness. There is unique combination of them for every camera, calibrated in factory to make sensor perfectly flat. You must carefully remove them with tweezers while you slighty lift sensor assembly, then write where they were. If you miss doing this, there is no way to assemble camera exactly as it was.
If You don't find all 8, first look if they are not stuck on back of the sensor board, if not, flip your camera body and tap it gently to make them fall out.
This tip only for people using this guide not for sensor lens replacement, but to know how to get to hot mirror for infrared camera conversion:
If you remove hot mirror, and NOT replace it with clear glass, then you want to assemble camera without these 8 washers. If you do this, it reduces flange focal distance and helps lens to focus properly in infrared light. You still want to find them all, as they can create short if left inside.
-
-
-
The sensor assembly has been removed.
-
-
-
Remove the 3 screws surrounding the sensor lens with a #000 Phillips screwdriver.
When you will be putting these screws back, try not to push them with lot of force, you may damage camera IBIS module.
-
-
-
Using a soldering iron and soldering wick desolder the two wires connecting the lens.
-
Solder in the new lens. Be sure to match the wire color to the original wire placement.
-
-
-
Remove the sensor lens by pulling back as shown.
-


To reassemble your device, follow these instructions in reverse order.
To reassemble your device, follow these instructions in reverse order.
crwdns2935221:0crwdne2935221:0
crwdns2935229:03crwdne2935229:0

crwdns2915084:0crwdne2915084:0

Colorado Springs, Team 9-1, Panko Spring 2015 crwdns2935289:0Colorado Springs, Team 9-1, Panko Spring 2015crwdne2935289:0
UCCS-PANKO-S15S9G1
crwdns2931471:03crwdne2931471:0
crwdns2935297:012crwdne2935297:0
crwdns2947412:02crwdne2947412:0
Hello. Is it possible to remove glass from sensor without damaging microwires? I want to debayer sensor.
Is that a battery on the right in Step 3? Might it be used to keep the clock running while changing the main battery?