crwdns2915892:0crwdne2915892:0
Use this guide to replace the charging port assembly in your Nokia G22.
Note: The daughterboard of the Nokia G22 includes both the USB-C charging port and the headphone jack.
crwdns2942213:0crwdne2942213:0
-
-
Insert a SIM eject tool, bit, or a straightened paper clip into the small hole on the SIM card tray on the upper left edge of the phone.
-
Press firmly to eject the tray.
-
-
-
Remove the SIM card tray.
-
-
-
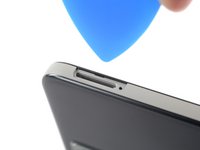
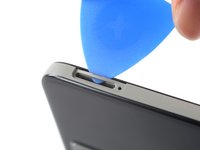
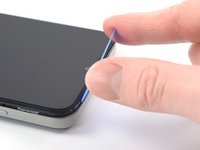
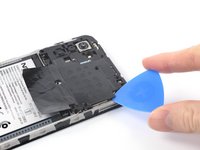
Insert an opening pick under the small notch in the SIM card tray slot.
-
-
-
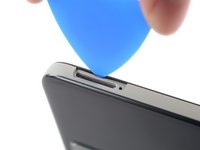
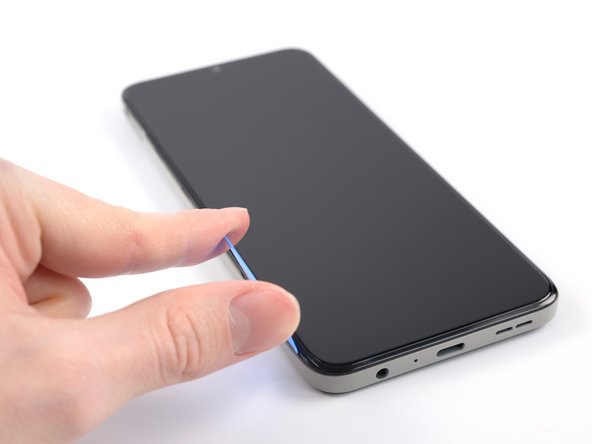
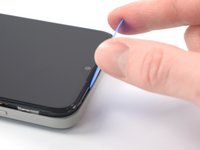
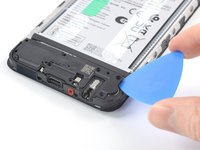
Position the opening pick at a steep downward angle between the back cover and the screen assembly.
-
Slide the opening pick down the left edge of the phone to release the plastic clips.
-
-
-
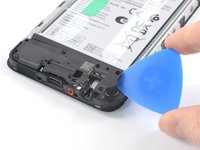
Turn the opening pick around the corner and continue to slide it along the bottom edge to release the plastic clips.
-
-
-
Slide the opening pick up the right edge to continue releasing the plastic clips.
-
-
-
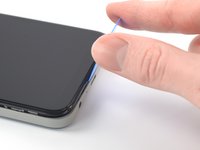
Slide the opening pick along the top edge to release the remaining plastic clips.
-
-
-
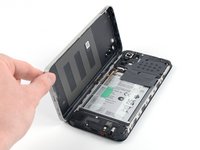
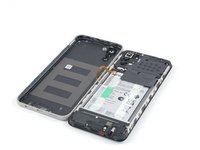
With the phone laying screen-side down, carefully lift the right edge of the back cover, opening it like a book.
-
Lay the back cover next to the phone.
-
-
-
-
Use a Phillips screwdriver to remove the 3.8 mm‑long screw securing the fingerprint reader bracket.
-
-
crwdns2935267:0crwdne2935267:0Tweezers$4.99
-
Use a pair of tweezers or your fingers to remove the fingerprint reader bracket.
-
-
-
Use the flat end of a spudger to disconnect the fingerprint reader by prying the connector straight up from its socket.
-
Remove the back cover.
why is the reattach tip for press connectors on the first tip... we are working backwards put it on the last one you remove.. also very lazy not to just make a resemble instructions it really wouldn't of been that hard
-
-
-
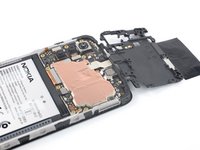
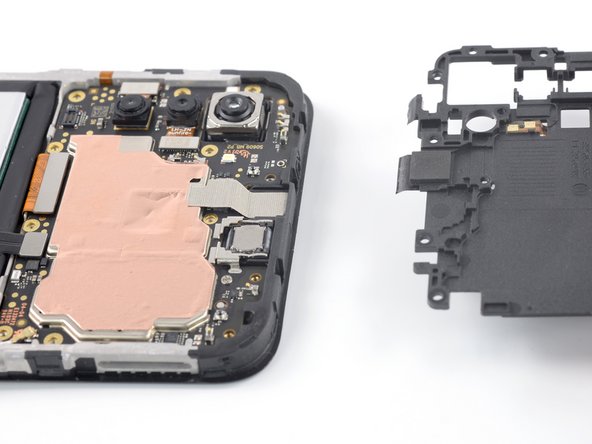
Use a Phillips screwdriver to remove the eleven 3.8 mm-long screws securing the motherboard cover.
-
-
-
Insert an opening pick under the right edge of the motherboard cover to release its plastic clips.
-
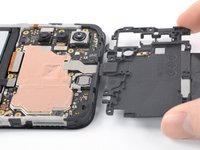
Flip the motherboard cover over the top edge of the phone.
-
-
-
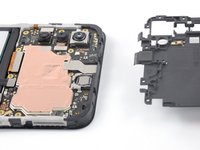
The motherboard cover has two short adhesive tapes wrapped around the top edge and onto the frame.
-
Pull the motherboard cover away from the frame to separate the adhesive tape and remove it.
-
-
-
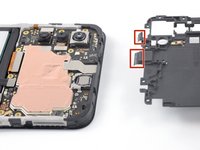
Use the flat end of a spudger to disconnect the battery cable by prying the connector straight up from its socket.
-
-
-
Use a Phillips screwdriver to remove the eight 3.8 mm-long screws securing the loudspeaker.
-
-
-
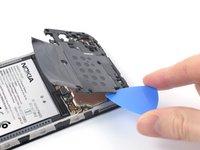
Insert an opening pick underneath the right edge of the loudspeaker.
-
Twist the opening pick to release loudspeaker from the plastic clips holding it in place.
-
-
-
Use your fingers or a pair of tweezers to remove the loudspeaker.
-
-
-
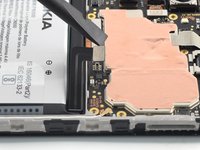
Use the flat end of a spudger to disconnect the display cable by prying the connector straight up from its socket.
-
-
-
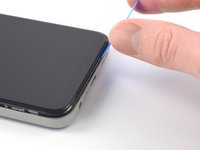
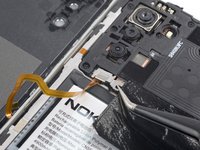
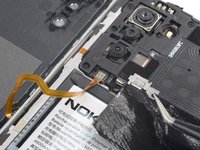
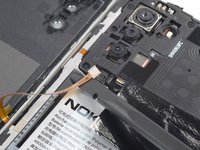
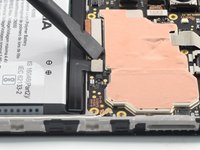
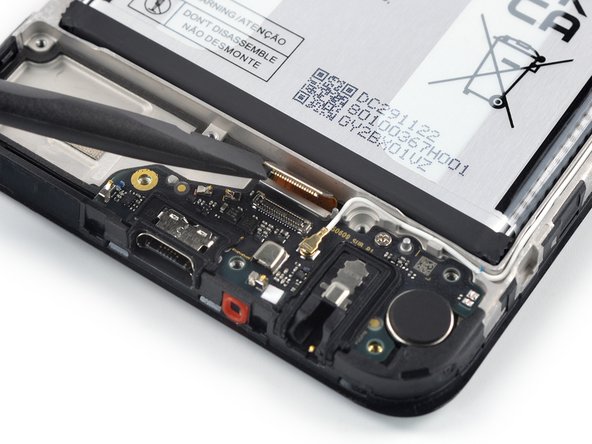
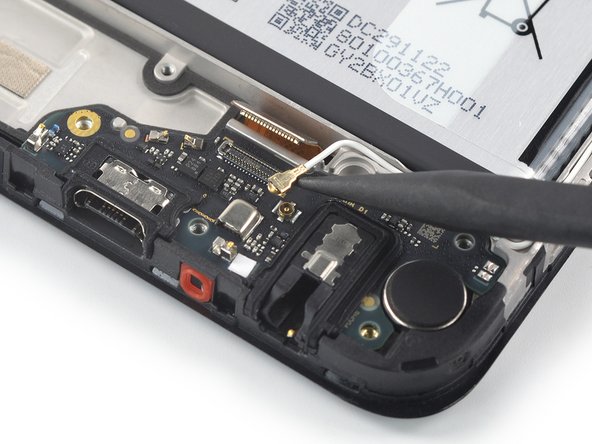
Use the pointed end of a spudger to disconnect the antenna cable by prying the connector straight up from its socket on the charging port assembly.
-
-
-
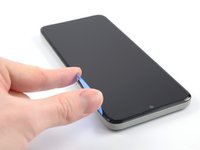
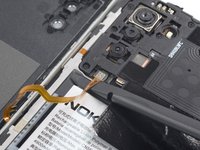
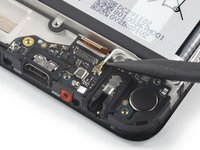
Use a Phillips screwdriver to remove the 2.8 mm‑long screw securing the charging port assembly.
-
-
-
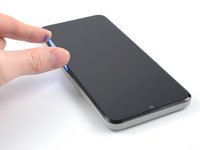
Insert the flat end of a spudger underneath the top edge of the charging port assembly.
-
Pry up the charging port assembly by twisting the spudger until you can grip it with your fingers.
-
-
-
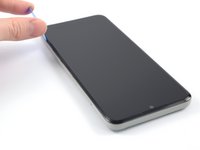
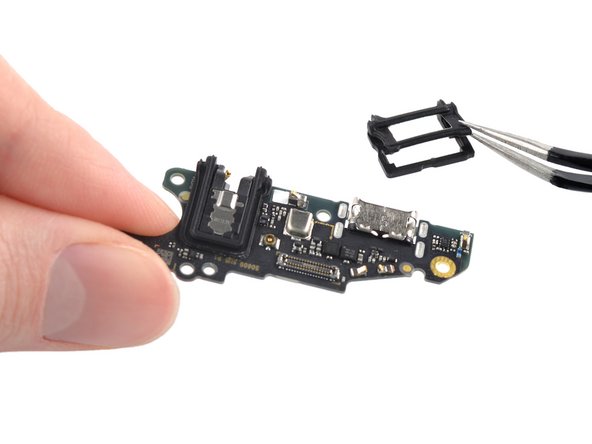
Remove the charging port assembly.
-
-
crwdns2935267:0crwdne2935267:0Tweezers$4.99
-
Use a pair of tweezers to remove the black rubber gaskets from the charging port and the headphone jack.
-
Only the charging port assembly remains.
-


To reassemble your device, follow these instructions in reverse order.
Take your e-waste to an R2 or e-Stewards certified recycler.
Repair didn’t go as planned? Try some basic troubleshooting, or ask our Answers community for help.
To reassemble your device, follow these instructions in reverse order.
Take your e-waste to an R2 or e-Stewards certified recycler.
Repair didn’t go as planned? Try some basic troubleshooting, or ask our Answers community for help.
crwdns2935221:0crwdne2935221:0
crwdns2935229:04crwdne2935229:0

crwdns2915084:0crwdne2915084:0

iFixit EU Team crwdns2935289:0iFixit EU Teamcrwdne2935289:0
Staff
crwdns2931471:038crwdne2931471:0
crwdns2935297:01,177crwdne2935297:0
crwdns2947410:01crwdne2947410:0
so helpful ,i really appreciate the guide