crwdns2942213:0crwdne2942213:0
-
crwdns2935201:0crwdne2935201:0 crwdns2935203:0crwdne2935203:0
-
Remove the battery cover from the remote and batteries inside.
-
Unscrew the four visible Y1 tri-point screws on the remote.
-
-
crwdns2935201:0crwdne2935201:0 crwdns2935203:0crwdne2935203:0
-
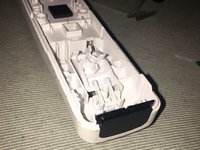
Use a pry tool to gently pry apart the white tabs near the top of the controller.
-
Once you open up the remote, the two halves of the Wii remote should be separated.
-
-
crwdns2935201:0crwdne2935201:0 crwdns2935203:0crwdne2935203:0
-
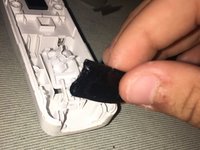
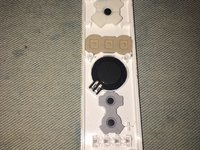
Use a pry tool or your fingers to remove the speaker piece from the remote.
-
-
crwdns2935201:0crwdne2935201:0 crwdns2935203:0crwdne2935203:0
-
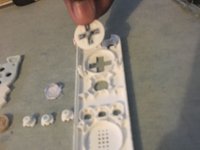
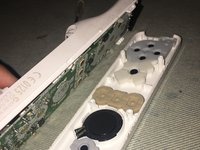
Simply remove the rest of the buttons and the conductive rubber pad button contacts.
-
-
crwdns2935201:0crwdne2935201:0 crwdns2935203:0crwdne2935203:0
-
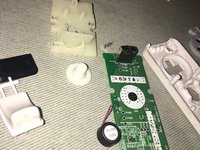
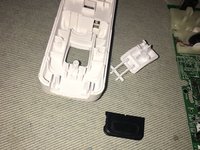
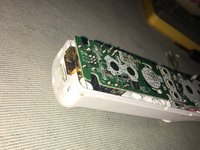
Go back to the side of the remote with the motherboard.
-
Gently lift and remove it from the base.
-
-
crwdns2935201:0crwdne2935201:0 crwdns2935203:0crwdne2935203:0
-
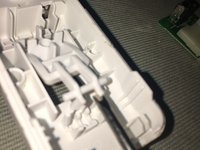
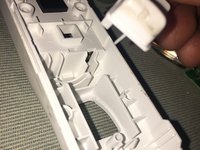
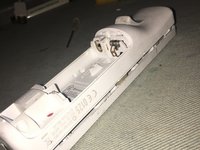
Find the white tabs facing where the IR sensor screen was.
-
Place a tool under one tab and push up until both tabs pop out of place to remove the B trigger button.
-
-
crwdns2935201:0crwdne2935201:0 crwdns2935203:0crwdne2935203:0
-
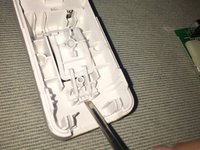
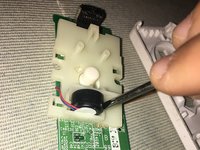
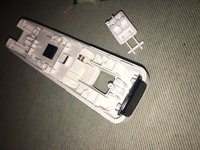
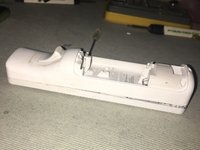
Use a tool and place it under the rumble motor. Gently lift and remove it from the plastic housing.
-
-
crwdns2935201:0crwdne2935201:0 crwdns2935203:0crwdne2935203:0
-
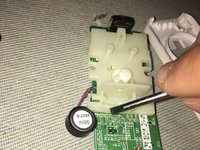
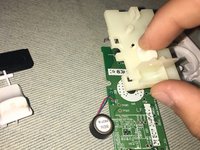
To remove the plastic housing, you have to locate the two white tabs. Use your thumbs to gently pull them apart so that the plastic housing is removed from the motherboard.
-
Remove the rubber button from the plastic housing.
-
-
-
crwdns2935201:0crwdne2935201:0 crwdns2935203:0crwdne2935203:0
-
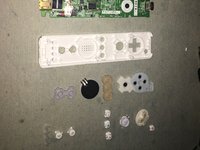
All the pieces of the Wii remote are now disassembled.
-
-
crwdns2935201:0crwdne2935201:0 crwdns2935203:0crwdne2935203:0
-
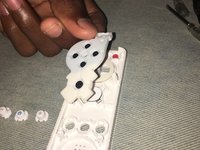
Return the the buttons back to their original locations, and then place the corresponding rubber pad button contacts on top of the buttons.
-
-
crwdns2935201:0crwdne2935201:0 crwdns2935203:0crwdne2935203:0
-
Place the rubber pad button contact for the B trigger button on the plastic housing.
-
Align the two white tabs with the two indents on the sides and slide the plastic housing into place on the motherboard.
-
Seat the rumble motor back to its original location.
-
-
crwdns2935201:0crwdne2935201:0 crwdns2935203:0crwdne2935203:0
-
Return the IR sensor screen to its location and slide it back into place.
-
-
crwdns2935201:0crwdne2935201:0 crwdns2935203:0crwdne2935203:0
-
Place the B trigger button back in its location and press the two white tabs into place so that it makes a click.
-
-
crwdns2935201:0crwdne2935201:0 crwdns2935203:0crwdne2935203:0
-
Lay the motherboard on top of the back side of the remote and push down gently until the motherboard is flush with the top edge of the Wii remote.
-
-
crwdns2935201:0crwdne2935201:0 crwdns2935203:0crwdne2935203:0
-
Face the bottom half of the Wii remote, with the motherboard side facing downwards, towards the top half of the Wii remote with the rubber pad button contacts facing upwards.
-
Align the sides and press together until all clips click into place.
-
Tighten all four Y1 tri-point screws.
-
-
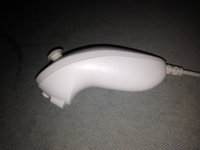
crwdns2935201:0crwdne2935201:0 crwdns2935203:0crwdne2935203:0
-
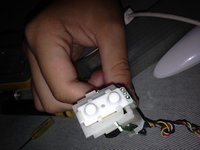
There are two small Y1 tri-point screws that need to be loosened on the bottom of the remote.
-
-
crwdns2935201:0crwdne2935201:0 crwdns2935203:0crwdne2935203:0
crwdns2935267:0crwdne2935267:0iFixit Opening Picks (Set of 6)$4.99-
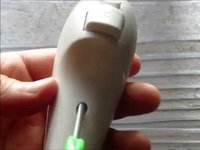
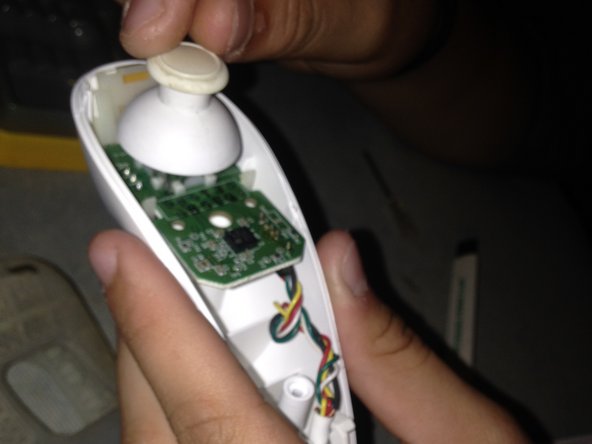
Once the screws are removed, you can remove the top half of the chassis off.
-
You may use an opening tool to assist with this step, such as the iFixit opening pick as an example.
-
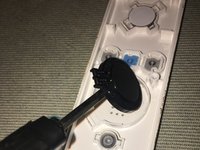
Next gently pull off the thumb stick.
-
-
crwdns2935201:0crwdne2935201:0 crwdns2935203:0crwdne2935203:0
-
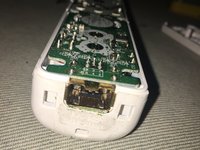
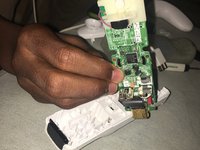
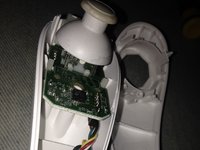
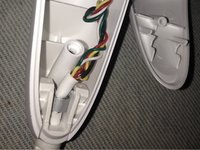
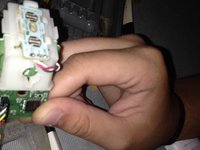
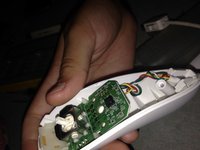
The cable that plugs into the Wii remote needs to be removed from the whole nunchuk by pulling upwards on the strain relief boot.
-
-
crwdns2935201:0crwdne2935201:0 crwdns2935203:0crwdne2935203:0
-
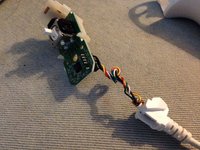
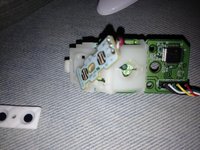
This will make it easier to slide the daughter board out from the white plastic housing cage for the C and Z trigger buttons in the next step.
-
-
crwdns2935201:0crwdne2935201:0 crwdns2935203:0crwdne2935203:0
-
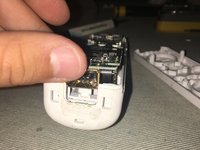
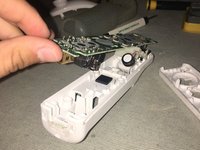
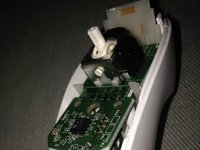
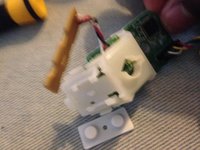
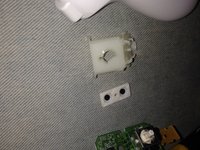
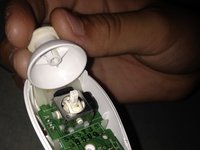
Then, remove the plastic housing cage that connects the C and Z button daughterboard to the Wii nunchuck's motherboard by unhooking the clips that hold onto the motherboard.
-
-
crwdns2935201:0crwdne2935201:0 crwdns2935203:0crwdne2935203:0
-
Begin reassembly by mounting the white plastic housing cage back onto the motherboard.
-
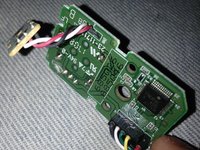
Slide the daughterboard for the C and Z buttons upwards into the plastic housing cage. Make sure not to force the daughterboard during this process to prevent breaking it.
-
Then slide the white conductive rubber pad button contact for the C and Z buttons on top of the daughterboard.
-
-
crwdns2935201:0crwdne2935201:0 crwdns2935203:0crwdne2935203:0
-
Seat the motherboard assembly, with the complete C and Z button housing cage, and Wii nunchuck cable back into the bottom half of the Wii nunchuck.
-
Seat the Wii nunchuck cable into the bottom half of the Wii remote.
-
Take care when putting the wires for the Wii nunchuck cable back in the Wii remote's bottom half of the remote casing, because they can easily fall out if not seated correctly.
-
-
crwdns2935201:0crwdne2935201:0 crwdns2935203:0crwdne2935203:0
-
Then press the analog stick onto the Wii nunchuck's analog stick stem to reattach it.
-
-
crwdns2935201:0crwdne2935201:0 crwdns2935203:0crwdne2935203:0
-
Lastly push the top half of the Wii nunchuck back on top of the bottom half of the remote. Screw the two Y1 tri-wing screws on the bottom half of the remote to complete the reassembly.
-


crwdns2935221:0crwdne2935221:0
crwdns2935229:024crwdne2935229:0
crwdns2947412:08crwdne2947412:0
Great guide! I took one of my remotes apart some years ago. Now, with fresh tri-wing driver in hand, I am ready to reassemble the thing. Problem: where to solder the green ground? It currently is fused to the nunchuk connector housing, but where does the other end go??? Wish I'd noted that, back then
Very accurate guide! I was able to clear debris between the buttons with ease.
Hello do you have tutorials for unassembly nunchuck's connector please?
Thank you ! My A button registered the click half the time : turns out it had corrosion, now it works like a charm !