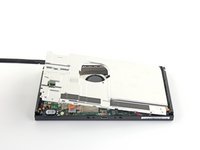
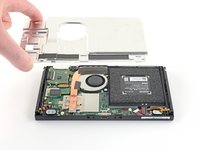
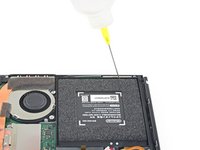
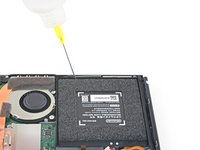
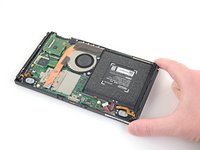
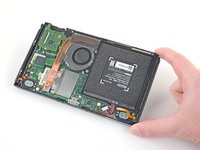
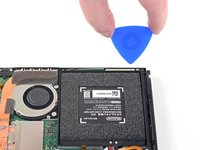
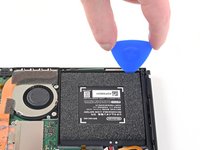
crwdns2933423:0crwdne2933423:0
crwdns2947577:0crwdnd2947577:0crwdne2947577:0

Nintendo Switch Battery Replacement

crwdns2869540:0crwdne2869540:0: 1.2M

crwdns2959988:0crwdne2959988:0

crwdns2959990:0crwdne2959990:0
319
crwdns2959992:0crwdne2959992:0
2,509
crwdns2959994:0crwdne2959994:0
10,667
crwdns2959996:0crwdne2959996:0
1,234,833
crwdns2955950:0crwdne2955950:0: 232

crwdns2960004:0167crwdne2960004:0, crwdns2960008:065crwdne2960008:0

crwdns2960000:0crwdne2960000:0
crwdns2959984:0crwdne2959984:0: 260

crwdns2959974:0260crwdne2959974:0

crwdns2959986:0crwdne2959986:0: 55

crwdns2959982:055crwdne2959982:0

crwdns2955944:0crwdne2955944:0: crwdns2931287:045crwdne2931287:0 - crwdns2931291:02crwdne2931291:0
crwdns2955970:0crwdne2955970:0: crwdns2937801:0crwdne2937801:0
crwdns2862627:0crwdne2862627:0

crwdns2862628:0crwdne2862628:0

Nintendo Switch Battery Replacement

crwdns2915892:0crwdne2915892:0

crwdns2959928:0crwdne2959928:0 ↓

Follow this guide to replace an old and degraded battery in the Nintendo Switch game console.

The Nintendo Switch uses JIS screws, which are slightly different than Phillips. We don’t recommend using Phillips drivers for JIS screws; however, iFixit Phillips bits are specifically designed to be compatible with JIS screws. If you use a non-iFixit Phillips driver, you risk stripping the screws.

When you remove the shield plate, you’ll need to replace the thermal compound between the plate and the heatsink. Normal thermal paste isn't designed to bridge large gaps, so you'll need thermal putty or viscous thermal paste.

This guide, and the part we sell, are compatible with the original Nintendo Switch model released in 2017, as well as the newer refreshed model released in 2019 (model numbers HAC-001 and HAC-001(-01), respectively).

For your safety, discharge the battery below 25% before disassembling your Switch. This reduces the risk of a fire hazard if the battery is accidentally damaged during the repair. If your battery is swollen, take appropriate precautions.

crwdns2959930:0crwdne2959930:0

crwdns2959950:0crwdne2959950:0

crwdns2959954:0crwdne2959954:0

crwdns2943213:0crwdne2943213:0

crwdns2943215:0crwdne2943215:0

crwdns2936621:0crwdne2936621:0

    1. Nintendo Switch Battery Replacement, Release the Joy Con controller locking tabs: crwdns2935265:01crwdnd2935265:01crwdnd2935265:03crwdne2935265:0 Nintendo Switch Battery Replacement, Release the Joy Con controller locking tabs: crwdns2935265:01crwdnd2935265:02crwdnd2935265:03crwdne2935265:0 Nintendo Switch Battery Replacement, Release the Joy Con controller locking tabs: crwdns2935265:01crwdnd2935265:03crwdnd2935265:03crwdne2935265:0
      • Before you begin this repair, make sure the device is completely powered off.

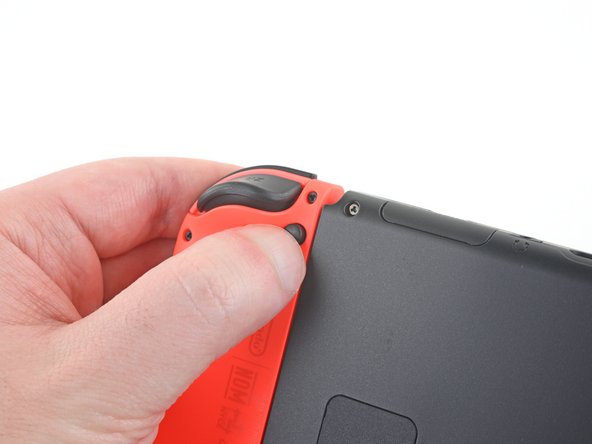
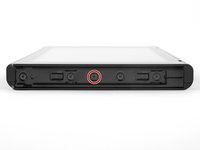
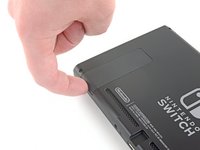
      • Press and hold down the small round button on the back of the Joy Con controller.

      • While you hold down the button, slide the controller upward.

      crwdns2952109:0crwdne2952109:0

      crwdns2917038:0crwdne2917038:0

    2. Nintendo Switch Battery Replacement, Remove the Joy Con controllers: crwdns2935265:02crwdnd2935265:01crwdnd2935265:03crwdne2935265:0 Nintendo Switch Battery Replacement, Remove the Joy Con controllers: crwdns2935265:02crwdnd2935265:02crwdnd2935265:03crwdne2935265:0 Nintendo Switch Battery Replacement, Remove the Joy Con controllers: crwdns2935265:02crwdnd2935265:03crwdnd2935265:03crwdne2935265:0
      • Continue sliding the Joy Con upward until it's completely removed from the console.

      • Repeat this same process for the other Joy Con.

      crwdns2952109:0crwdne2952109:0

      crwdns2917038:0crwdne2917038:0

    3. Nintendo Switch Battery Replacement, Remove the back-side screws: crwdns2935265:03crwdnd2935265:01crwdnd2935265:01crwdne2935265:0
      crwdns2935267:0crwdne2935267:0
      Magnetic Project Mat
      $19.95
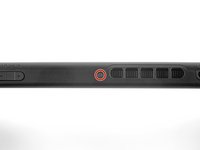
      • Use a Y00 screwdriver to remove the four 6.3 mm-long screws securing the rear panel.

      • Throughout this repair, keep track of each screw and make sure it goes back exactly where it came from.

      • If you do happen to strip one of the four 6.3 mm-long Y00 screws, If you are lucky and careful, you may be able to use a Y0 bit to remove the screw(s). Please note that if you do attempt this, a bit of extra pressure will need to be applied to the screwdriver so that the screwdriver bit catches the screw.

      • If you do end up removing the stripped screw with this method, PLEASE do not reuse the screw again and instead replace the screw.

      crwdns2952109:0crwdne2952109:0

      crwdns2917038:0crwdne2917038:0

    4. Nintendo Switch Battery Replacement, Remove the top and bottom screws: crwdns2935265:04crwdnd2935265:01crwdnd2935265:02crwdne2935265:0 Nintendo Switch Battery Replacement, Remove the top and bottom screws: crwdns2935265:04crwdnd2935265:02crwdnd2935265:02crwdne2935265:0
      • Use a JIS 00 driver to remove the following screws securing the rear panel:

      • One 2.5 mm-long screw on the top edge of the device

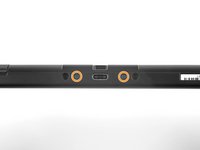
      • Two 2.5 mm-long screws on the bottom edge of the device

      • To prevent these tight screws from stripping, apply firm downward force, work slowly, and try another JIS 00 driver if the screws won't come out. Make sure the driver is fully inserted.

      • You can use a Phillips #000 screwdriver in a pinch, but you risk damaging or stripping the screws. Push down firmly on the screwdriver and twist slowly. Often, switching drivers may help, even if they are the same size.

      crwdns2952109:0crwdne2952109:0

      crwdns2917038:0crwdne2917038:0

    5. Nintendo Switch Battery Replacement, Remove the center side screws: crwdns2935265:05crwdnd2935265:01crwdnd2935265:02crwdne2935265:0 Nintendo Switch Battery Replacement, Remove the center side screws: crwdns2935265:05crwdnd2935265:02crwdnd2935265:02crwdne2935265:0
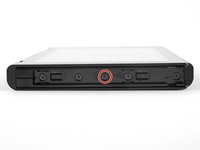
      • Use a JIS 00 driver to remove the two 3.8 mm center screws on the sides of the device (one on each side).

      crwdns2952109:0crwdne2952109:0

      crwdns2917038:0crwdne2917038:0

    6. Nintendo Switch Battery Replacement: crwdns2935265:06crwdnd2935265:01crwdnd2935265:02crwdne2935265:0 Nintendo Switch Battery Replacement: crwdns2935265:06crwdnd2935265:02crwdnd2935265:02crwdne2935265:0
      • Use your finger to flip up the kickstand on the back of the device.

      • If there's a microSD card in the microSD card slot, remove it now before you continue to the next step.

      crwdns2952109:0crwdne2952109:0

      crwdns2917038:0crwdne2917038:0

    7. Nintendo Switch Battery Replacement, Remove the kickstand well screw: crwdns2935265:07crwdnd2935265:01crwdnd2935265:01crwdne2935265:0
      • Use a JIS 00 driver to remove the 1.6 mm screw in the kickstand well.

      • Close the kickstand.

      crwdns2952109:0crwdne2952109:0

      crwdns2917038:0crwdne2917038:0

    8. Nintendo Switch Battery Replacement, Remove the rear panel: crwdns2935265:08crwdnd2935265:01crwdnd2935265:03crwdne2935265:0 Nintendo Switch Battery Replacement, Remove the rear panel: crwdns2935265:08crwdnd2935265:02crwdnd2935265:03crwdne2935265:0 Nintendo Switch Battery Replacement, Remove the rear panel: crwdns2935265:08crwdnd2935265:03crwdnd2935265:03crwdne2935265:0
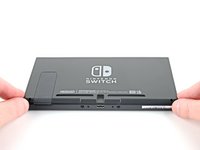
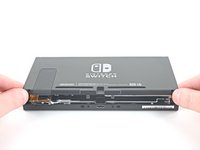
      • Open the game card cartridge flap.

      • The game card cartridge flap attaches to the other half of the plastic shell, preventing you from completely lifting up the rear panel if it's closed.

      • Lift the rear panel straight up from the bottom of the device and remove it.

      • Don't tilt it upwards while opening or else you risk breaking the plastic tabs on the top edge of the panel.

      crwdns2952109:0crwdne2952109:0

      crwdns2917038:0crwdne2917038:0

    1. Nintendo Switch Battery Replacement, Remove the microSD card reader: crwdns2935265:09crwdnd2935265:01crwdnd2935265:01crwdne2935265:0
      • Use a JIS 00 driver to remove the 3.1 mm screw securing the microSD card reader to the device.

      crwdns2952109:0crwdne2952109:0

      crwdns2917038:0crwdne2917038:0

    2. Nintendo Switch Battery Replacement: crwdns2935265:010crwdnd2935265:01crwdnd2935265:03crwdne2935265:0 Nintendo Switch Battery Replacement: crwdns2935265:010crwdnd2935265:02crwdnd2935265:03crwdne2935265:0 Nintendo Switch Battery Replacement: crwdns2935265:010crwdnd2935265:03crwdnd2935265:03crwdne2935265:0
      • Use the flat end of a spudger to disconnect the microSD card reader press connector and lift straight up to remove it.

      • During reassembly, remove the foam pad before connecting the press connector to the motherboard. Set the foam pad back in place after you verify it's connected.

      crwdns2952109:0crwdne2952109:0

      crwdns2917038:0crwdne2917038:0

    3. Nintendo Switch Battery Replacement, Reassembly information: crwdns2935265:011crwdnd2935265:01crwdnd2935265:03crwdne2935265:0 Nintendo Switch Battery Replacement, Reassembly information: crwdns2935265:011crwdnd2935265:02crwdnd2935265:03crwdne2935265:0 Nintendo Switch Battery Replacement, Reassembly information: crwdns2935265:011crwdnd2935265:03crwdnd2935265:03crwdne2935265:0
      • During reassembly:

      • Peel the foam block off the MicroSD card reader.

      • Carefully align the MicroSD card reader press connector over its socket on the board and press down to connect it.

      • Don't try to force the connector into place. If you're having trouble, reposition it and try again.

      • Set the foam block onto the connector and press it into place.

      crwdns2952109:0crwdne2952109:0

      crwdns2917038:0crwdne2917038:0

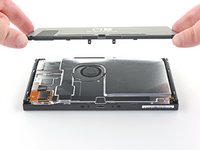
    1. Nintendo Switch Battery Replacement, Remove the shield plate: crwdns2935265:012crwdnd2935265:01crwdnd2935265:01crwdne2935265:0
      • Use a JIS 00 driver to remove the six 3 mm screws securing the shield plate to the device.

      crwdns2952109:0crwdne2952109:0

      crwdns2917038:0crwdne2917038:0

    2. Nintendo Switch Battery Replacement: crwdns2935265:013crwdnd2935265:01crwdnd2935265:02crwdne2935265:0 Nintendo Switch Battery Replacement: crwdns2935265:013crwdnd2935265:02crwdnd2935265:02crwdne2935265:0
      crwdns2935267:0crwdne2935267:0
      Tweezers
      $4.99
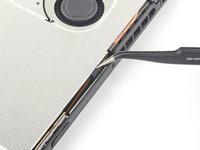
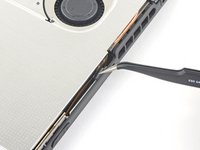
      • If the console doesn't have this foam, skip this step.

      • Use your fingers or a pair of tweezers to peel back the piece of foam on the top edge of the device near the fan exhaust port.

      • If the foam doesn't easily peel away, don't force it as it might end up tearing. Carefully peel at different spots to pull back the foam.

      crwdns2952109:0crwdne2952109:0

      crwdns2917038:0crwdne2917038:0

    3. Nintendo Switch Battery Replacement: crwdns2935265:014crwdnd2935265:01crwdnd2935265:03crwdne2935265:0 Nintendo Switch Battery Replacement: crwdns2935265:014crwdnd2935265:02crwdnd2935265:03crwdne2935265:0 Nintendo Switch Battery Replacement: crwdns2935265:014crwdnd2935265:03crwdnd2935265:03crwdne2935265:0
      crwdns2935267:0crwdne2935267:0
      iFixit Thermal Putty
      $9.95
      • Insert a spudger underneath the shield plate along the edge of the device.

      • Pry up to lift the shield plate and remove it from the device.

      • You may feel a bit of resistance. This is normal, since the shield plate is slightly bonded to the heat sink with thermal paste.

      • A thick pink thermal compound bridges the gap between the shield plate and the copper heat sink underneath. This helps prevent the Switch from overheating.

      • During reassembly, if you don't have replacement thermal compound, use the flat end of a spudger to distribute the old compound evenly across the heat pipe, as thick as possible to ensure proper contact. Repeat this process on the shield plate.

      • If you need to replace it, refer to our thermal paste guide to remove the old thermal compound and replace it with an appropriate compound, such as thermal putty or K5 Pro, during reassembly.

      crwdns2952109:0crwdne2952109:0

      crwdns2917038:0crwdne2917038:0

    1. Nintendo Switch Battery Replacement, Disconnect the battery: crwdns2935265:015crwdnd2935265:01crwdnd2935265:02crwdne2935265:0 Nintendo Switch Battery Replacement, Disconnect the battery: crwdns2935265:015crwdnd2935265:02crwdnd2935265:02crwdne2935265:0
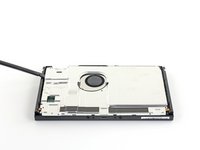
      • Insert the point of a spudger beneath the battery cable and slowly lift straight up to disconnect the flat‑topped battery connector from the board.

      crwdns2952109:0crwdne2952109:0

      crwdns2917038:0crwdne2917038:0

    1. Nintendo Switch Battery Replacement, Remove the battery: crwdns2935265:016crwdnd2935265:01crwdnd2935265:02crwdne2935265:0 Nintendo Switch Battery Replacement, Remove the battery: crwdns2935265:016crwdnd2935265:02crwdnd2935265:02crwdne2935265:0
      crwdns2935267:0crwdne2935267:0
      iFixit Adhesive Remover
      $19.99
      crwdns2952109:0crwdne2952109:0

      crwdns2917038:0crwdne2917038:0

    2. Nintendo Switch Battery Replacement: crwdns2935265:017crwdnd2935265:01crwdnd2935265:02crwdne2935265:0 Nintendo Switch Battery Replacement: crwdns2935265:017crwdnd2935265:02crwdnd2935265:02crwdne2935265:0
      • Tilt the top edge of the device upward to allow the isopropyl alcohol to work its way underneath the battery.

      • Hold for 1-2 minutes to allow time for the isopropyl alcohol to weaken the adhesive.

      crwdns2952109:0crwdne2952109:0

      crwdns2917038:0crwdne2917038:0

    3. Nintendo Switch Battery Replacement: crwdns2935265:018crwdnd2935265:01crwdnd2935265:03crwdne2935265:0 Nintendo Switch Battery Replacement: crwdns2935265:018crwdnd2935265:02crwdnd2935265:03crwdne2935265:0 Nintendo Switch Battery Replacement: crwdns2935265:018crwdnd2935265:03crwdnd2935265:03crwdne2935265:0
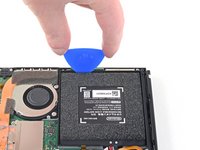
      • Insert an opening pick into the gap between the battery and the wall of the battery well.

      • Carefully dig the tip of the opening pick underneath the battery and slide it along the edge to begin slicing the adhesive.

      • Take care not to puncture or bend the battery with your tool—a punctured or bent battery may leak dangerous chemicals or cause a thermal event.

      crwdns2952109:0crwdne2952109:0

      crwdns2917038:0crwdne2917038:0

    4. Nintendo Switch Battery Replacement: crwdns2935265:019crwdnd2935265:01crwdnd2935265:01crwdne2935265:0
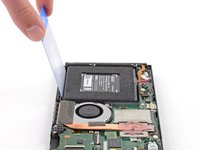
      • Leave the opening pick in place and apply a few more drops of adhesive remover or isopropyl alcohol inside the battery well.

      • Tilt the top edge of the device upward and wait 1-2 minutes for the isopropyl alcohol to weaken the adhesive.

      crwdns2952109:0crwdne2952109:0

      crwdns2917038:0crwdne2917038:0

    5. Nintendo Switch Battery Replacement: crwdns2935265:020crwdnd2935265:01crwdnd2935265:01crwdne2935265:0
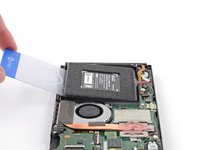
      • Continue sliding the opening pick deeper along the top edge of the battery, slicing more of the adhesive underneath.

      crwdns2952109:0crwdne2952109:0

      crwdns2917038:0crwdne2917038:0

    6. Nintendo Switch Battery Replacement: crwdns2935265:021crwdnd2935265:01crwdnd2935265:03crwdne2935265:0 Nintendo Switch Battery Replacement: crwdns2935265:021crwdnd2935265:02crwdnd2935265:03crwdne2935265:0 Nintendo Switch Battery Replacement: crwdns2935265:021crwdnd2935265:03crwdnd2935265:03crwdne2935265:0
      crwdns2935267:0crwdne2935267:0
      Plastic Cards
      $2.99
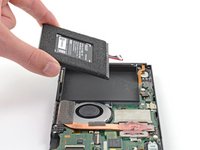
      • Once there's enough room, insert a plastic card underneath the battery and slowly pry the battery up.

      • You may need to apply more isopropyl alcohol if you have difficulty prying.

      • Be careful not to bend the battery as you pry.

      • Remove the battery.

      • Do not reuse the battery after it has been removed, as doing so is a potential safety hazard. Replace it with a new battery.

      crwdns2952109:0crwdne2952109:0

      crwdns2917038:0crwdne2917038:0

    7. Nintendo Switch Battery Replacement: crwdns2935265:022crwdnd2935265:01crwdnd2935265:01crwdne2935265:0
      crwdns2935267:0crwdne2935267:0
      Microfiber Cleaning Cloths
      $3.99
      • Use adhesive remover or isopropyl alcohol and a microfiber cloth to clean up any remaining adhesive left behind in the battery well before you install the new battery.

      • If your new battery does not come with pre-installed adhesive, follow this guide to install pre-cut adhesive on the bottom of the battery.

      crwdns2952109:0crwdne2952109:0

      crwdns2917038:0crwdne2917038:0

crwdns2915888:0crwdne2915888:0

To reassemble your device, follow these instructions in reverse order.

For optimal performance, calibrate your newly installed battery after completing this guide.

Take your e-waste to an R2 or e-Stewards certified recycler.

Repair didn’t go as planned? Try some basic troubleshooting, or ask our Nintendo Switch Answers community for help.

crwdns2935221:0crwdne2935221:0

crwdns2935229:0260crwdne2935229:0

Craig Lloyd

crwdns2935283:002/10/16crwdne2935283:0

43,701 crwdns2915208:0crwdne2915208:0

crwdns2935297:082crwdne2935297:0

crwdns2947412:065crwdne2947412:0

Can anyone confirm that Switch will NOT work with the battery removed or dead (dead as in once it’s totally non-functional as all lithium batteries eventually are, not dead as in just discharged but the battery works).

PSP works with the battery dead or pulled, as far as I know DS, 3DS, Vita and Switch do NOT, which is a gigantic design flaw.

Tester - crwdns2934203:0crwdne2934203:0 crwdns2950251:0crwdne2950251:0

Yes. The battery of my Switch has been wearing down over some time, to the point where I had to charhe the device for some hours to even activate it - it isn't functional without a working battery.

Helen Winkler - crwdns2934203:0crwdne2934203:0 crwdns2950251:0crwdne2950251:0

I would highly recommend against keeping dead batteries in any system, as this can cause damage to the motherboard of the device. If you experience your Switch randomly turning off while its battery is dead, immediately seek to get the battery removed or replaced.

While it is considered rare, dead batteries can sometimes reverse in polarity when its voltage is too low. This can damage the motherboard or other components unexpectedly.

Reboot - crwdns2934203:0crwdne2934203:0 crwdns2950251:0crwdne2950251:0

Why can't you reuse the switch's battery?, if I'm just replacing the shell of the switch and have to move the battery why can't I reuse the battery in the new shell?

Matt - crwdns2934203:0crwdne2934203:0 crwdns2950251:0crwdne2950251:0

Good question!

For safety reasons, we strongly discourage people from reusing a battery once it has been removed. Bending a lithium-ion battery even slightly can create uneven spots between the thin layers inside the battery. The battery may function fine for awhile, but over time and charge cycles, the uneven area can wear down faster, eventually resulting in an electrical short. The battery would fail, swell up, and possibly catch on fire.

Arthur Shi - crwdns2934203:0crwdne2934203:0 crwdns2950251:0crwdne2950251:0

crwdns2917038:0crwdne2917038:0

crwdns2936625:0crwdne2936625:0:

crwdns2936751:024crwdne2936751:0 319

crwdns2936753:07crwdne2936753:0 2,509

crwdns2936753:030crwdne2936753:0 10,667

crwdns2959996:0crwdne2959996:0 1,234,833