crwdns2933423:0crwdne2933423:0

Nintendo Game Boy Advance SP Motherboard Replacement

crwdns2942213:0crwdne2942213:0

  1. Nintendo Game Boy Advance SP Motherboard Replacement, Prepare your Game Boy for disassembly: crwdns2935265:01crwdnd2935265:01crwdnd2935265:03crwdne2935265:0 Nintendo Game Boy Advance SP Motherboard Replacement, Prepare your Game Boy for disassembly: crwdns2935265:01crwdnd2935265:02crwdnd2935265:03crwdne2935265:0 Nintendo Game Boy Advance SP Motherboard Replacement, Prepare your Game Boy for disassembly: crwdns2935265:01crwdnd2935265:03crwdnd2935265:03crwdne2935265:0
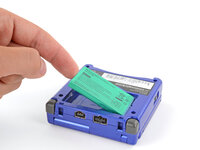
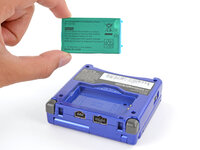
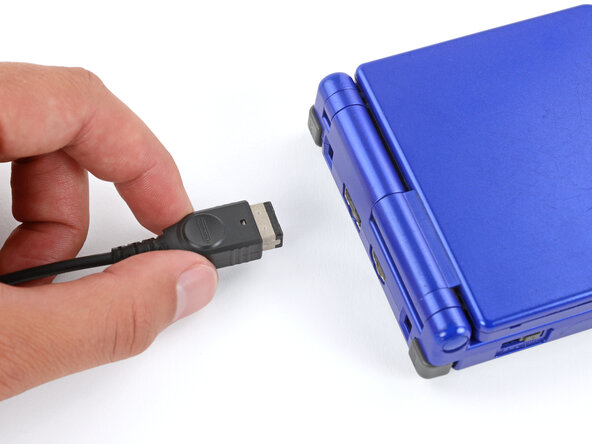
    • Slide the power switch to the OFF position and unplug any cables.

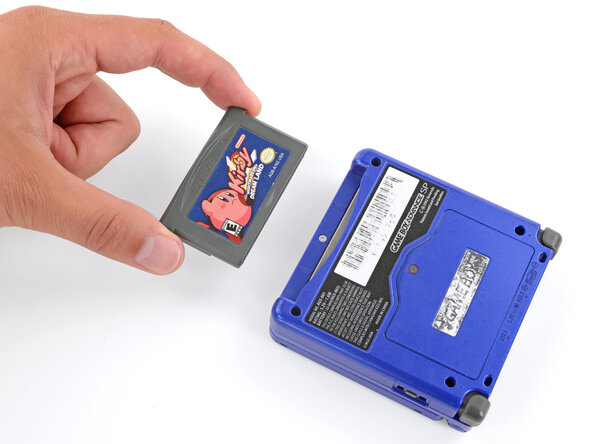
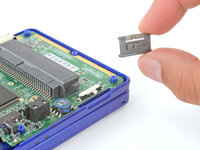
    • If you have a game cartridge in, remove it.

  2. Nintendo Game Boy Advance SP Motherboard Replacement, Remove the battery cover: crwdns2935265:02crwdnd2935265:01crwdnd2935265:02crwdne2935265:0 Nintendo Game Boy Advance SP Motherboard Replacement, Remove the battery cover: crwdns2935265:02crwdnd2935265:02crwdnd2935265:02crwdne2935265:0
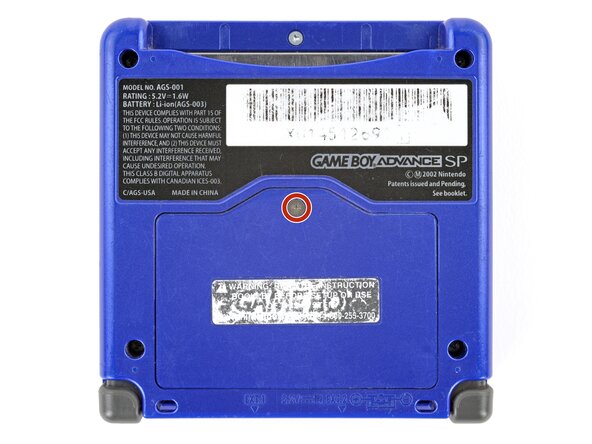
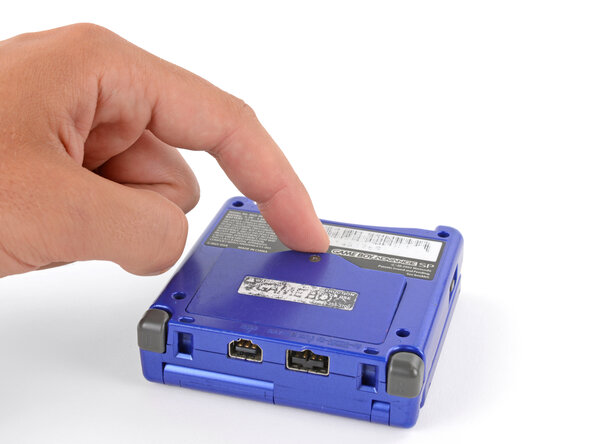
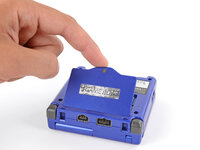
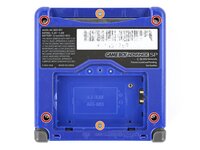
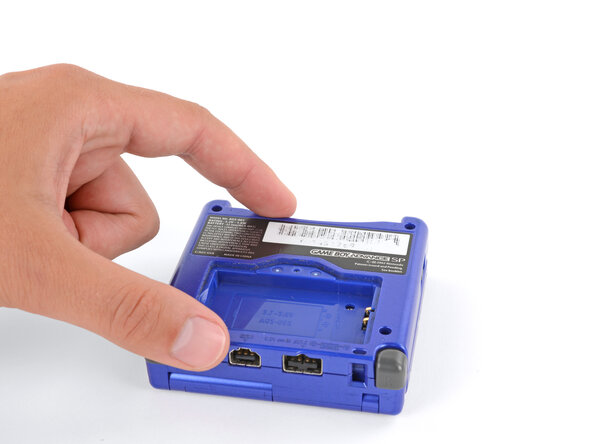
    • Use a JIS 00 screwdriver to loosen the captive screw securing the battery cover.

    • You can try to use a non-iFixit Phillips driver in a pinch, but you risk damaging or stripping the screw. Push down firmly on the driver and twist slowly.

  3. Nintendo Game Boy Advance SP Motherboard Replacement: crwdns2935265:03crwdnd2935265:01crwdnd2935265:03crwdne2935265:0 Nintendo Game Boy Advance SP Motherboard Replacement: crwdns2935265:03crwdnd2935265:02crwdnd2935265:03crwdne2935265:0 Nintendo Game Boy Advance SP Motherboard Replacement: crwdns2935265:03crwdnd2935265:03crwdnd2935265:03crwdne2935265:0
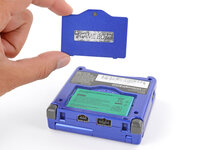
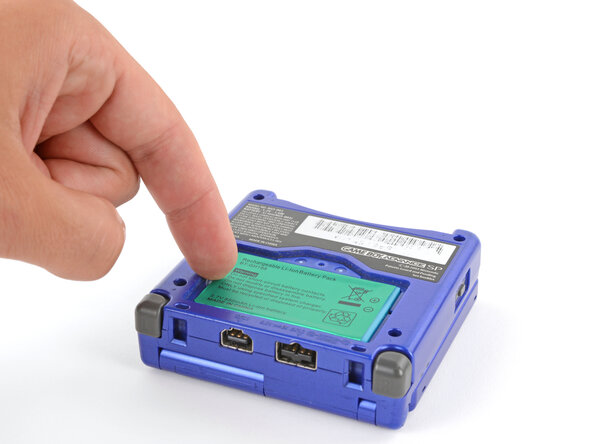
    • Lift the edge of the cover near the screw and remove the cover.

    • During reassembly, hook the tabs on the bottom edge of the cover into their slots and lay the cover into place.

  4. Nintendo Game Boy Advance SP Motherboard Replacement, Remove the battery: crwdns2935265:04crwdnd2935265:01crwdnd2935265:03crwdne2935265:0 Nintendo Game Boy Advance SP Motherboard Replacement, Remove the battery: crwdns2935265:04crwdnd2935265:02crwdnd2935265:03crwdne2935265:0 Nintendo Game Boy Advance SP Motherboard Replacement, Remove the battery: crwdns2935265:04crwdnd2935265:03crwdnd2935265:03crwdne2935265:0
    • Use your finger to lift the battery by the tab on its left edge, then remove it.

    • During reassembly:

    • Never reuse a deformed or damaged battery—it's a fire hazard. Replace it with a new battery.

    • Your replacement battery may come with a plastic enclosure that slides over the battery.

    • Insert the edge of the battery with contacts at a slight downward angle—aligning the contacts with their prongs in the recess—and press the battery into place.

  5. Nintendo Game Boy Advance SP Motherboard Replacement, Remove the bottom shell: crwdns2935265:05crwdnd2935265:01crwdnd2935265:02crwdne2935265:0 Nintendo Game Boy Advance SP Motherboard Replacement, Remove the bottom shell: crwdns2935265:05crwdnd2935265:02crwdnd2935265:02crwdne2935265:0
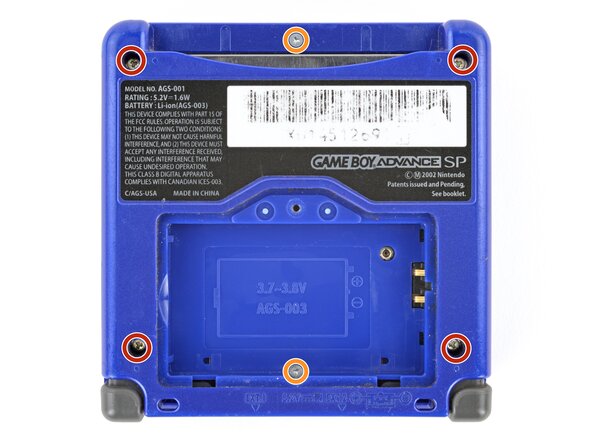
    • Use a tri‑point Y0 screwdriver to remove the six screws securing the bottom shell:

    • Four 6.3 mm‑long recessed screws

    • Two 4.6 mm‑long screws

  6. Nintendo Game Boy Advance SP Motherboard Replacement: crwdns2935265:06crwdnd2935265:01crwdnd2935265:02crwdne2935265:0 Nintendo Game Boy Advance SP Motherboard Replacement: crwdns2935265:06crwdnd2935265:02crwdnd2935265:02crwdne2935265:0
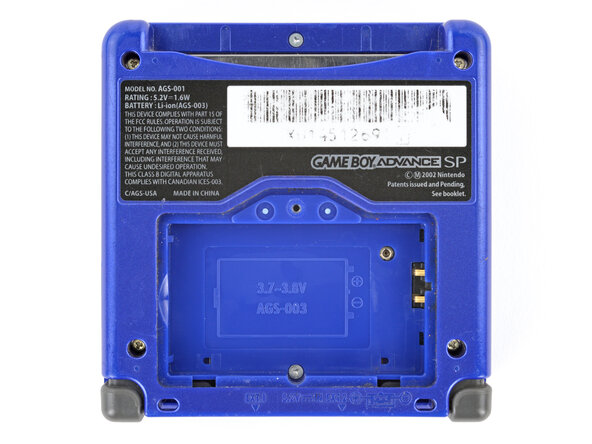
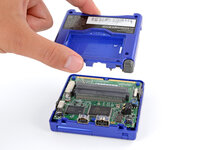
    • Lift the bottom shell straight up and remove it.

  7. Nintendo Game Boy Advance SP Motherboard Replacement, Remove the power switch cover: crwdns2935265:07crwdnd2935265:01crwdnd2935265:02crwdne2935265:0 Nintendo Game Boy Advance SP Motherboard Replacement, Remove the power switch cover: crwdns2935265:07crwdnd2935265:02crwdnd2935265:02crwdne2935265:0
    • Use your fingers to lift and remove the power switch cover.

    • During reassembly:

    • Use your fingers to put the power switch cover (notched side up) into place so the cutout goes around the actual switch.

    • Gently slide the cover back and forth to make sure it's positioned properly and moving the switch.

    • If the switch isn't properly in its cutout, you won't be able to power on your Game Boy.

  8. Nintendo Game Boy Advance SP Motherboard Replacement, Remove the motherboard screws: crwdns2935265:08crwdnd2935265:01crwdnd2935265:02crwdne2935265:0 Nintendo Game Boy Advance SP Motherboard Replacement, Remove the motherboard screws: crwdns2935265:08crwdnd2935265:02crwdnd2935265:02crwdne2935265:0
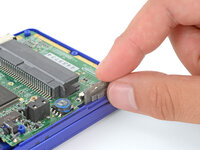
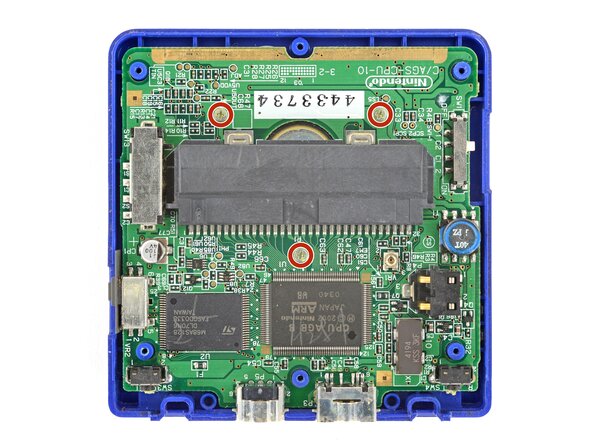
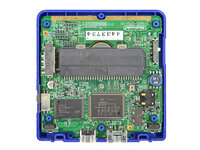
    • Use a JIS 00 screwdriver to remove the three 4.1 mm‑long screws securing the motherboard.

  9. Nintendo Game Boy Advance SP Motherboard Replacement, Prop up the motherboard: crwdns2935265:09crwdnd2935265:01crwdnd2935265:03crwdne2935265:0 Nintendo Game Boy Advance SP Motherboard Replacement, Prop up the motherboard: crwdns2935265:09crwdnd2935265:02crwdnd2935265:03crwdne2935265:0 Nintendo Game Boy Advance SP Motherboard Replacement, Prop up the motherboard: crwdns2935265:09crwdnd2935265:03crwdnd2935265:03crwdne2935265:0
    • Place a sturdy object such as a stack of books or tool case along the edge of your Game Boy with the hinges.

    • Use your fingers to gently flip the motherboard over the hinges and prop it up.

  10. Nintendo Game Boy Advance SP Motherboard Replacement, Remove the silicone pads: crwdns2935265:010crwdnd2935265:01crwdnd2935265:03crwdne2935265:0 Nintendo Game Boy Advance SP Motherboard Replacement, Remove the silicone pads: crwdns2935265:010crwdnd2935265:02crwdnd2935265:03crwdne2935265:0 Nintendo Game Boy Advance SP Motherboard Replacement, Remove the silicone pads: crwdns2935265:010crwdnd2935265:03crwdnd2935265:03crwdne2935265:0
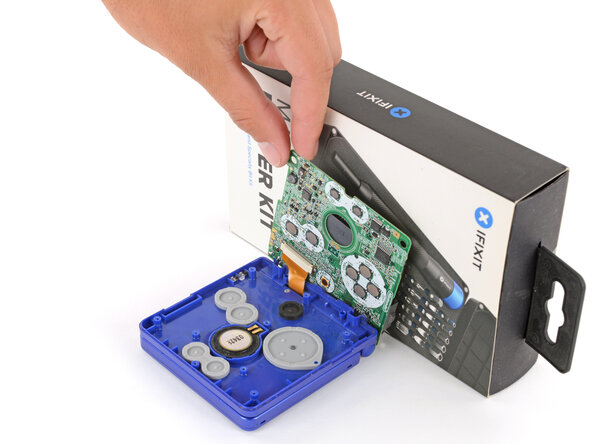
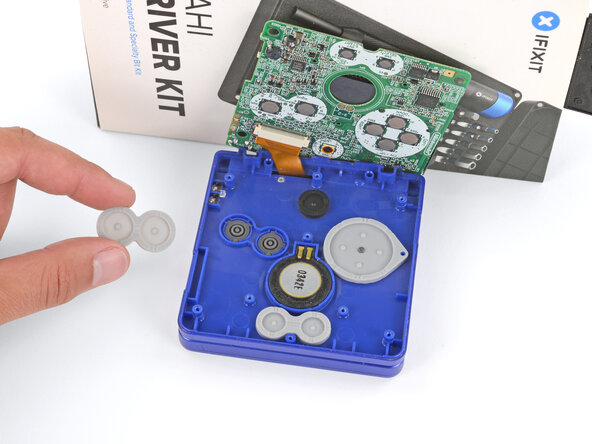
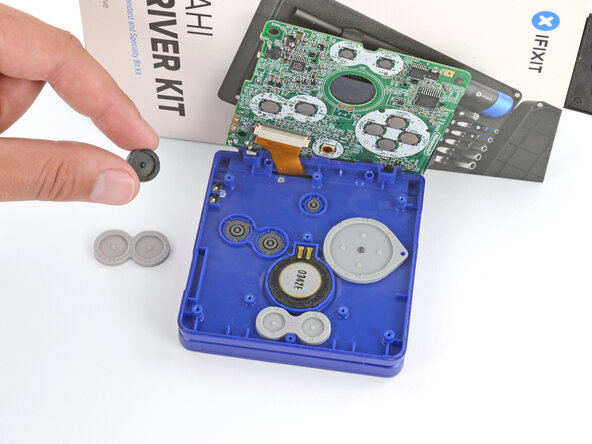
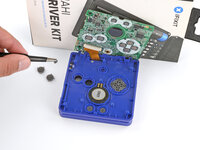
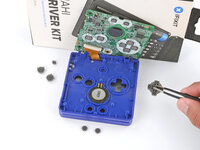
    • Use tweezers or your fingers to remove the four silicone pads covering the buttons (A and B, D‑pad, brightness, and Start/Select).

    • If any of the pads are missing, they may be stuck to their corresponding spot on the motherboard.

  11. Nintendo Game Boy Advance SP Motherboard Replacement, Remove the buttons: crwdns2935265:011crwdnd2935265:01crwdnd2935265:03crwdne2935265:0 Nintendo Game Boy Advance SP Motherboard Replacement, Remove the buttons: crwdns2935265:011crwdnd2935265:02crwdnd2935265:03crwdne2935265:0 Nintendo Game Boy Advance SP Motherboard Replacement, Remove the buttons: crwdns2935265:011crwdnd2935265:03crwdnd2935265:03crwdne2935265:0
    • Use tweezers or your fingers to remove the buttons (A and B, D‑pad, brightness, and Start/Select).

    • When re‑inserting the action buttons, note that each one is keyed specifically for its recess and proper orientation.

  12. Nintendo Game Boy Advance SP Motherboard Replacement, Remove the speaker: crwdns2935265:012crwdnd2935265:01crwdnd2935265:03crwdne2935265:0 Nintendo Game Boy Advance SP Motherboard Replacement, Remove the speaker: crwdns2935265:012crwdnd2935265:02crwdnd2935265:03crwdne2935265:0 Nintendo Game Boy Advance SP Motherboard Replacement, Remove the speaker: crwdns2935265:012crwdnd2935265:03crwdnd2935265:03crwdne2935265:0
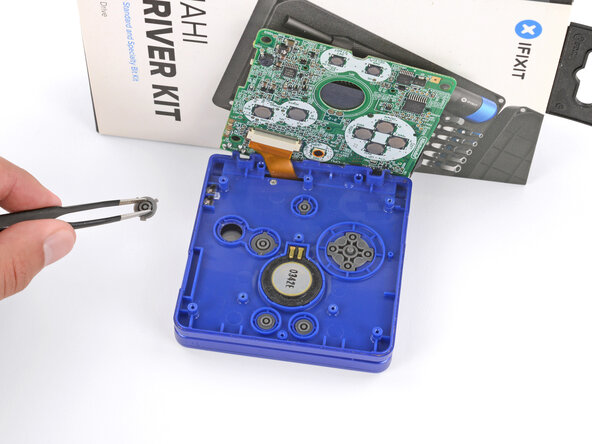
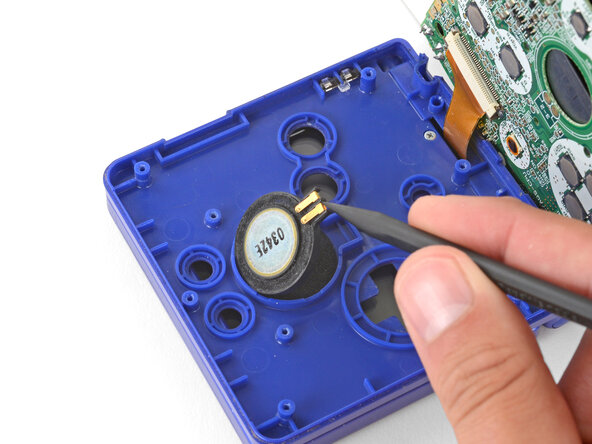
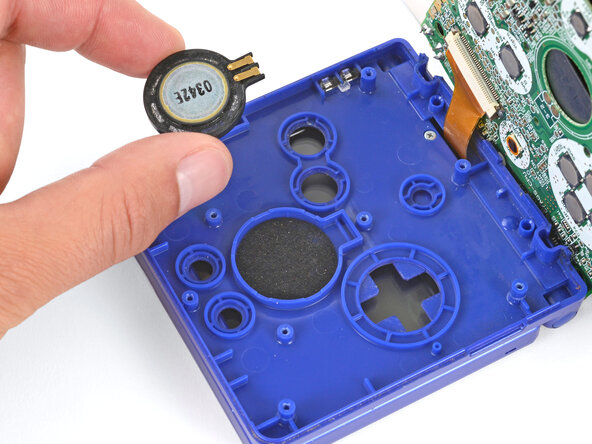
    • Use the point of a spudger or a clean fingernail to lift the speaker until you can grip it with your fingers.

    • Remove the speaker.

  13. Nintendo Game Boy Advance SP Motherboard Replacement, Prop up the main body: crwdns2935265:013crwdnd2935265:01crwdnd2935265:01crwdne2935265:0
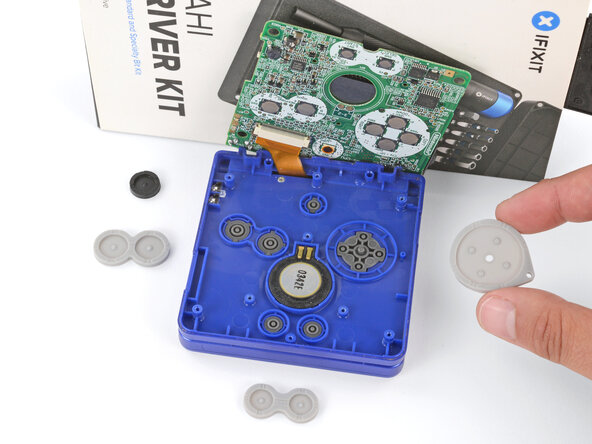
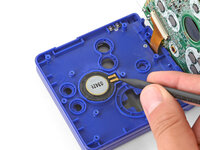
    • Remove the circular mesh from the speaker recess and set it aside—the piece can easily fall out and get lost when working.

  14. Nintendo Game Boy Advance SP Motherboard Replacement, Prop up the main body: crwdns2935265:014crwdnd2935265:01crwdnd2935265:03crwdne2935265:0 Nintendo Game Boy Advance SP Motherboard Replacement, Prop up the main body: crwdns2935265:014crwdnd2935265:02crwdnd2935265:03crwdne2935265:0 Nintendo Game Boy Advance SP Motherboard Replacement, Prop up the main body: crwdns2935265:014crwdnd2935265:03crwdnd2935265:03crwdne2935265:0
    • Be careful not to strain the screen cable during the next few steps—it has very little slack.

    • You need to prop up the main body of your Game Boy in order to disconnect the screen cable without straining it. Here are two ways to do so:

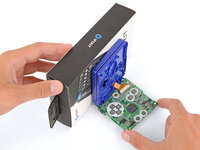
    • Option 1: Open the main body of your Game Boy to a 90‑degree angle and gently lay the motherboard down. Make sure the main body is resting on top of the motherboard to give the cable slack.

    • Option 2: Keep the main body closed and prop it up on the edge of the logic board, using a sturdy object to hold it up.

  15. Nintendo Game Boy Advance SP Motherboard Replacement, Disconnect the screen cable: crwdns2935265:015crwdnd2935265:01crwdnd2935265:03crwdne2935265:0 Nintendo Game Boy Advance SP Motherboard Replacement, Disconnect the screen cable: crwdns2935265:015crwdnd2935265:02crwdnd2935265:03crwdne2935265:0 Nintendo Game Boy Advance SP Motherboard Replacement, Disconnect the screen cable: crwdns2935265:015crwdnd2935265:03crwdnd2935265:03crwdne2935265:0
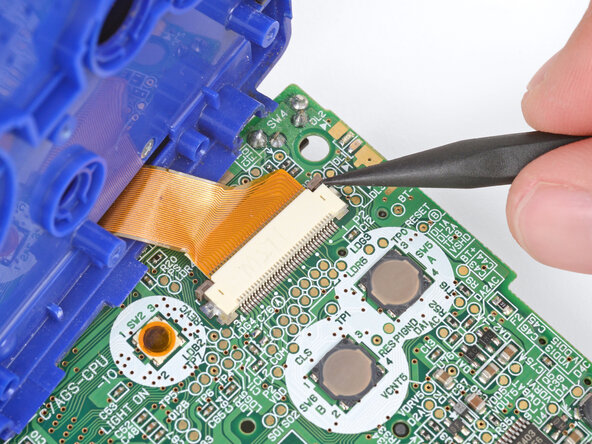
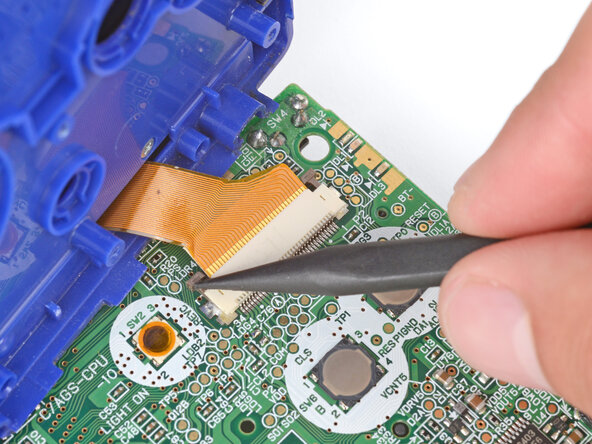
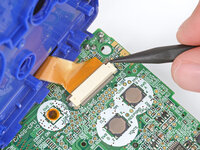
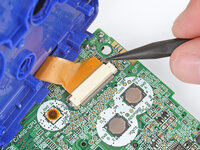
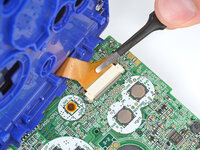
    • Use the point of a spudger to push the two tabs on either side of the screen cable connector into the unlocked position.

    • Only push the tabs until they stop. If you push them too far, you may slide the locking tab off the connector.

  16. Nintendo Game Boy Advance SP Motherboard Replacement: crwdns2935265:016crwdnd2935265:01crwdnd2935265:02crwdne2935265:0 Nintendo Game Boy Advance SP Motherboard Replacement: crwdns2935265:016crwdnd2935265:02crwdnd2935265:02crwdne2935265:0
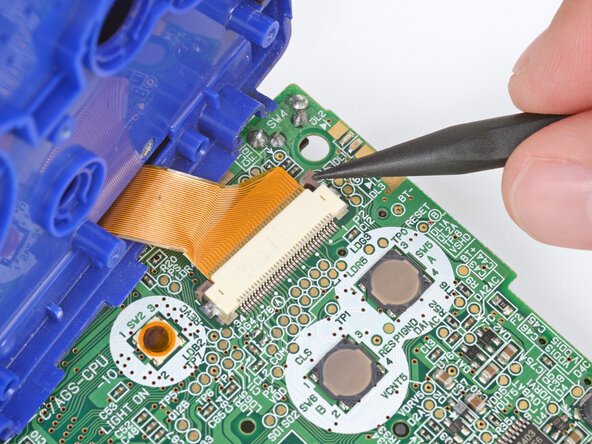
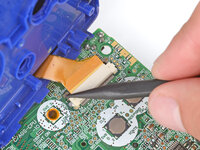
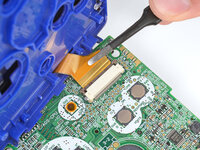
    • Use a pair of tweezers to gently slide the screen cable out of its socket.

  17. Nintendo Game Boy Advance SP Motherboard Replacement, Remove the main body: crwdns2935265:017crwdnd2935265:01crwdnd2935265:01crwdne2935265:0
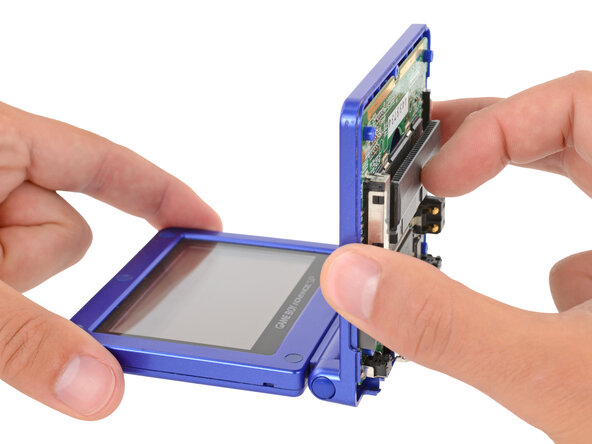
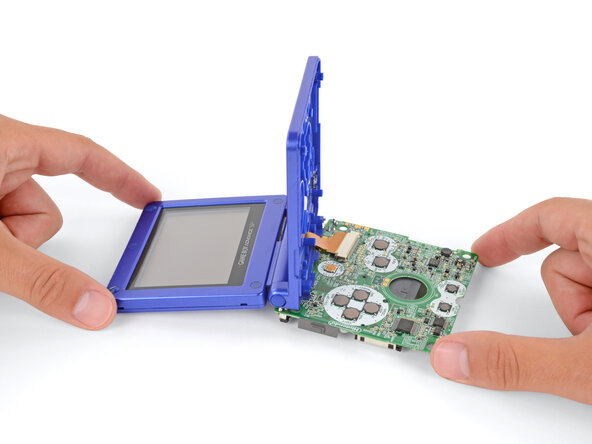
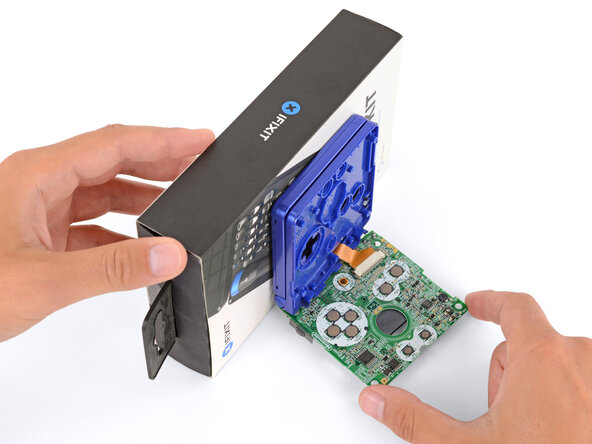
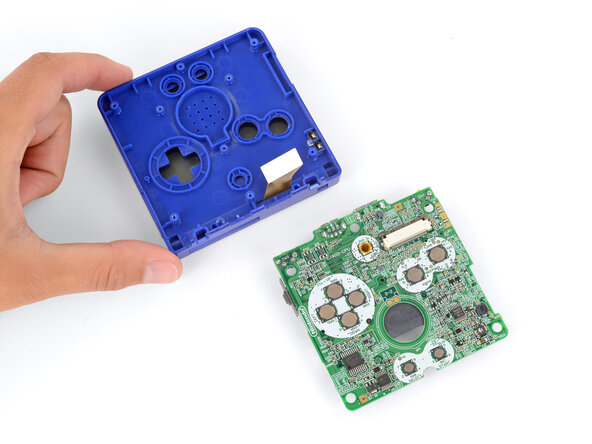
    • Remove the main body from the motherboard.

    • During reassembly, prop up the main body for enough slack reconnect the screen cable.

crwdns2915888:0crwdne2915888:0

To reassemble your device, follow these instructions in reverse order.

Take your e-waste to an R2 or e-Stewards certified recycler.

Repair didn’t go as planned? Try some basic troubleshooting, or ask our Answers Community for troubleshooting help.

crwdns2935229:026crwdne2935229:0

Spencer Day

crwdns2935283:009/14/22crwdne2935283:0

130 260 crwdns2915208:0crwdne2915208:0

crwdns2935297:0884crwdne2935297:0

crwdns2947412:04crwdne2947412:0

I just bought one at a garage sale. Everything works fine, but the screen does not display properly. when you turn the unit on, all you get is vertical lines on the screen. They are random each time you turn it on. Is the ribbon ripped? If so, can you get a new one??? If so - where?

Brian - crwdns2934203:0crwdne2934203:0

picked up Gameboy advanced sp 101 model when you go to charge it the light comes on but then shuts off so I thought maybe its either the battery or a fuse on the motherboard how can I change that or fix it

jourdanjoseph - crwdns2934203:0crwdne2934203:0

I think this would be a good idea, one day i will have a new GBA SP LCD screen and then, disassemble it and replace the screen

Santi12008 - crwdns2934203:0crwdne2934203:0

I dropped it once , now half of the games do not run, what should I do?

Sarthak sibou - crwdns2934203:0crwdne2934203:0

crwdns2917038:0crwdne2917038:0

crwdns2936625:0crwdne2936625:0:

crwdns2936751:024crwdne2936751:0 9

crwdns2936753:07crwdne2936753:0 87

crwdns2936753:030crwdne2936753:0 346

crwdns2942667:0crwdne2942667:0 45,760