crwdns2915892:0crwdne2915892:0
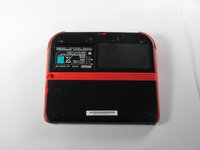
This guide illustrates how to remove the upper rear panel from the Nintendo 2DS to access the battery and other parts of the device.
crwdns2942213:0crwdne2942213:0
-
-
Remove the two Phillips captive screws securing the upper rear panel.
 crwdns2952109:0crwdne2952109:0
-
-
-
-
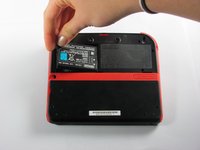
Hinge the upper rear panel upwards and outwards to remove it.
-
-
-
Remove the battery from its housing by lifting it up from the side closest to the outside edge.
-


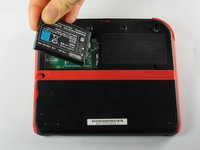
To reassemble your device, follow these instructions in reverse order.
crwdns2935221:0crwdne2935221:0
crwdns2935229:046crwdne2935229:0
crwdns2935287:0crwdne2935287:0

Cal Poly, Team 70-1, Forte Winter 2015 crwdns2935289:0Cal Poly, Team 70-1, Forte Winter 2015crwdne2935289:0
CPSU-FORTE-W15S70G1
crwdns2931471:04crwdne2931471:0
crwdns2935297:036crwdne2935297:0
crwdns2947412:07crwdne2947412:0
The only thing I was trying to figure out is if the bezel came up with the panel, and it’s not clear from these photos. For the record, it does not.
francis deible - crwdns2934203:0crwdne2934203:0 crwdns2950251:0crwdne2950251:0
This didnt help my problem
Artemy Matveev - crwdns2934203:0crwdne2934203:0 crwdns2950251:0crwdne2950251:0
maybe its because you did not plug the battery correctly matthew
Ludovic Chartrain - crwdns2934203:0crwdne2934203:0 crwdns2950251:0crwdne2950251:0
or maybe its just not working ludovic 🫡
Natalia Rabago - crwdns2934203:0crwdne2934203:0 crwdns2950251:0crwdne2950251:0
Who knows, will the same battery, instead of 1300mah in original, 2000mah in 'fake' works with 2DS?
Anton Kornilov - crwdns2934203:0crwdne2934203:0 crwdns2950251:0crwdne2950251:0