crwdns2915892:0crwdne2915892:0
If your screen breaks or is no longer responsive to touch, then you will need to replace it. The LCD screen itself has two wires attached that will need to be separated from the motherboard, and reinstalled with the new part.
crwdns2942213:0crwdne2942213:0
-
-
Using a Philips #000 head screwdriver, remove the 8 screws (3.30 mm) visible on the external part of the camera.
-
There are 2 on each side, and 4 on the bottom.
-
-
-
Remove the black casing on the back of the camera that runs around the LCD screen.
-
-
-
Using the Philips #000 head screwdriver, remove the 1.90 mm internal screw located just above the lanyard mount.
-
-
-
Using the Philips #000 head screwdriver, remove the 3.30 mm screw located on the side of the camera near the lanyard mount.
-
-
-
Using the Philips #000 head screwdriver, remove 2 additional 3.30 mm screws holding the lanyard mount in place.
-
-
-
-
Remove the lanyard mount and accompanying side shell casing off of the camera.
-
-
-
Using the Philips #000 head screwdriver, remove the 3.30 mm screw securing the top shell casing.
-
-
-
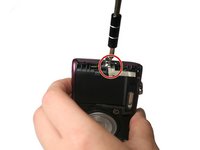
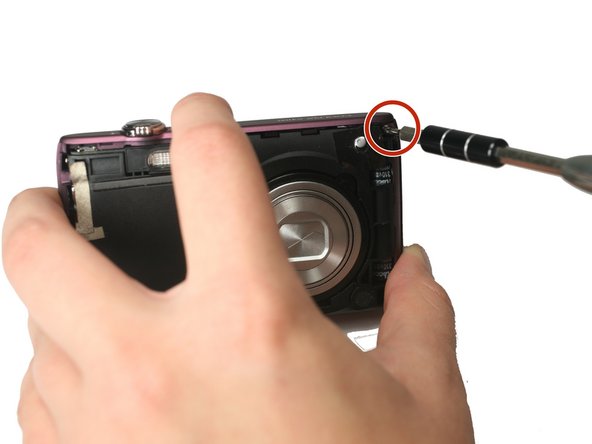
Using the Philips #000 head screwdriver, remove the 3.40 mm screw located on the front of the camera in the upper corner by the LED light.
-
-
-
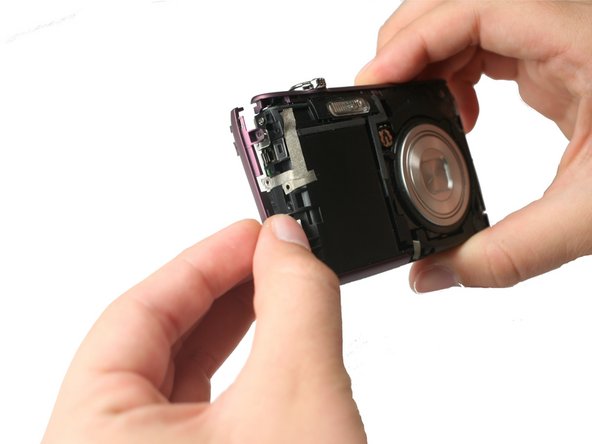
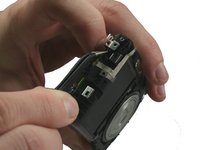
Remove the remaining side shell casing.
-
-
-
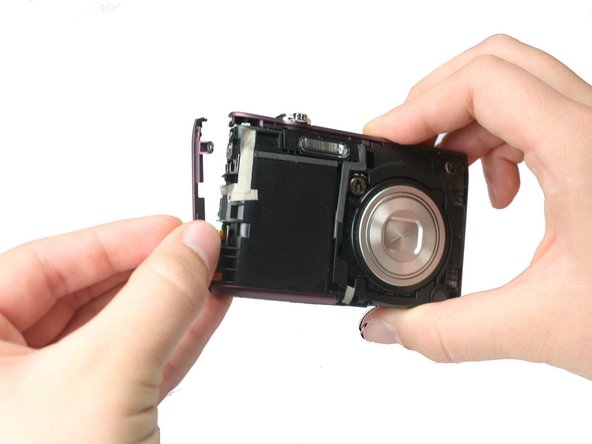
Using the Philips #000 head screwdriver, remove the 3.40 mm screw located near the functional buttons.
-
-
crwdns2935267:0crwdne2935267:0Tweezers$4.99
-
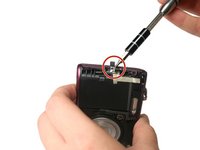
Using precision tweezers, remove the ribbon cable that runs from the functional buttons plate to the under side of the motherboard.
-
-
-
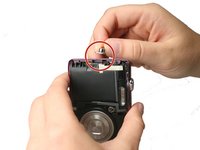
Using precision tweezers, lift up the bottom of the functional buttons plate and remove the metal plate.
-
-
crwdns2935267:0crwdne2935267:0Tweezers$4.99
-
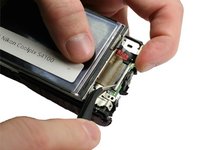
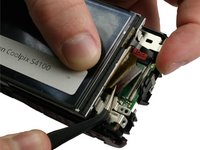
Using precision tweezers, gently remove the ribbon cable running from LCD to the bottom side of the motherboard.
-
-
-
Using precision tweezers, gently lift up on the black strip of the ZIF Connector securing the cable from the LCD to the motherboard.
-
Then, gently remove the wire by pulling the base of the ribbon cable towards the LCD screen.
-
-
-
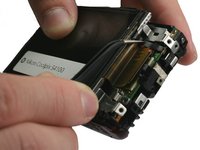
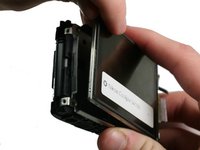
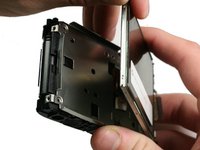
Remove the LCD screen from the metal mount.
-


To reassemble your device, follow these instructions in reverse order.
To reassemble your device, follow these instructions in reverse order.
crwdns2915084:0crwdne2915084:0

Baylor, Team 4-2, Williams Fall 2015 crwdns2935289:0Baylor, Team 4-2, Williams Fall 2015crwdne2935289:0
BU-WILLIAMS-F15S4G2
crwdns2931471:04crwdne2931471:0
crwdns2935297:08crwdne2935297:0
crwdns2947410:01crwdne2947410:0
Quick question would this be similar to replacing the screen for the Nikon Coolpix S4300? I couldn't find anything to fix that specific camera.