crwdns2915892:0crwdne2915892:0
If the doorbell button on your Nest Hello is cracked or leaking, this guide will help you access and replace it. During disassembly, it is easy to damage the waterproofing O-Ring, so plan on replacing that as well. This does involve removing all of the internals from the device using the iFixit opening picks, Phillips #000 screwdriver, and tweezers. Be sure to take your time and keep track of screws and other parts.
crwdns2942213:0crwdne2942213:0
-
-
-
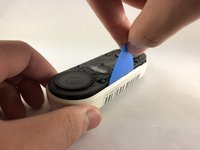
Insert the pick between the black faceplate and white casing of the Nest Hello.
-
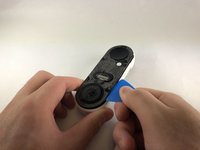
Pry the faceplate away from the device with the opening pick.
-
Completely remove the faceplate from the device, do not be afraid to pull hard.
 crwdns2952109:0crwdne2952109:0
-
-
-
Peel back the cover stickers and use the Phillips #000 screwdriver to remove the four screws.
-
-
-
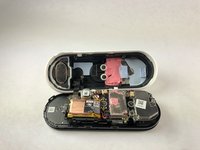
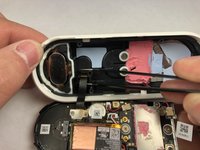
Insert opening pick between the white casing and the black internal circuitry and pry it out.
-
-
-
-
-
Use the Phillips #000 to remove the two screws holding the ribbon cable to the white casing.
-
-
-
crwdns2935267:0crwdne2935267:0Tweezers$4.99
-
Grip the connector with the tweezers as shown and pull it away from the casing.
-
-
-
Remove the six smaller screws shown with the Phillips #000 screwdriver.
-
Remove the three larger screws shown with the Phillips #000 screwdriver.
-
-
-
Holding the device as shown push the circuit board away from you and up to free it from the clips.
-
-
-
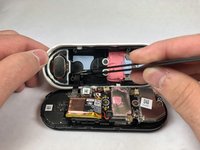
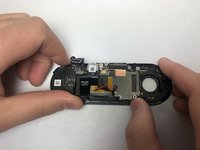
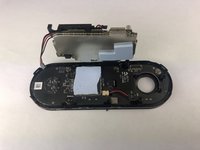
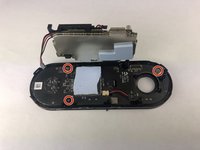
Use the Phillips #000 screwdriver to remove the three screws holding the last circuit board to the black plastic housing.
-
-
-
Insert the pick underneath the black connectors and pry them upward to disconnect them from the circuit board.
-
Work your way around the device, prying the circuit board away from the housing.
-
-
-
-
-
Once the circuitboard is free from the plastic housing, the button can be removed by pushing on it from the front side.
-
-








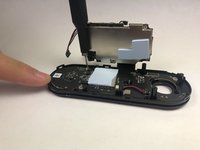

To reassemble your device, follow these instructions in reverse order.
crwdns2935221:0crwdne2935221:0
crwdns2935227:0crwdne2935227:0

crwdns2935287:0crwdne2935287:0

Embry-Riddle Aeronautical University, Team S1-G7, Cromer Twal Spring 2020 crwdns2935289:0Embry-Riddle Aeronautical University, Team S1-G7, Cromer Twal Spring 2020crwdne2935289:0
ERAU-CROMER TWAL-S20S1G7
crwdns2931471:04crwdne2931471:0
crwdns2935297:027crwdne2935297:0
crwdns2947412:02crwdne2947412:0
Where do you get the parts. Google is no help. I’m trying to get the black faceplate from your first step. I can’t find it.
Ryan Gauder - crwdns2934203:0crwdne2934203:0 crwdns2950251:0crwdne2950251:0
Where do I buy a button?
Joel Lundi - crwdns2934203:0crwdne2934203:0 crwdns2950251:0crwdne2950251:0
