crwdns2915892:0crwdne2915892:0
This guide will help you replace a leaky O-Ring caused by exposure to the elements or damage during disassembly. All you will need to access this are iFixit opening picks. It is recommended that this is replaced anytime the device is opened as it can be pinched or torn during removal of the face plate or device housing.
crwdns2942213:0crwdne2942213:0
-
-
-
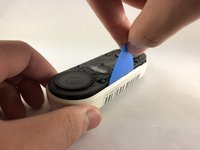
Insert the pick between the black faceplate and white casing of the Nest Hello.
-
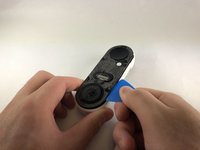
Pry the faceplate away from the device with the opening pick.
-
Completely remove the faceplate from the device, do not be afraid to pull hard.
 crwdns2952109:0crwdne2952109:0
-
-
-
Peel back the cover stickers and use the Phillips #000 screwdriver to remove the four screws.
-
-
-
-
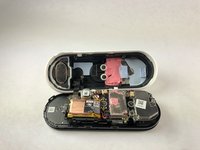
Insert opening pick between the white casing and the black internal circuitry and pry it out.
-
-
-
-
-
Remove the O-Ring (colored blue) from the device. It is placed around the edge of the motherboard.
-
-



To reassemble your device, follow these instructions in reverse order.
crwdns2935221:0crwdne2935221:0
crwdns2935229:03crwdne2935229:0

crwdns2935287:0crwdne2935287:0

Embry-Riddle Aeronautical University, Team S1-G7, Cromer Twal Spring 2020 crwdns2935289:0Embry-Riddle Aeronautical University, Team S1-G7, Cromer Twal Spring 2020crwdne2935289:0
ERAU-CROMER TWAL-S20S1G7
crwdns2931471:04crwdne2931471:0
crwdns2935297:027crwdne2935297:0
crwdns2947412:02crwdne2947412:0
Is there a link available for spare replacement parts? I can’t seem to find anything other than replacement internal batteries . Thanks!
Andres Chavez - crwdns2934203:0crwdne2934203:0 crwdns2950251:0crwdne2950251:0
Also looking for this replacement part. Googling did not produce results.
KB_KB - crwdns2934203:0crwdne2934203:0 crwdns2950251:0crwdne2950251:0
