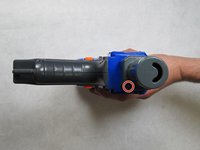
crwdns2915892:0crwdne2915892:0
A displaced or damaged firing spring could render your blaster futile in combat. Periodic replacement as a preventative maintenance strategy may allow you to avoid this unfortunate situation.
Modifying your blaster is not advised and may void the manufacturer’s warranty in certain states.
This blaster is equipped with a rifled barrel for maximum performance.
crwdns2942213:0crwdne2942213:0
-
-
While holding the blaster, rotate the barrel assembly in the counter-clockwise direction and pull away from the blaster.
-
-
-
Remove the stock of the blaster by pushing the orange tabs downward while pulling the stock away from the blaster.
-
-
-
-
Remove the magazine from the blaster by forcing the sliding mechanism backwards, pushing the orange tabs downward, and pulling the magazine away.
-
-
-
Remove the stock attachment point by removing the two 8mm Phillips head screws.
-
-
-
Remove the eleven 8mm and two 10mm Phillips head screws from the left side of the blaster, and carefully remove the outer casing.
Itd be nice if we got a pic comparing the internals to an old yellow nerf recon (if you have one). I wonder how much changes between generations.
Removed every screw and gun does not separate. not showing the seperation of the gun makes this tutorial completely useless.
You have to remove the thing you use to ready it
It would be nice if you could color-code where to put the 16mm, 10mm and 8mm screws. That way, you don’t wind up damaging the screw post or stripping a screw by trying to insert a 10mm screw into a post meant for an 8mm one.
it's very helpful that the troubleshooting for slider won't move backwards goes to "Another two must be removed with the sliding mechanism in the back position." How, just how do you do that if it's jammed
please help if you can
definitely not angry at the troubleshooting page
-
-
-
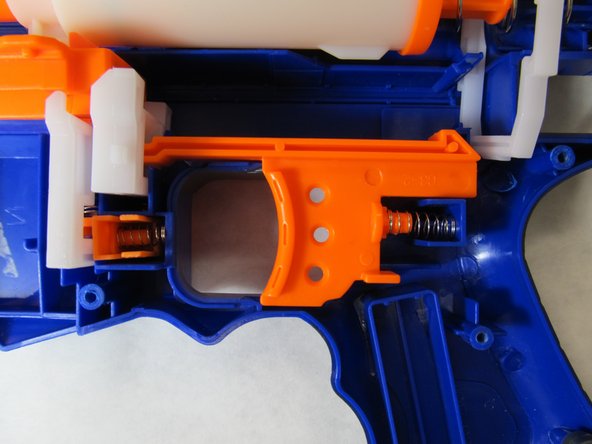
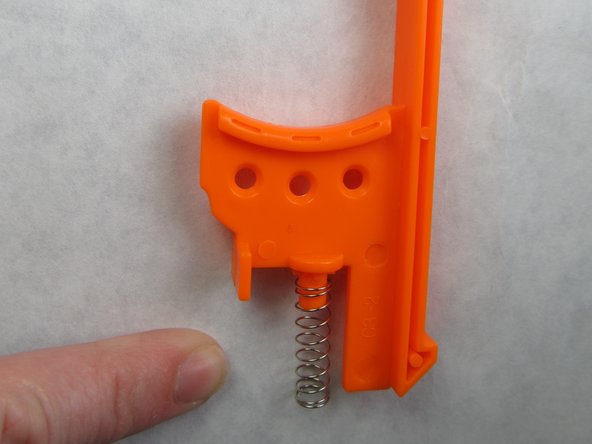
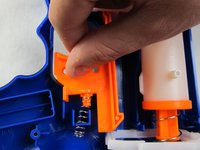
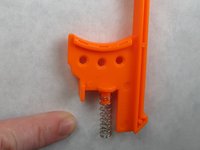
Carefully pull the orange trigger upward and backward to remove it from the blaster.
-
Remove the spring from the rear of the trigger.
-


To reassemble your device, follow these instructions in reverse order.
To reassemble your device, follow these instructions in reverse order.
crwdns2935221:0crwdne2935221:0
crwdns2935227:0crwdne2935227:0
crwdns2947410:01crwdne2947410:0
ok, taken the spring out. now what?