crwdns2915892:0crwdne2915892:0
This guide will show the user how to disassemble the Neato XV-21, locate the motor and disconnect the motor. The user can then follow the guide in reverse to connect and reassemble the Neato XV-21.
crwdns2942213:0crwdne2942213:0
-
-
Flip the Neato on its back so the bottom is exposed
-
Unscrew the seven screws.
-
-
-
Lift the panels to reveal the batteries, brush and fan
-
-
-
The Neato's core components are now exposed and ready to be cleaned and/or replaced.
-
-
-
-
Pinch and pull the white connector to disconnect the battery from the device
-
Lift and remove the battery from the cavity
-
-
-
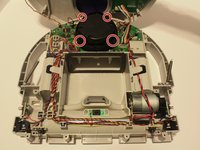
Remove the 17 visible screws and the 2 covered/hidden screws near the battery compartments that connect the bottom to the top of the Neato robot.
I have a neato signature, have followed to this point removing every screw listed but cannot remove the lid. Every video I have watched shows the top and base coming apart easily. Can anybody help
There are two white paper seals and two more screws under them
There are two white squares covering two more hidden screws. They are just paper, or something similar, so just poke through with your screw driver.
After you take off the 17 screws (circled in the picture) in addition to the 2 under the tamper evident seals, there are 4 deep along the front edge.
There are two more screws under the white paper
-
-
-
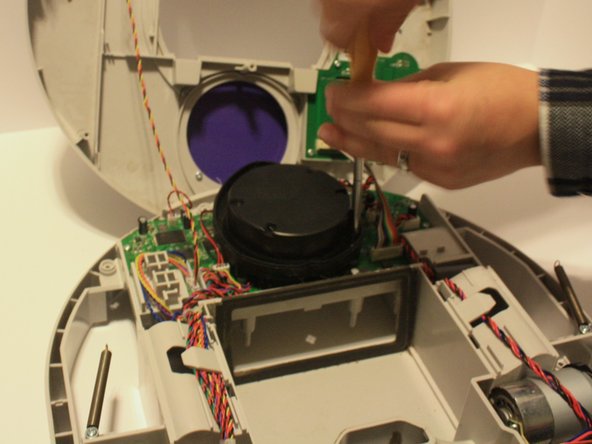
Lift and separate the two pieces to give access to the Distance Sensor
-
-
-
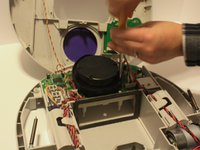
Remove the four screws on the lidar sensor.
-
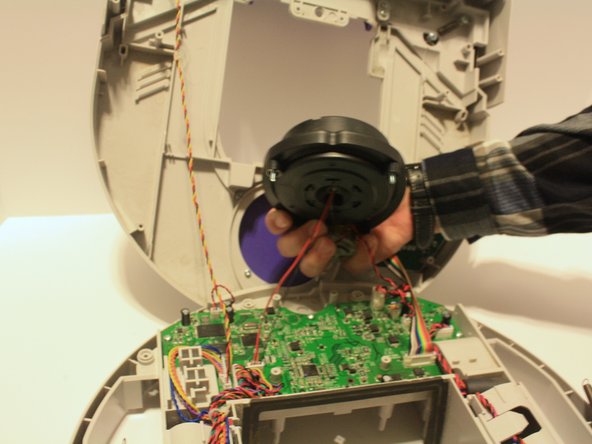
After the wires are fully disconnected lift the motor away to reveal the motherboard
-
-
-
Pinch and pull the white connectors indicated in the image, this will allow the top and bottom panels to fully seperate
-


To reassemble your device, follow these instructions in reverse order.
To reassemble your device, follow these instructions in reverse order.
crwdns2935221:0crwdne2935221:0
crwdns2935227:0crwdne2935227:0
crwdns2915084:0crwdne2915084:0

University of North Texas, Team S2-G3, Thompson Fall 2017 crwdns2935289:0University of North Texas, Team S2-G3, Thompson Fall 2017crwdne2935289:0
UNT-THOMPSON-F17S2G3
crwdns2931471:04crwdne2931471:0
crwdns2935297:06crwdne2935297:0
crwdns2947410:01crwdne2947410:0
Mine has a wire jumper that I can't remember where it goes. It appears to be an extension for the Lidar motor wires, but I can't say for sure if that's where it was when I took this apart over a year ago. I can't find anywhere else it might go.
were those common in these? or do know of anyplace else it might go?
Thanks!
This should be unnecessary. You should only need to remove the four screws from the battery doors. In this picture, the two lower-right screws are for one of the battery doors and the other is on the other side of the robot, under the demonstrator’s hands.
John - crwdns2934203:0crwdne2934203:0
It is EIGHT screws, not SEVEN.
There are FOUR screws for the battery compartment panels (TWO for each).
FOUR screws for the fan access panel.
The panels are independent. There is no need to open the battery compartments to access the fan, nor vice versa.
Fred - crwdns2934203:0crwdne2934203:0