crwdns2915892:0crwdne2915892:0
The home button on the Motorola Moto G5 plus can stop working. If you find the home button sticks and is unresponsive, use this guide to replace it with a new one.
crwdns2942213:0crwdne2942213:0
-
-
Use a SIM eject bit, SIM eject tool, or paper clip to remove the SIM card from your phone.
-
-
-
Prepare an iOpener and heat the front of the phone along its left edge for about two minutes, or until it's slightly too hot to touch. This will help soften the adhesive securing the display.
Heat not only along the phone’s left edge, right?
I used two suction cups on the screen. Just above the finger print reader and the other near the top. Then used my heatgun set at 390 degrees. Low speed and had the wide, flat blade attachment so the heat spread to a narrow/wide area. Heated the left edge from corner to corner, then pulled up on the suction cups until I could work in a plastic triangle guitar-like-pic under the screen. Continued to heat and add another pick around the screen . Do not rush and take your time. Got the screen off and didn’t damage the adhesive too bad. Was able to reuse it. Once reassembled, I heated the screen around the edge and rubbed with a plastic tool to make sure the adhesive was working. So far so good with the adhesive. Good Luck!
-
-
-
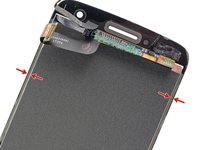
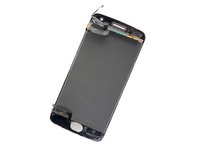
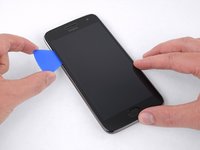
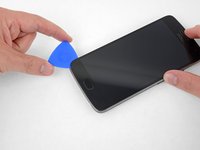
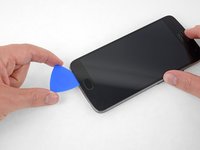
Refer to the second and third images and familiarize yourself with the width of the adhesive around edges of the display.
2mm ONLY on the SIDES of the display. The top can have adhesive as far as 10mm from the edge, and at the bottom as much as 12mm. And there’s no way to cut this adhesive with the tools at 45 degrees. Once the left side is open, carefully insert the tool a little further at a time on the top and bottom, whilst attempting to keep a little pull force on the suction cup. Hard to do, and almost inevitably the on-off button will be hit at some point unless you’re really careful. The adhesive pieces are quite tough, and I used a tiny scissors to cut some of the adhesive “ropes” when the case was far enough open. A highly detailed photo of the adhesive locations top and bottom (and on both parts) would help here. This is likely the most difficult step (well, don’t know for certain, ‘cause I haven’t got further yet…), and warrants better photos and explanation IMO.
-
-
-
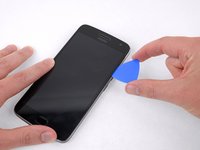
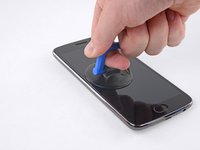
Apply a suction cup to the display, near the middle of the left edge.
-
Pull the suction cup with firm, constant pressure to create a slight gap between the display panel and the rear case.
-
If the display doesn't separate even with significant force, apply more heat to further soften the adhesive and try again. The adhesive cools quickly, so you may need to heat it repeatedly.
-
-
-
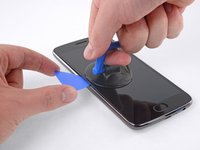
Slide the tool along the left edge of the phone, cutting through the adhesive securing the display.
-
-
-
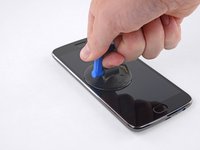
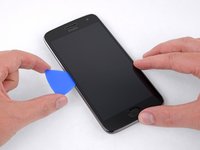
Slide the opening pick down and cut the adhesive around the bottom of the display.
-
-
-
-
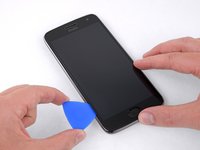
Continue cutting through the adhesive on the top and right sides of the phone.
Pues se me fastidia la pantalla al hacer esto
This is a great guide except for one thing. My screen works fine but it is separating from the phone on both sides. I need to remove it just enough to clean up the old adhesive and reattach. The instructions on repeating the steps in reverse order to replace the screen doesn't help with getting the regluing right, what kind of glue or double sided tape to use, etc …
-
-
-
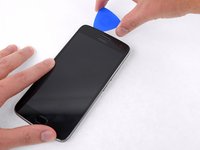
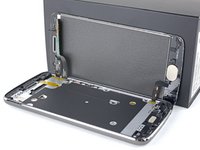
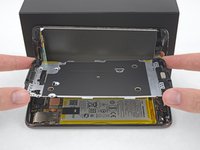
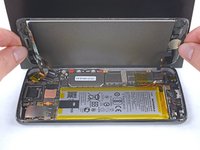
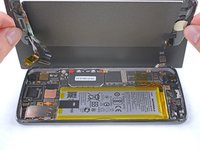
Once all the adhesive is cut, carefully lift open the display from the left edge.
-
Prop the display unit at a 90 degree angle against a box to prevent the display and fingerprint cables from bending or tearing.
it should be pointed out that the fingerprint cable is easy to tear as it lays next to a sharp angle of the display unit.
-
-
-
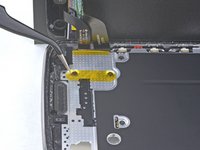
Remove the yellow sticker covering two of the black Phillips screws below the earpiece.
Attention must be paid not to lose the small rubber gasket around the proximity sensor - I found it best to collect it with all the screws of the midframe and reinstall it at the end during re-assembly.
-
-
-
Remove the following Phillips screws from the midframe:
-
Sixteen 3.8 mm black screws
-
Three 2.4 mm silver screws
Esa placa se levanta por el otro lado, por donde estan los botones de volumen por ahi se puede levantar de una mejor manera.
-
-
-
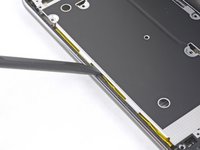
Insert the flat end of a spudger between the midframe and the left edge of the phone and carefully pry to release the two clips holding the midframe in place.
A lot easier to pry open from the right side of the phone.
-
-
-
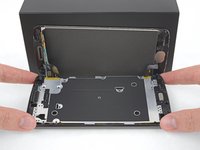
Lift the midframe up and away from the phone.
If replacing the battery, jump to that section at this step.
-
-
-
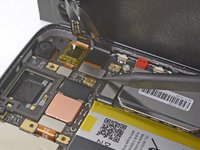
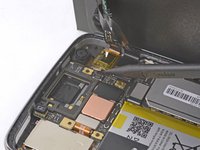
Use the point of a spudger to disconnect the larger of the two display cable connectors.
-
-
-
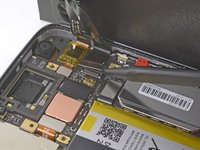
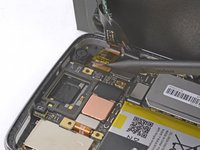
Disconnect the smaller display cable connector.
-
Gently continue lifting the cable to break the adhesive seal and pull the cable away from the motherboard.
-
-
-
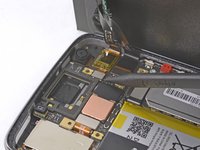
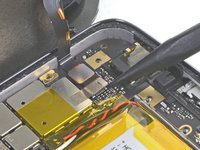
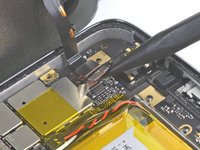
At the opposite end of the phone, disconnect the fingerprint sensor cable.
-
-
-
Remove the display assembly from the phone.
If your digitizer appears to be "dead", power down the phone (which you can't because the digitizer is dead) and disconnect the battery connector by prying the connector up out of its socket (with something NONE conductive like your spudge tool) for few seconds. (It does not "slide" out, but pries straight up.) This will FORCE a cold boot and initialize the digitizer WITHOUT a factory reset, preserving all setups and all your files. :-)
-
-
-
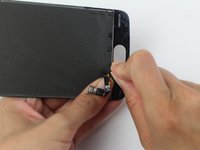
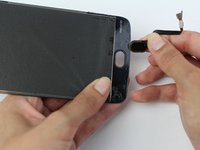
Remove the fingerprint sensor button from the screen by pushing it out with your fingers.
-


To reassemble your device, follow these instructions in reverse order.
To reassemble your device, follow these instructions in reverse order.
crwdns2935221:0crwdne2935221:0
crwdns2935229:05crwdne2935229:0
crwdns2915084:0crwdne2915084:0

USF Tampa, Team S1-G6, Leahy Fall 2017 crwdns2935289:0USF Tampa, Team S1-G6, Leahy Fall 2017crwdne2935289:0
USFT-LEAHY-F17S1G6
crwdns2931471:05crwdne2931471:0
crwdns2935297:021crwdne2935297:0
crwdns2947412:02crwdne2947412:0
Any way to just clean the edges of the sensor without taking apart the entire phone?
Finger print scanner connector port get completely damaged. is this the reason my phone is not getting started