crwdns2915892:0crwdne2915892:0
This guide will walk you through the process of removing or replacing the display assembly of a Motorola Moto G5 Plus.
This guide is for replacing a complete display assembly, which includes the home button. Your replacement part should look like this. If you purchased a bare display, you must complete additional disassembly steps, which are not covered by this guide.
For your safety, discharge your battery below 25% before disassembling your phone. This reduces the risk of a dangerous thermal event if the battery is accidentally damaged during the repair.
crwdns2942213:0crwdne2942213:0
-
-
Use a SIM eject bit, SIM eject tool, or paper clip to remove the SIM card from your phone.
-
-
-
Prepare an iOpener and heat the front of the phone along its left edge for about two minutes, or until it's slightly too hot to touch. This will help soften the adhesive securing the display.
-
-
-
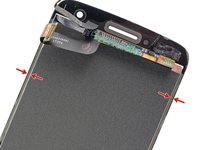
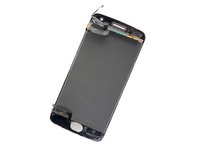
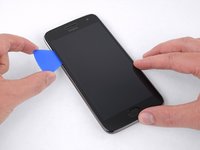
Refer to the second and third images and familiarize yourself with the width of the adhesive around edges of the display.
-
-
-
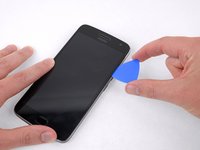
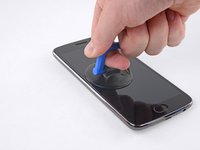
Apply a suction cup to the display, near the middle of the left edge.
-
Pull the suction cup with firm, constant pressure to create a slight gap between the display panel and the rear case.
-
If the display doesn't separate even with significant force, apply more heat to further soften the adhesive and try again. The adhesive cools quickly, so you may need to heat it repeatedly.
-
-
-
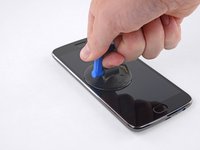
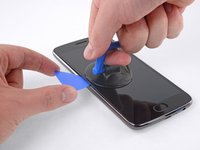
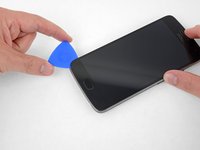
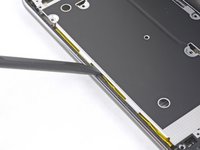
Slide the tool along the left edge of the phone, cutting through the adhesive securing the display.
-
-
-
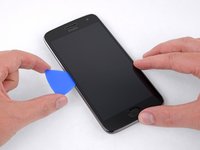
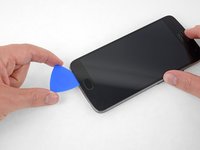
Slide the opening pick down and cut the adhesive around the bottom of the display.
-
-
-
-
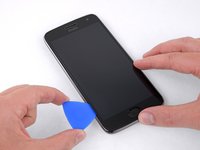
Continue cutting through the adhesive on the top and right sides of the phone.
-
-
-
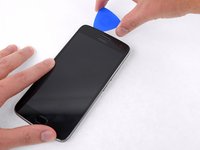
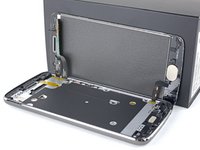
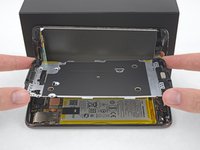
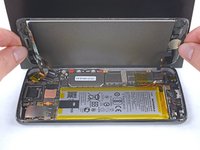
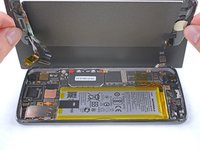
Once all the adhesive is cut, carefully lift open the display from the left edge.
-
Prop the display unit at a 90 degree angle against a box to prevent the display and fingerprint cables from bending or tearing.
-
-
-
Remove the yellow sticker covering two of the black Phillips screws below the earpiece.
-
-
-
Remove the following Phillips screws from the midframe:
-
Sixteen 3.8 mm black screws
-
Three 2.4 mm silver screws
-
-
-
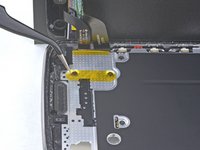
Insert the flat end of a spudger between the midframe and the left edge of the phone and carefully pry to release the two clips holding the midframe in place.
-
-
-
Lift the midframe up and away from the phone.
-
-
-
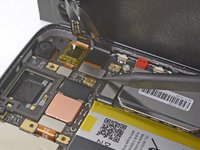
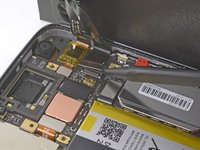
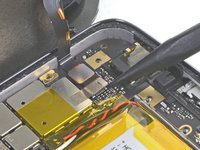
Use the point of a spudger to disconnect the larger of the two display cable connectors.
-
-
-
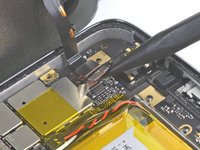
Disconnect the smaller display cable connector.
-
Gently continue lifting the cable to break the adhesive seal and pull the cable away from the motherboard.
-
-
-
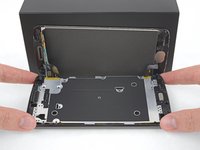
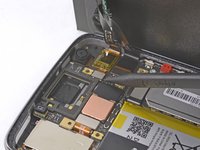
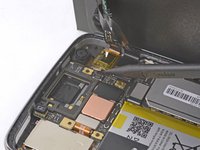
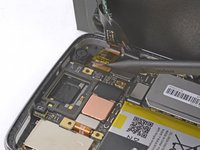
At the opposite end of the phone, disconnect the fingerprint sensor cable.
-
-
-
Remove the display assembly from the phone.
-


To reassemble your device, follow these instructions in reverse order.
Compare your new replacement part to the original part. You may need to transfer remaining components or remove adhesive backings from the new part before installing.
Take your e-waste to an R2 or e-Stewards certified recycler.
Repair didn’t go as planned? Check out our Answers community for troubleshooting help.
crwdns2935221:0crwdne2935221:0
crwdns2935229:039crwdne2935229:0

crwdns2947412:020crwdne2947412:0
Thank you for the explainations. I followed the whole tutorial and I manage to fix the phone with no surprise.
Thank you. Instructions are great.
After replacing the screen, touch is offset by 125 pixels on Y axis (meaning that first registration from the top edge is at 125 px). Is there a way to get the phone to recalibrate?
Thanks
Thanks. These tips, plus the Moto G5 LCD guide solved my problem. The replacement I purchased was only for the LCD (needed to heat and remove the glass after disassembling the whole phone). Again, thanks.
does the silver plastic on back of digitizer need to be removed in order for the screen to light up on the display??
I assume there are two pieces to the screen - the glass front/digitizer/touchscreen and the LCD display itself. Is this correct? On mine I believe only the glass/digitizer is cracked since the phone works fine and has only a minor crack. This tutorial doesn’t show how to separate them. Is my understanding correct? I also need to buy the correct part and it is a bit confusing.