crwdns2915892:0crwdne2915892:0
Follow these steps to remove your Droid's broken rear-facing camera.
crwdns2942213:0crwdne2942213:0
-
-
Insert a SIM eject tool, SIM eject bit, or a straightened paperclip into the small hole in the SIM card tray.
-
Press to eject the tray.
-
Remove the SIM card tray assembly from the phone.
-
-
-
Heat an iOpener and apply it to the top edge of the phone for a minute.
-
-
-
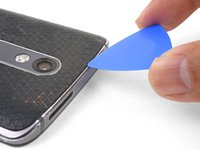
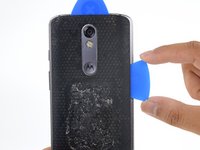
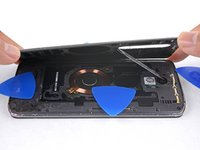
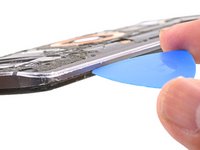
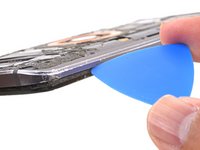
Angle an opening pick and firmly press so that it slips under the back cover.
-
-
-
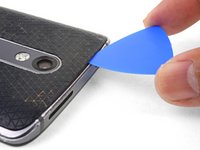
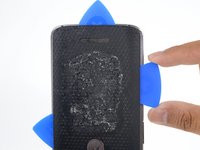
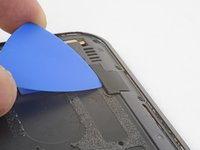
Slide the opening pick along the top edge of the phone to break up the adhesive.
-
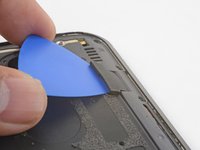
Use the pick to release the deeper areas but avoid slicing through the camera bezel area.
-
-
-
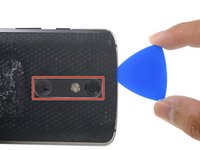
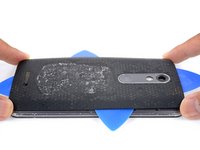
Repeat the iOpener heating and slicing procedures for the remaining three sides.
-
-
-
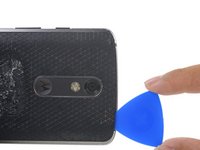
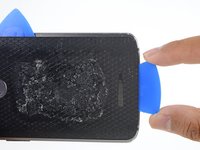
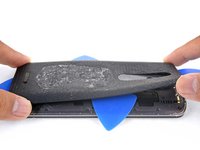
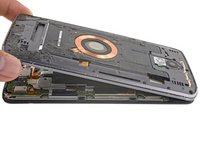
Once you have cut through the adhesive, slowly peel the back cover away from the frame.
-
Remove the back cover.
-
-
-
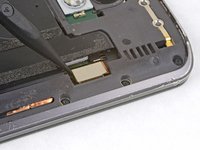
Insert an opening pick under the flash connector rubber cover and pry forward to remove it.
-
-
-
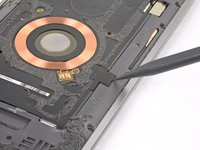
Use the point of a spudger to pry up and remove the coil connector rubber cover.
-
To reinstall the cover, align the cover and use your finger to push it forward into place.
-
-
-
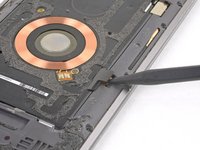
Use the point of a spudger to pry up and disconnect the flash connector.
-
-
-
-
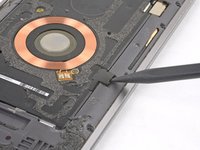
Use the point of a spudger to pry up and disconnect the wireless charging coil connector.
-
-
-
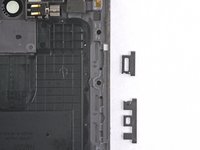
Remove the following T3 screws securing the midframe:
-
Thirteen 3.1 mm black screws
-
Four 4.3 mm silver screws
-
-
-
Insert an opening pick along the frame seam and twist slightly to release the midframe from the phone.
-
-
-
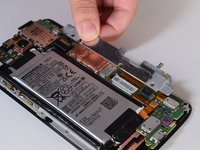
Using your fingers, carefully remove the black tape from the battery.
-
-
-
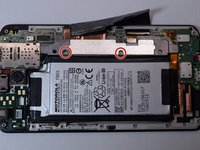
Using a T4 bit on your screw driver, remove the two 4.0mm screws from the metal bracket.
-
Remove the metal bracket.
-
-
crwdns2935267:0crwdne2935267:0Tweezers$3.99
-
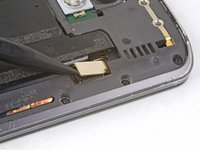
Use the angled tweezers to lift up the small orange plastic piece near the bottom right corner of the battery.
-
-
-
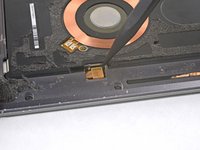
Use the pointed tweezers to remove the transparent gold tape on top of the ZIF connector.
-
-
-
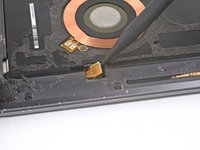
Slightly unlatch the ZIF connector with the spudger. It will pop up, but it will not completely detach.
-
-
-
Using the blunt tweezers, remove the transparent gold tape from the small gold ribbon near the bottom right of the battery.
-
Use the spudger to then unlatch the ribbon cable connector.
-
-
-
Use the spudger or tweezers to unlatch the gold ribbon.
-
-
-
Using a plastic opening tool, unclip the small black ribbon near the upper right corner of the battery.
-
-
-
Gently lift up the motherboard and use the blunt tweezers to detach the black antenna cable connector near the top of the battery.
-
-
-
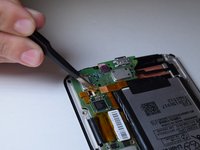
Gently remove the entire motherboard from the phone.
-
-
-
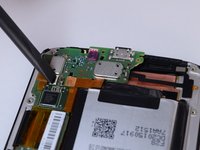
Using the pointed tweezers, remove the tape that covers the ZIF connector.
-
-
-
Using the spudger, pry up the ZIF connector.
-


To reassemble your device, follow these instructions in reverse order.
To reassemble your device, follow these instructions in reverse order.
crwdns2935221:0crwdne2935221:0
crwdns2935229:02crwdne2935229:0
crwdns2915084:0crwdne2915084:0

UW Tacoma, Team 1-6, Rose Fall 2016 crwdns2935289:0UW Tacoma, Team 1-6, Rose Fall 2016crwdne2935289:0
UWT-ROSE-F16S1G6
crwdns2931471:04crwdne2931471:0
crwdns2935297:06crwdne2935297:0