crwdns2915892:0crwdne2915892:0
Follow this guide to replace the auxiliary port in the Moto X Pure Edition.
Before you begin, download the Rescue and Smart Assistant app to backup your device and diagnose whether your problem is software or hardware related.
crwdns2942213:0crwdne2942213:0
-
-
Prepare an iOpener and heat the back of the phone along its right edge for about five minutes. This will help soften the adhesive securing the back cover.
-
-
-
In the following steps, you'll be cutting through the adhesive securing the back cover.
-
Avoid slicing in this area to avoid damaging delicate ribbon cables.
-
-
crwdns2935267:0crwdne2935267:0Tweezers$4.99
-
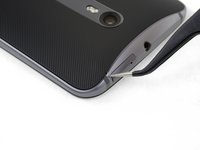
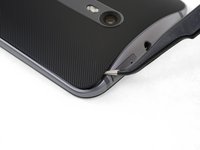
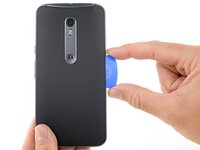
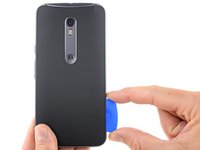
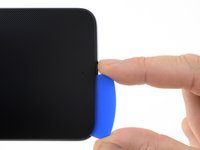
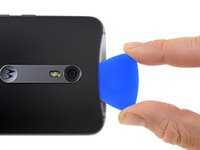
Hold a pair of pointed tweezers closed, and insert them into the small hole on the edge of the back cover near the SIM card slot.
-
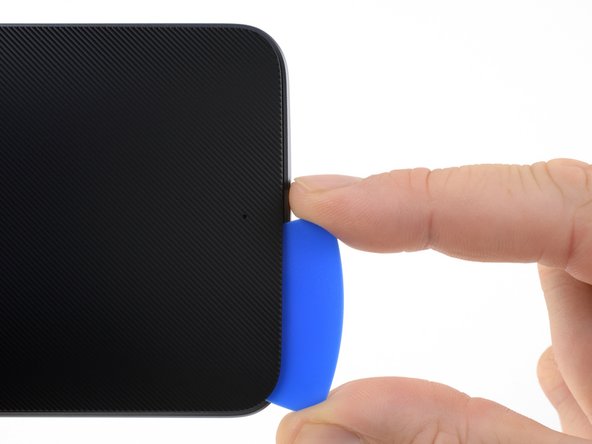
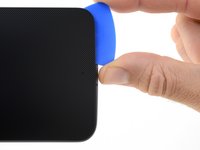
Use the tweezers to lift the cover up slightly, and slide an opening pick into the gap between the cover and the frame.
Insert only one of the tweezers’ point into the hole. Once the rubber backing is lifted high enough, slip a corner of the opening pick under the rubber backing. Leave the first pick near the corner while you use a second pick as directed in Step 6.
-
-
-
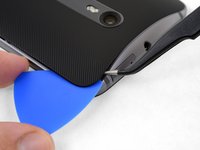
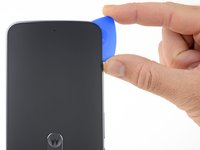
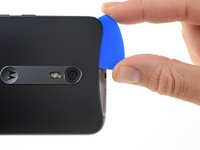
Slide the opening pick along the edge of the phone to slice through the back cover adhesive.
-
Try to insert the pick as far as you can underneath the cover, toward the center of the cover. There's thick adhesive on the middle of the cover that must be separated.
I did not have a pick, used a few old credit cards, leaving them in place to keep the phone back separated.
Used a hair dryer to heat up a little, one section at a time, was enough to remove. Pulled apart slowly.
Left adhesive on the back and on the phone, where possible, using a tiny screw driver to separate. Reused whatever adhesive remained to reattach.
-
-
-
Prepare an iOpener and heat the back of the phone along its left edge for about five minutes. This will help soften the adhesive securing the rest of the back cover.
-
-
-
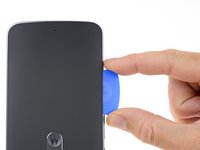
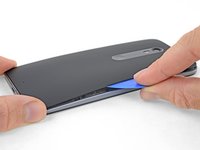
Slice through the adhesive along the bottom edge of the phone.
-
-
-
-
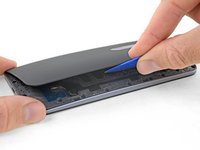
Slice through the adhesive along the left side of the phone.
-
Try to insert the pick as far as you can underneath the cover, toward the center of the cover. There's thick adhesive on the middle of the cover that must be separated.
-
-
-
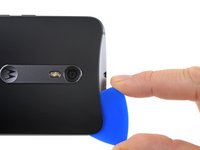
Slice through the adhesive along the top edge of the phone, pulling the pick out slightly to guide it around the rear-facing camera.
-
-
crwdns2935267:0crwdne2935267:0Tesa 61395 Tape$5.99
-
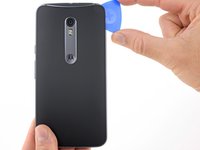
Carefully pry the cover away from the phone.
-
First use tweezers and a spudger to peel and scrape away any remaining adhesive from both the back cover and the phone's chassis.
-
Then, clean the adhesion areas with high concentration isopropyl alcohol (at least 90%) and a lint-free cloth. Swipe in one direction only, not back and forth. This will help prep the surface for the new adhesive.
-
Replacement adhesive comes in a pre-cut sheet to match the exact contours of the back cover. If that's not available, you can use a high-bond double-sided tape, such as Tesa 61395. Before installing the precut adhesive on the back cover, remove the metal insert. Install the adhesive, then replace the insert.
-
After installing the back cover, apply strong, steady pressure to your phone for several minutes to help the adhesive form a good bond.
Had the pre-cut adhesive sheet for reinstalling the Moto X Pure’s back cover. It seemed like the most “original” option at the time. I tried and tried to get it aligned inside the back cover, but found it virtually impossible to do. You pretty much have to get it perfectly aligned and then stick it down all at once. If it makes contact with the cover before it’s perfectly aligned, it’s all over. You’ll never get it back off without destroying it.
After failing with the pre-cut sheet, I resorted to the die-cut strips and corner pieces. This worked just fine.
-
-
-
Use the point of a spudger to pry up the rubber cover over the battery connector.
-
Remove the rubber cover.
-
-
-
Use the flat end of a spudger to pry the battery connector straight up and out of its socket.
Reconnecting the battery was difficult, did not align exactly. Note there are 2 slots that line up and 4 pins. Used a 10x magnifying lens with LED light, purchased to do this job. This step (reassembly) is where the magnifier came in handy. Had to move battery around a bit to get it to line up. Ended up removing adhesive tape from battery, so I could get in place to attach the connector. Battery held in place with screws and phone case, so far so good.
this is the difficult part. I find it is easier to remove this connector as the midframe and phone screen are separating (see step 19). Be also careful in prying this mine got broken luckily it is connected to the old battery which I replaced anyway
Broke the battery plug right off the motherboard! Trying to do a 2nd battery replacement. Only push up gently on the edge of the tab and straight up. Shopping for a new phone.
-
-
-
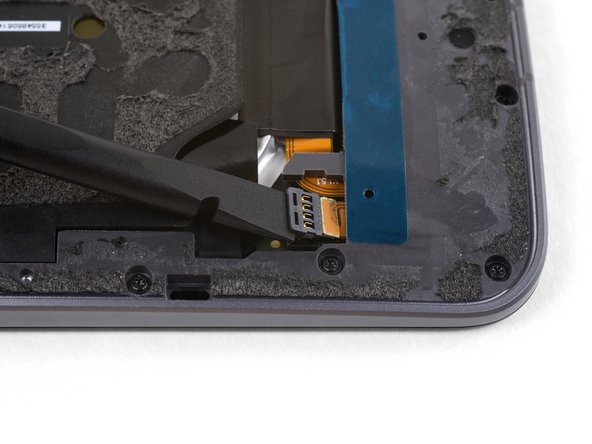
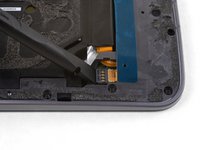
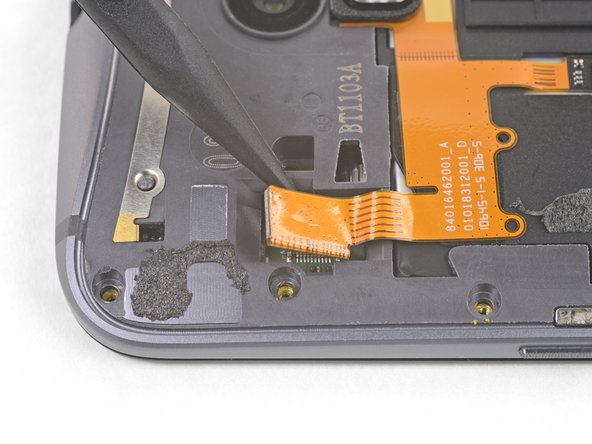
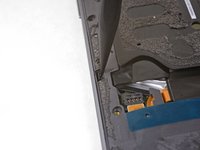
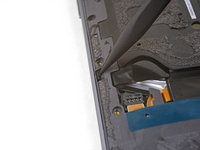
Use tweezers to lift away the rubber cover over the flash connector.
-
-
-
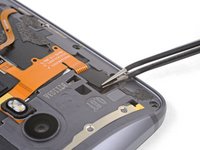
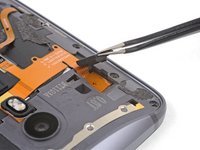
Use the tip of a spudger against the corner of the flash connector to pry the connecter straight up and out of its socket.
-
-
-
Use a T3 Torx driver to remove twenty 2.4 mm screws.
Need to add a step for removing the bar holding the buttons in place. Step 5 from the tear down. Still can’t take the mid frame off though.
I stripped the threads on one of the 20 screws, had to drill it out. (Managed to do this without cracking the screen, completed battery replacement, all ok.)
Careful removing the screws, be sure of tight grip. I saw T4 torx suggested on another site for Moto X Pure, this might grip better? Try both.
I did not have to remove the screw holding the volume buttons bar in place. These stay attached, not needed for replacing the battery. Just the 20 screws shown.
DO NOT REMOVE THE SILVER SCREW HOLDING IN THE VOLUME AND ON-OFF BUTTON. If these buttons fall out there are 4 very small springs that will pop out and are very hard to reinsert. If they do pop out do not use tweezers to reinsert but use a magnetic screw driver bit to reinsert.
This is extremely easy to overlook. This screw is a different color (silver versus black) but when you’re in the swing of removing all the screws it’s tempting to just remove ALL the screws. I goofed, had the buttons fall out, could only find 3 of the springs. Put two back in the volume rocker and only one in the power button since it’s smaller, seems like it wouldn’t need two as much. Everything still works, maybe just slightly less tactile than before. Even without the the springs, there’s still some mechanical return to the buttons, so if you do lose them don’t despair.
This is not working, got two out. Most just strip.
Update. The driver provided is not the right size. I had some tools laying around and found one that fit. This allowed me to get all the screws out except the six I stripped using the driver provided by ifiixit. Turns out they come out pretty easy if you have the right size bit. Would have been an easy fix had I not bought the tools…. go figure.
What is the right size bit?
The T3 Torx Driver was bundled in the bag with the Alcohol Prep Pad, not with the rest of the drivers! So look before you there before you call support like I did.
T4 works better, T3 also works. Try both and proceed carefully, get a good grip before turning.
-
-
-
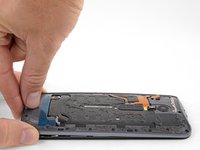
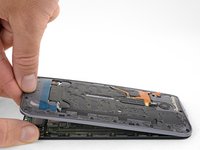
Use the point of a spudger to push the small clip securing the left side of the midframe toward the edge of the phone, releasing the clip.
On reassembly, these did not really click back in place. Held tight when reattaching the 20 (19 in my case) screws).
I had to push rather hard to release both clips. The tip of the spudger bent under the pressure I had to apply. But the the clips did finally release without damage.
-
-
-
Repeat the previous step to release the right side midframe clip.
-
-
-
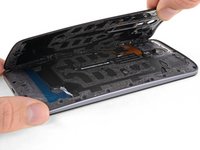
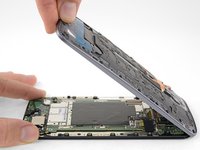
Holding the display by the edges, gently lift the midframe away from the display.
-
Remove the midframe from the display.
My mid-frame and display were separated on the long sides but seemed a little bit stuck on the top and bottom. I used the flat end of the spudger to carefully pry the two assemblies apart at either end.
In my case, stuck in the middle. Pulled apart very slowly, giving the adhesive a chance to separate, and not tearing whatever it was in there. Kept an eye on the inside middle, and very SLOW let it separate. Or was that the battery? In either case, go slow on all steps.
Yeah, everything went according to the guide until this step. I lifted the midframe away from the screen assembly as shown and something in the center didn’t separate at all. I spent a good half hour terrified that I had missed a step or a screw or that there was something different about my phone. In the end I read the comments and very slowly and patiently lifted the midframe until something uncoupled and the two parts cleanly separated. I was certain that permanent damage must have been done, but upon reassembling everything seems to be working perfectly.
Note to self - check that ALL (20) screws have been removed… especially if midframe is stubborn lifting up - i (almost) forgot about the one near the display cable (and it’s threaded into the motherboard instead of the frame) :)
In my unit, the midframe released from the display nicely just as described in the instructions.
-
-
-
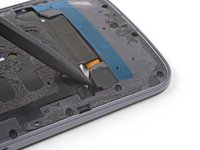
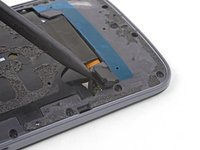
Using the nylon spudger, remove the auxiliary port.
-


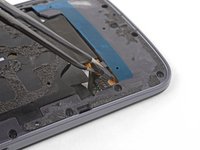


To reassemble your device, follow these instructions in reverse order.
To reassemble your device, follow these instructions in reverse order.
crwdns2935221:0crwdne2935221:0
crwdns2935229:05crwdne2935229:0

crwdns2915084:0crwdne2915084:0

UMass Dartmouth, Team 5-2, Landers Spring 2016 crwdns2935289:0UMass Dartmouth, Team 5-2, Landers Spring 2016crwdne2935289:0
UMASSD-LANDERS-S16S5G2
crwdns2931471:03crwdne2931471:0
crwdns2935297:015crwdne2935297:0
crwdns2947410:01crwdne2947410:0
There is an extra screw that you forgot to mark for removal on the back panel of the phone, It is next to plastic cover towards the top right side of the phone.